The following describes how to create a Root CA and an Issuing CA.
Create Root CA
To create a Root CA:
- Click Certification Authorities under CA Functions.
- In the Add CA field, enter the CA name Corporate Root CA – G1 and click Create.
- On the Create CA page, select Corporate Root CA Crypto Token in the Crypto Token list.
- Ensure all keys are used appropriately.
The keys previously created and named defaultKey, certSignKey, and testKey (in section Create Crypto Tokens) should be populated automatically with the rest as "- Default key".
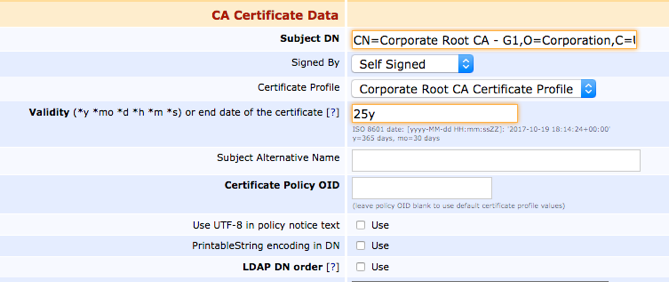
- In the CA Certificate Data section, specify the following:
- Subject DN: Enter CN=Corporate Root CA - G1,O=Corporation,C=US.
- Signed by: Select Self Signed since this is the Root CA.
- Certificate Profile: Select Corporate Root CA Certificate Profile.
- Validity: Specify 25y.
- LDAP DN order: Clear Use.
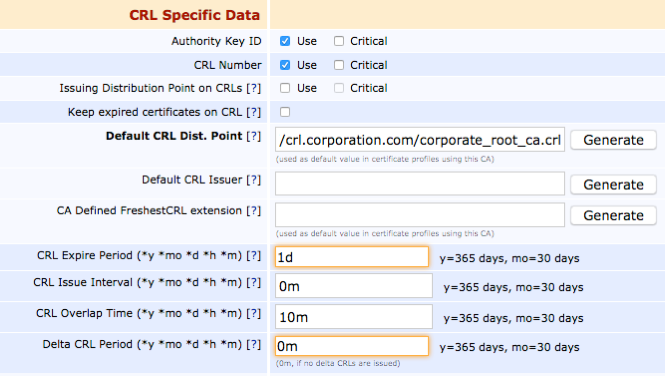
- In the CRL Specific Data section, specify the following:
- Default CRL Dist. Point: Change the URL to your desired CRL URL.
- CRL Expire Period: Specify the interval for the CRL file to expire and no longer be valid. The default value 1 day (1d) can be changed to for example 3 days (3d).
- Click Create to create the Root CA.
Create Issuing CA
To create an Issuing CA:
- Under CA Functions, click Certification Authorities.
- In the Add CA field, enter the CA name Corporate Issuing CA – G1 and click Create.
- On the Create CA page, select Corporate Issuing CA Crypto Token in the Crypto Token list.
- Ensure that all keys are used appropriately. The keys created (in section Create Crypto Tokens) and named defaultKey, certSignKey, and testKey should be populated automatically with the rest as "- Default key".
- In the CA Certificate Data section, specify the following:
- Subject DN: Enter CN=Corporate Issuing CA - G1,O=Corporation,C=US.
- Signed by: Select Corporate Root CA – G1 since this is the Issuing CA and can automatically be signed by the Root CA we previously created (see Create Crypto Tokens).
- Certificate Profile: Select Corporate Issuing CA Certificate Profile.
- Validity: Specify 15y.
LDAP DN order: Clear Use.
- In the CRL Specific Data section, specify the following:
Default CRL Dist. Point: Change the URL to your desired CRL URL.
- CRL Expire Period: Specify the interval for the CRL file to expire and no longer be valid. The default value 1 day (1d) can be changed to for example 3 days (3d).
- In the Other Data section, Monitor if CA active (healthcheck): Select Activate as this CA should be up all the time issuing certificates and should therefore be monitored by health checks.
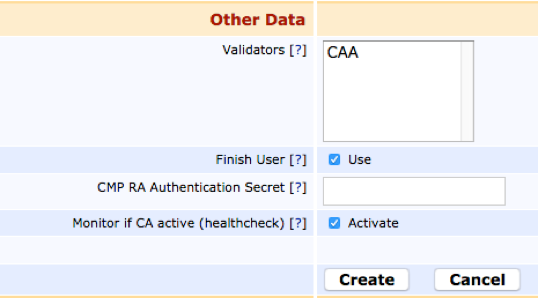
- Click Create to create the Issuing CA.