Changing Client Certificate and Trusted CA for Management Interface
The following example shows how to change the client certificate and update the trusted CA for Management Interface using WebConf.
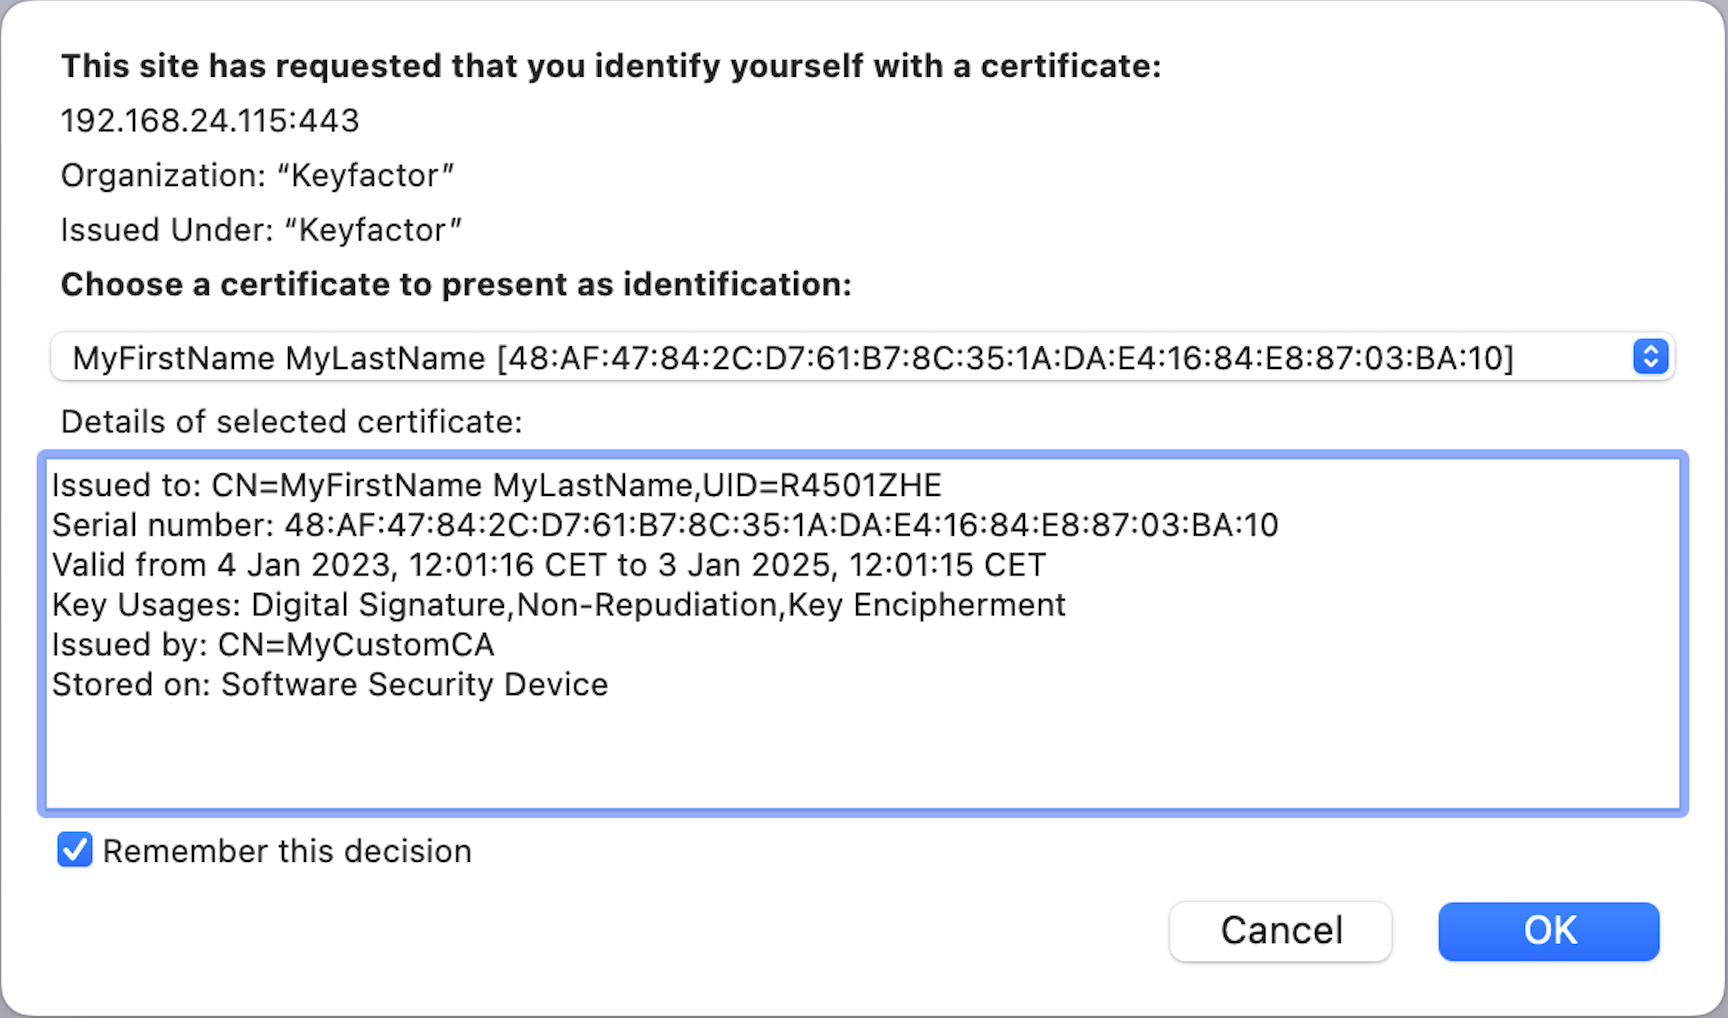
The new superuser certificate has to be issued from the same CA (MyCustomCA) that we will install for TLS authentication. First we need to specify the information about the certificate (MyUsername.pem) to be used as superuser.
Check the SubjectDN of the certificate using openssl.
Run the following command as 'user':\$ openssl x509 -in MyUsername.pem -subject subject= /C=MyCountry/O=MyCompany/SN=MyLastName/GN=MyFirstName \ /serialNumber=G824734/CN=MyFirstName MyLastName/UID=R4501ZHE -----BEGIN CERTIFICATE----- MIID3zCCAsegAwIBAgIIdzHlq8R4dnAwDQYJKoZIhvcNAQELBQAwPTETMBEGA1UE AwwKTXlDdXN0b21DQTESMBAGA1UECgwJTXlDb21wYW55MRIwEAYDVQQGEwlNeUNv dW50cnkwHhcNMTUwMTEzMDkxOTIzWhcNMTYwMTEzMDkyNjAzWjCBoDESMBAGA1UE BhMJTXlDb3VudHJ5MRIwEAYDVQQKDAlNeUNvbXBhbnkxEzARBgNVBAQMCk15TGFz dE5hbWUxFDASBgNVBCoMC015Rmlyc3ROYW1lMRAwDgYDVQQFEwdHODI0NzM0MR8w HQYDVQQDDBZNeUZpcnN0TmFtZSBNeUxhc3ROYW1lMRgwFgYKCZImiZPyLGQBAQwI UjQ1MDFaSEUwggEiMA0GCSqGSIb3DQEBAQUAA4IBDwAwggEKAoIBAQC5Dr5dRsio TvihzdeQQ1cCbDDM/KqN729+wuNcfO3btlMhXMRMrSdBz2gZgfIDfbNjWnmOmkF5 ... qqh6BtM4h2SpLlzcpELvOA6ySUEsfvaVpK4I7ebLFDFhtTM= -----END CERTIFICATE-----
Important!
In the subject value, slashes (/) have to be replaced with commas (,).
Open the WebConf Access tab and click on Appliance Accounts:
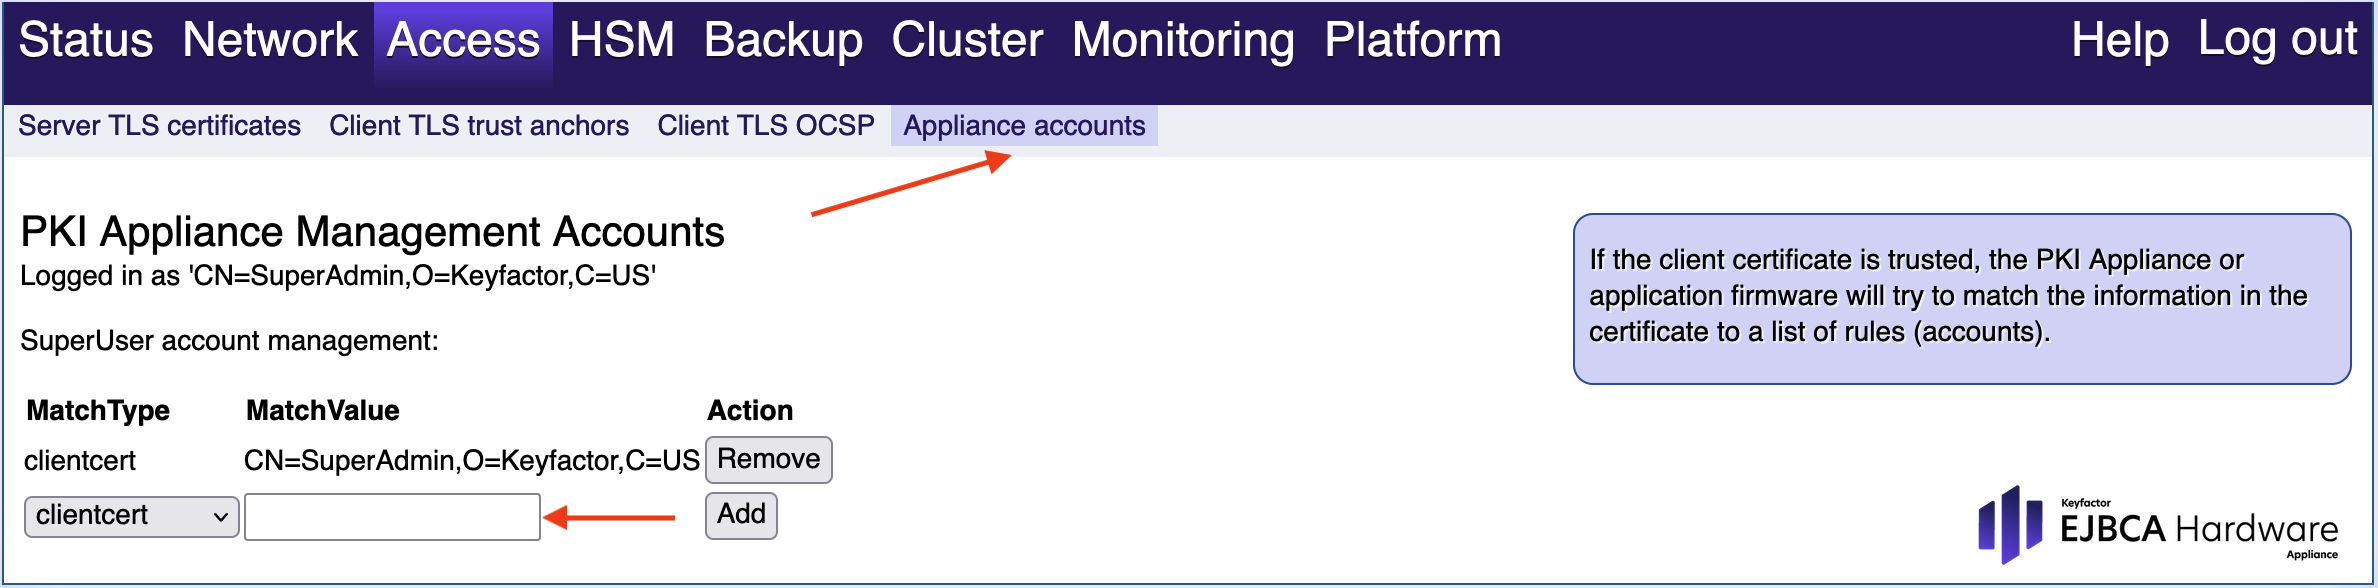
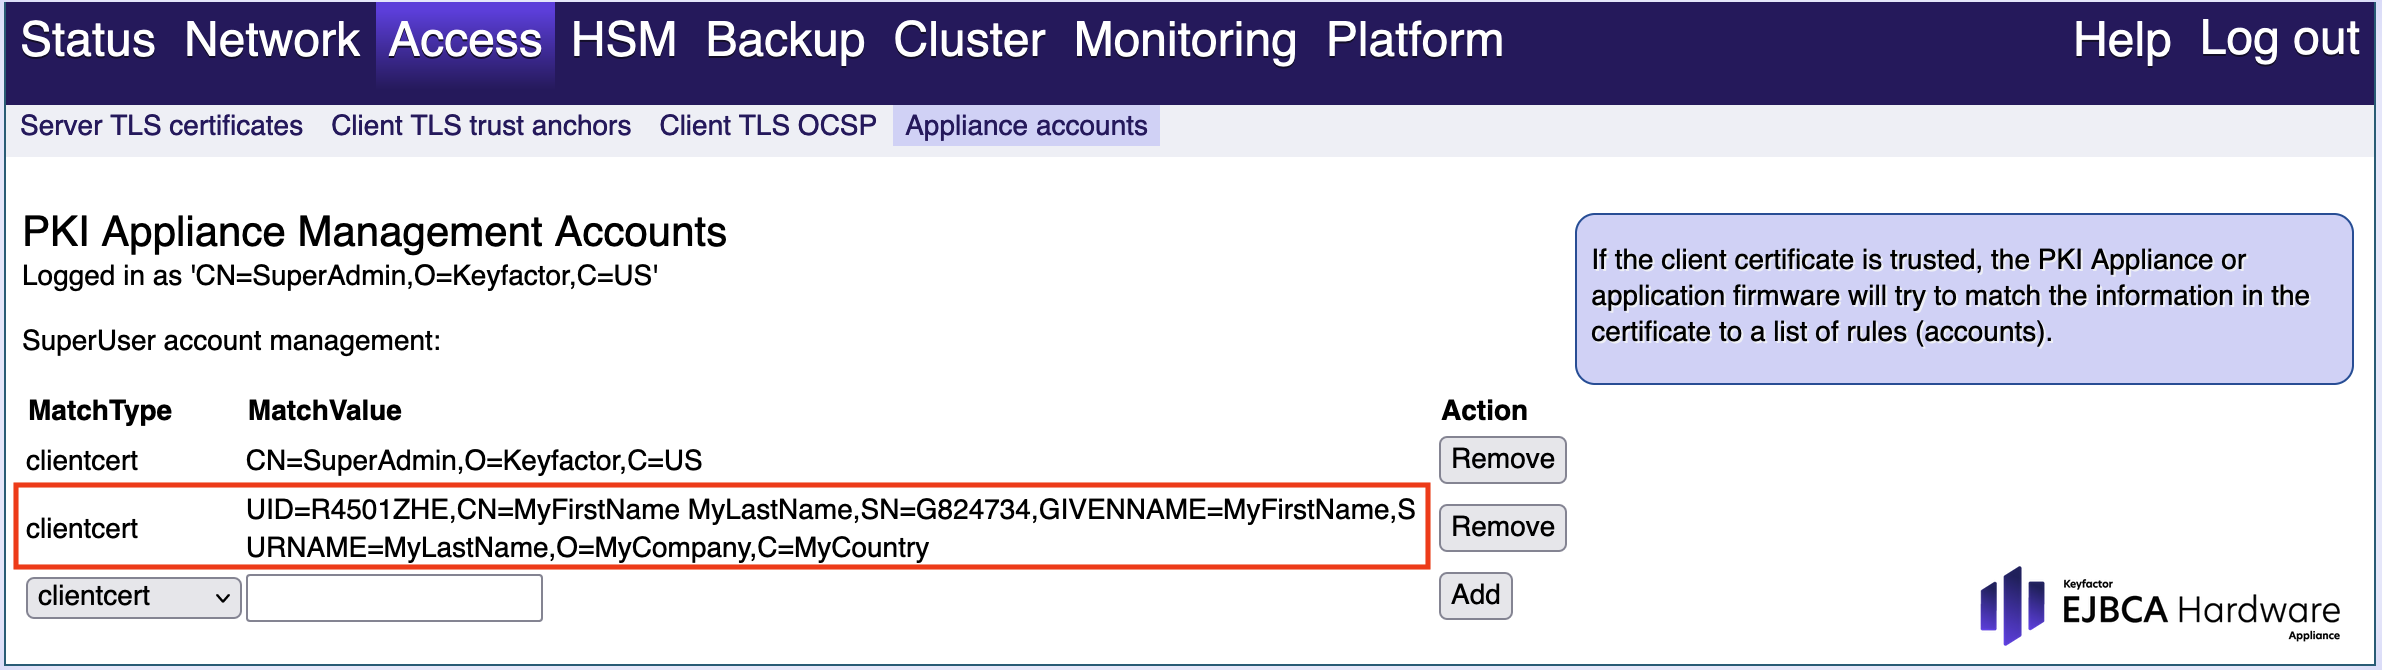
In the section PKI Appliance Management Accounts, select clientcert, provide the following SubjectDN and click Add.
EJBCA is using org.bouncycastle.asn1.x500.style.BCStyle which interprets SN as serialNumber. We inherit this in org.cesecore.util.CeSecoreNameStyle (Legacy reasons).
Caution!
Replace SN with SURNAME and GN with GIVENNAME otherwise you risk being locked out.
C=MyCountry,O=MyCompany,SURNAME=MyLastName,GIVENNAME=MyFirstName,serialNumber=G824734,CN=MyFirstNameMyLastName,UID=R4501ZHE
The clientcert will be displayed.
Switch the tab and go to Client TLS trust anchors. The section Trusted CAs for TLS client authentication is divided in two columns.
Application Interface
Management InterfaceFirst Management Interface is edited.
Click Add... > Browse and select the certificate chain you got from your issuing CA.The whole chain from the issuer CA of the client certificate up to the trusted RootCA is required.
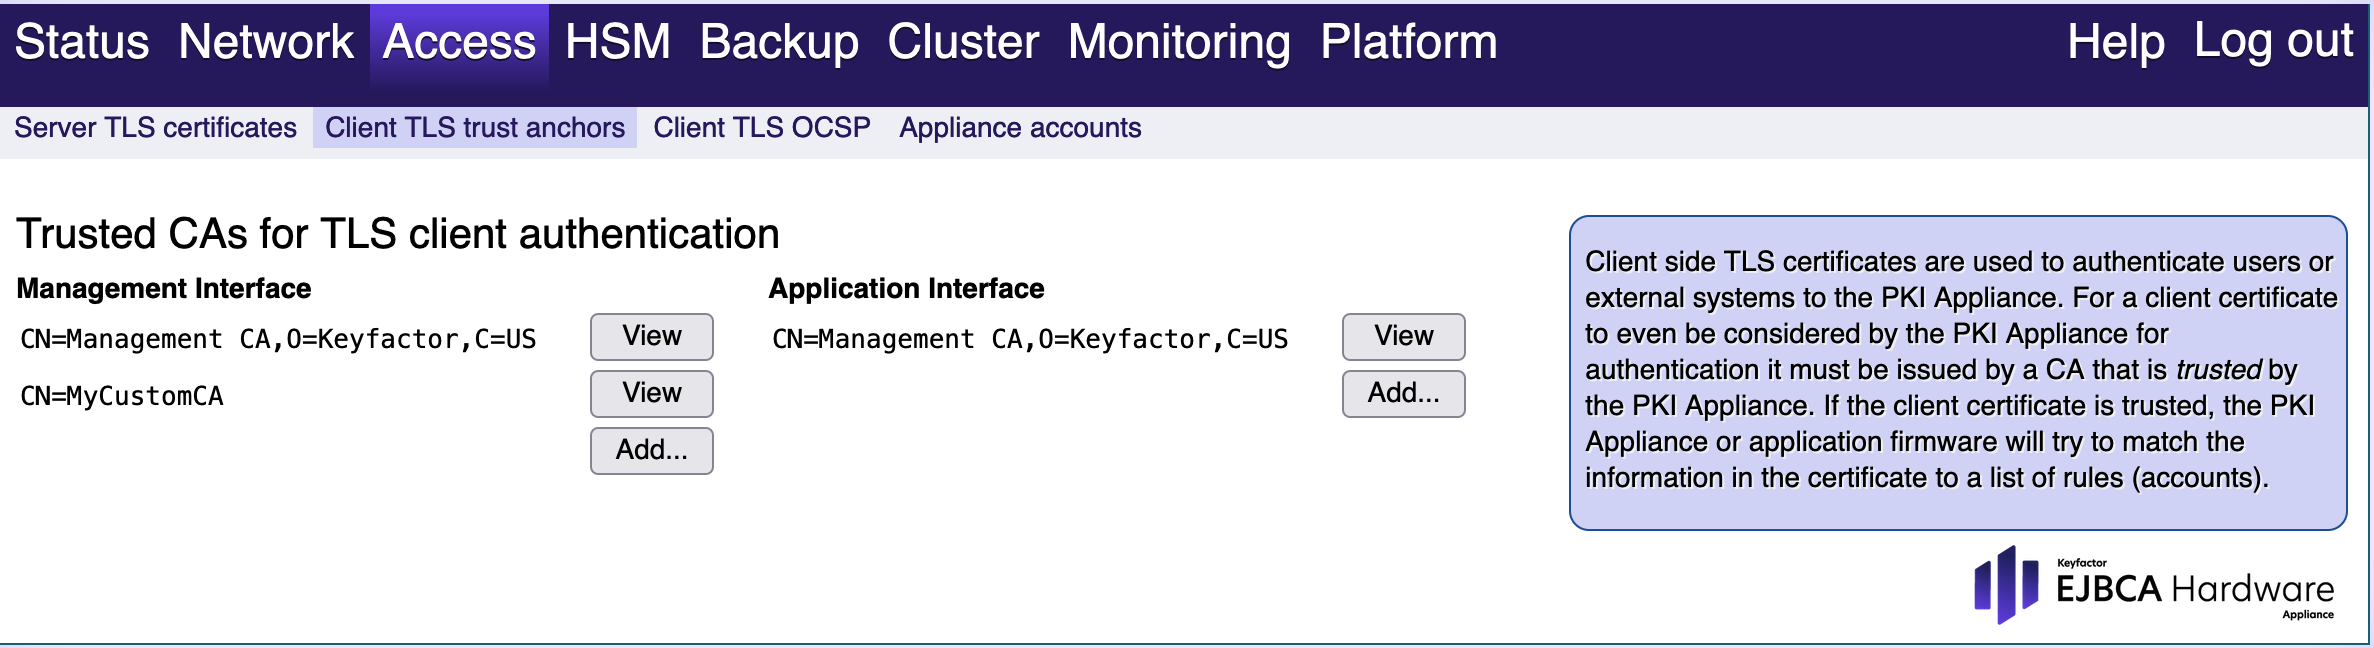
Click Activate new CA certificate to allow TLS to update the new trust of CA.
Once the update is made, the new trusted configuration is used for authentication in the Management Interface.
- Next, the Application Interface must be edited. Please refer to Changing Client Certificate and Trusted CA for Application Interface.