Creating TLS Server Side Certificate for Application Interface
This section describes how you check the currently used TLS certificate and how you use WebConf to create a new server TLS certificate for the Application Interface.
To check the currently used TLS certificate, proceed as follows:
Open the Application Interface in the browser.
Click the Padlock icon in the address bar of your browser and click More information.
On the Info page, go to the Security tab and click View Certificate.
Various information about the certificate is displayed. For Common Name (CN), you will find the value node1-ssl-app.
This CN is based on the values selected during installation (both the host name in the network settings and the CN in the Management CA provide CNs in this certificate chain). The value may be different.
To create a new TLS server certificate for the Application Interface, proceed as follows:
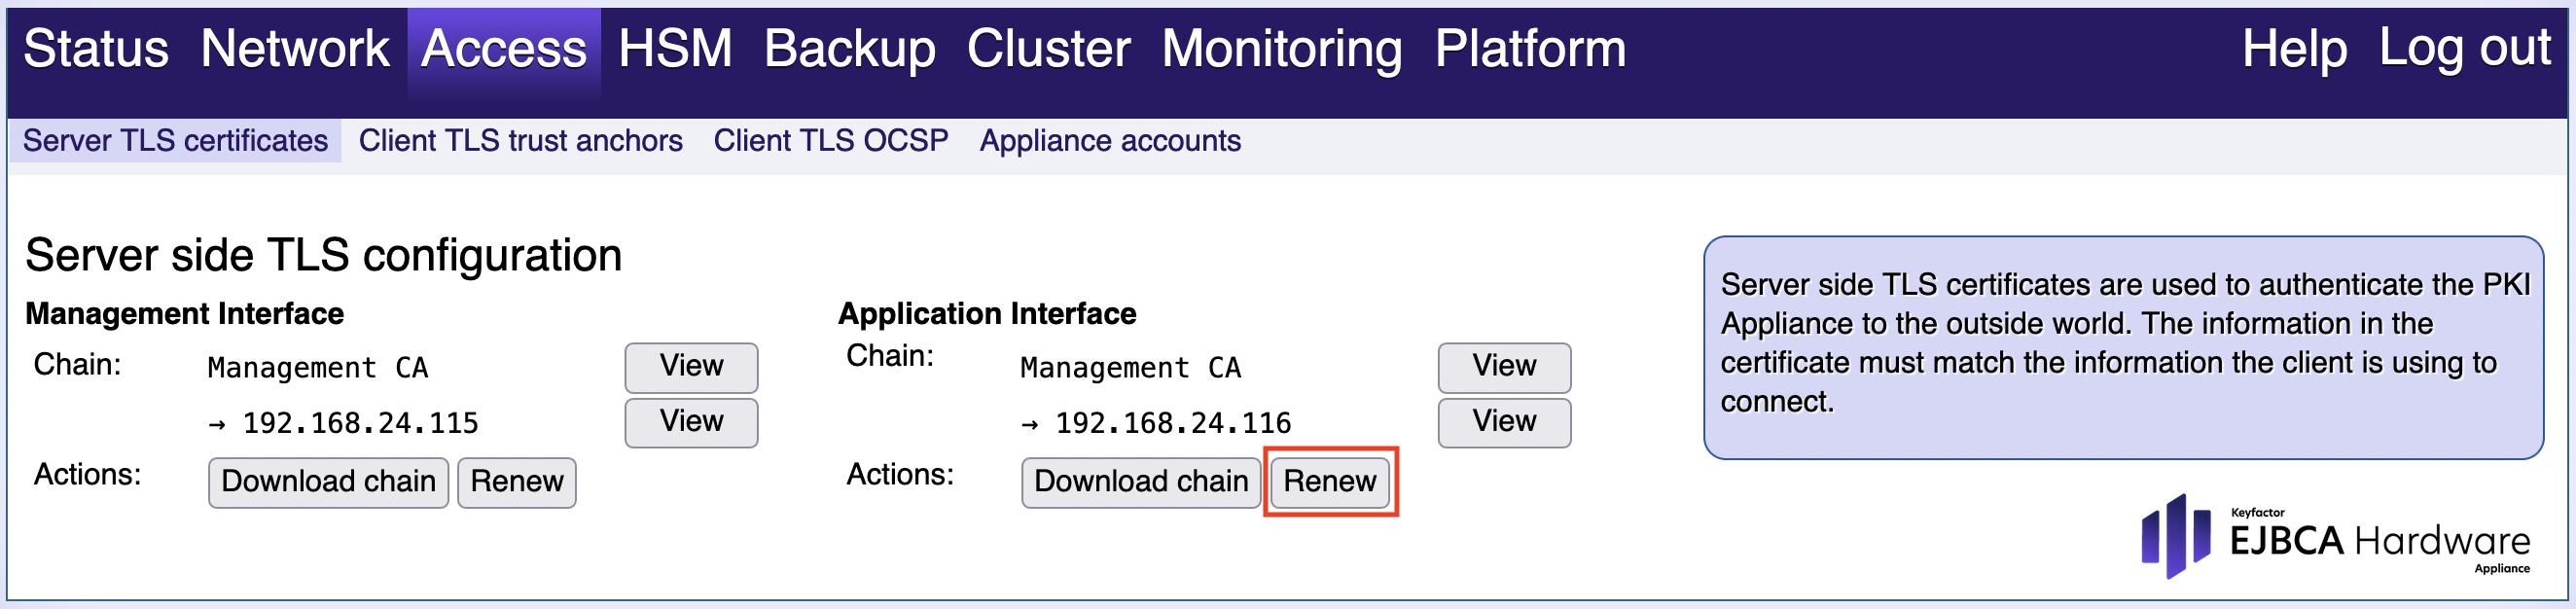
Open the tab Access > Server TLS certificates in WebConf.
In the section Application Interface, click Renew.
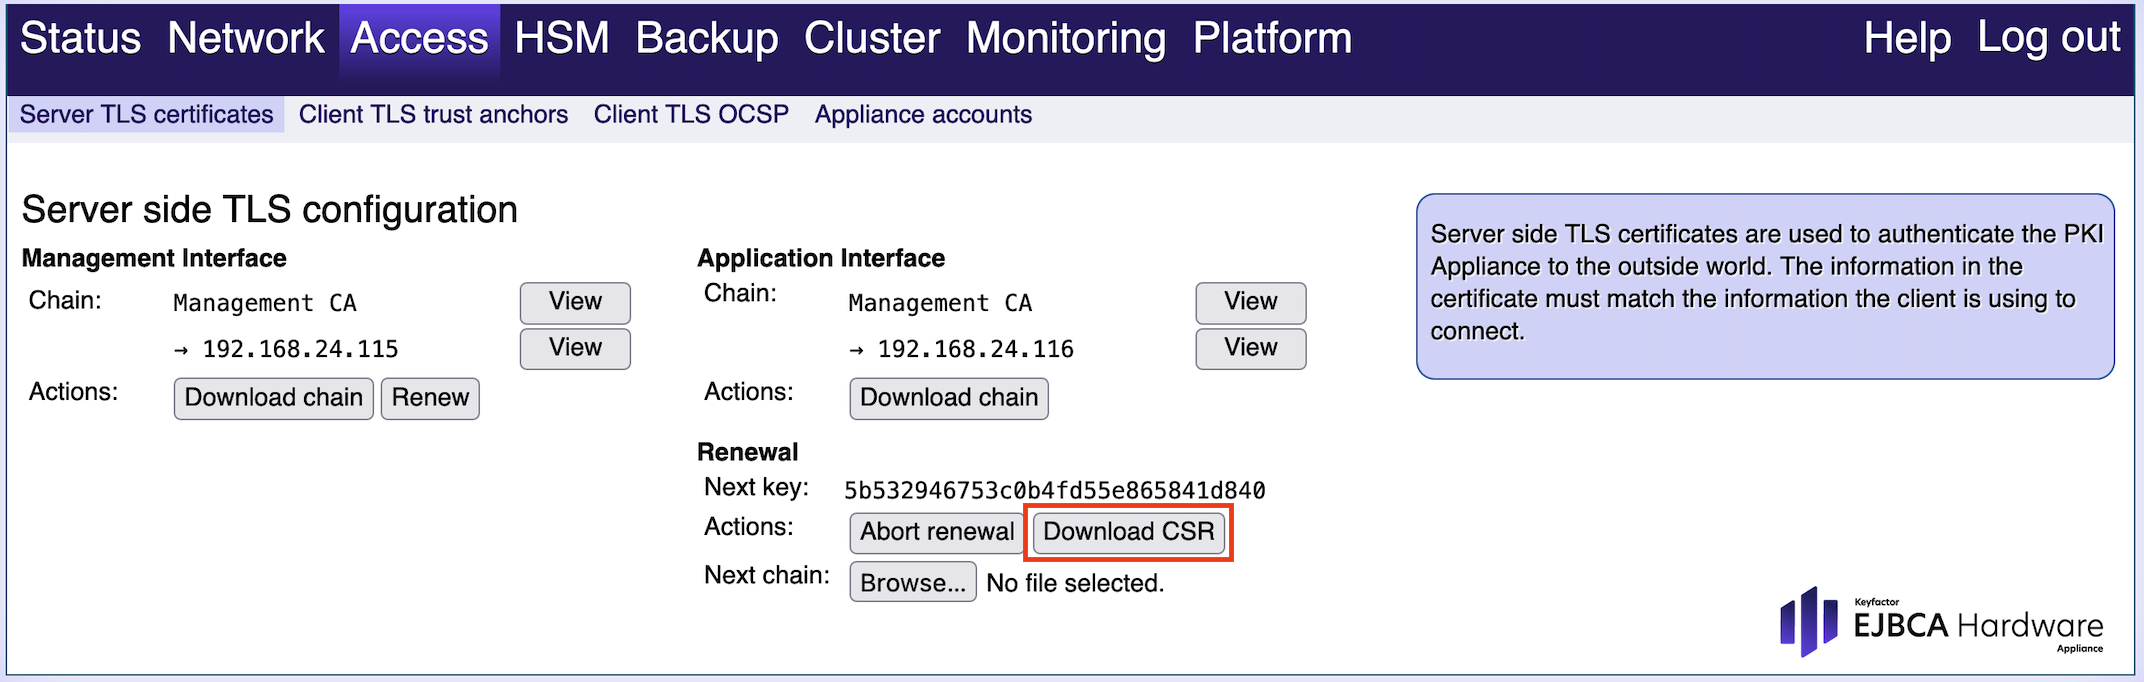
Click Download CSR.
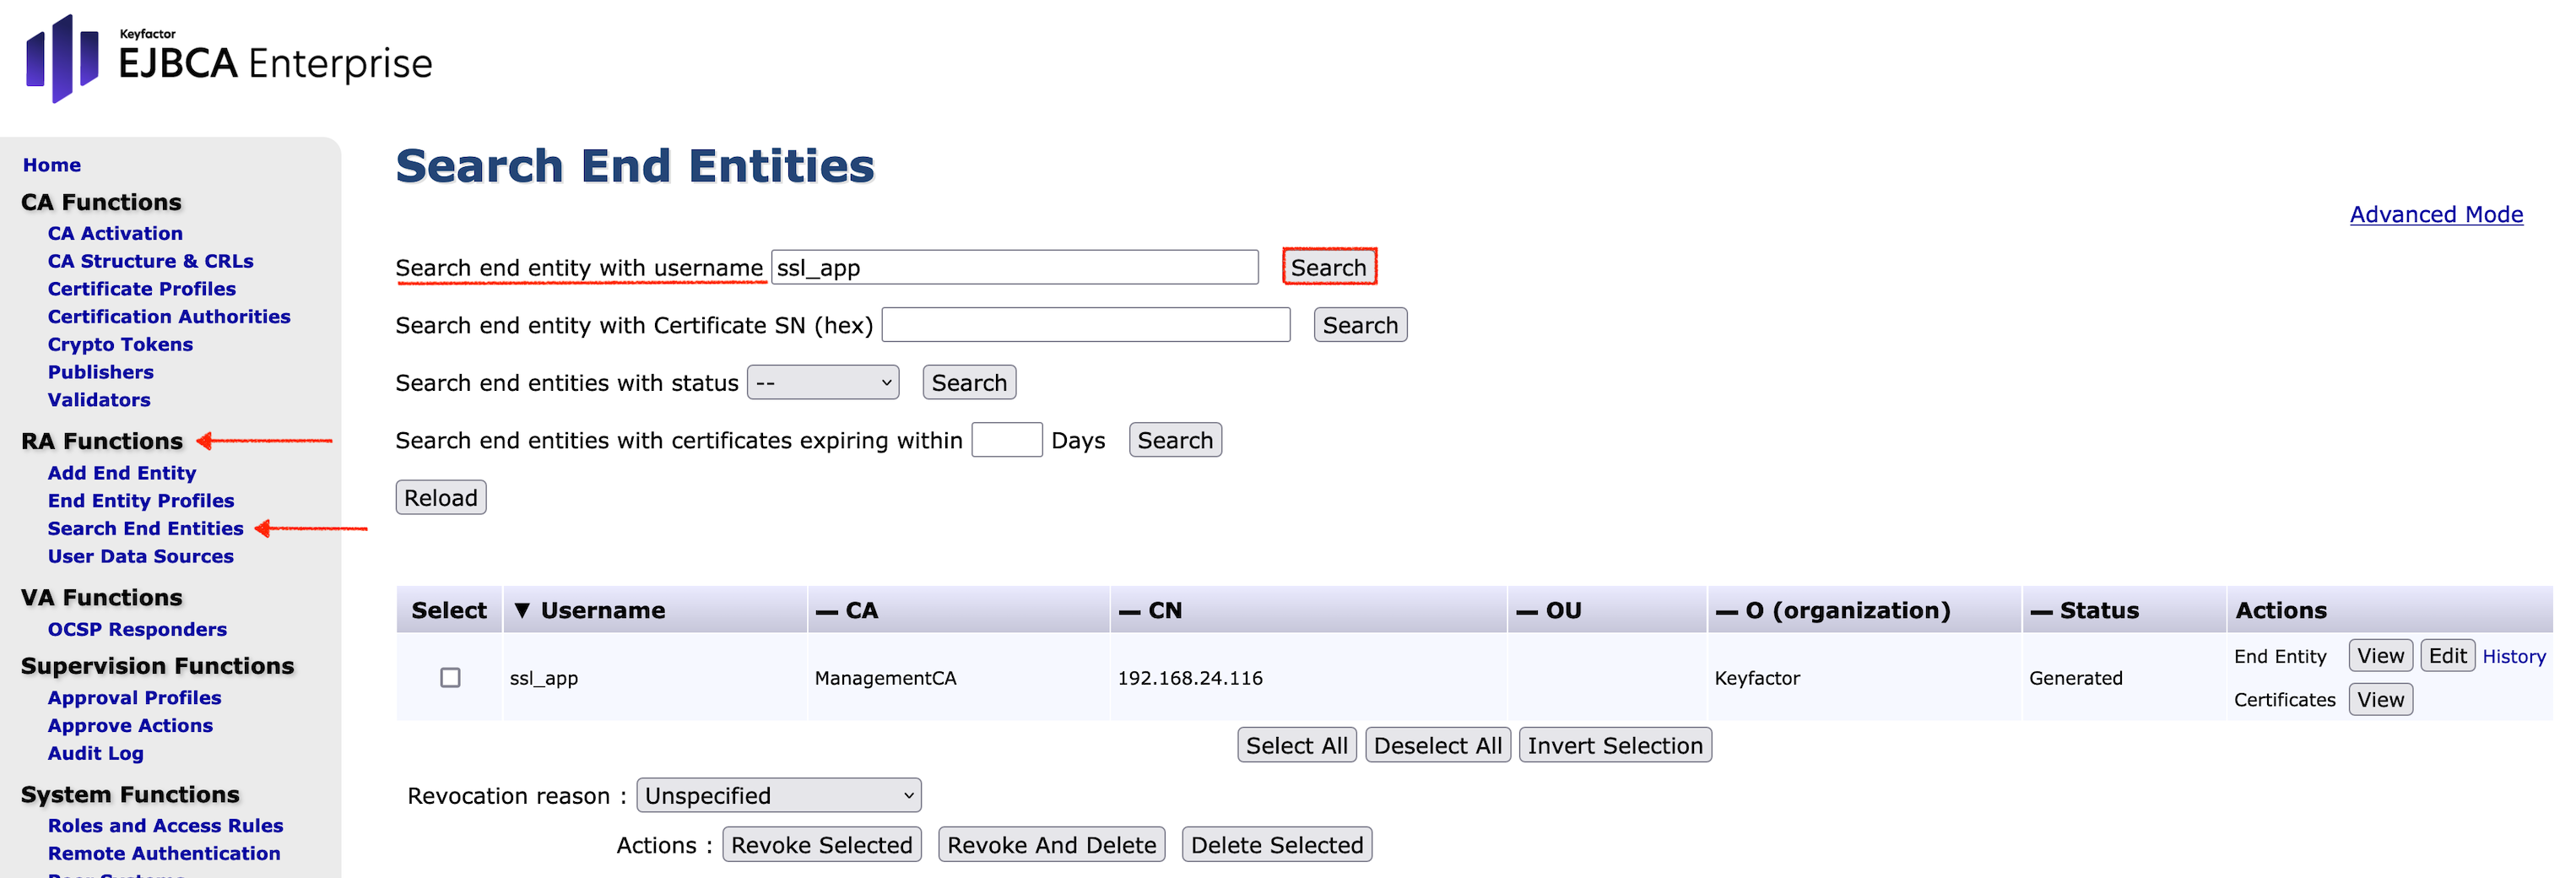
In the EJBCA Enterprise, search RA Functions in the side menu and clickSearchEndEntities.
In the Search end entity with username field, enter ssl_app and click Search.
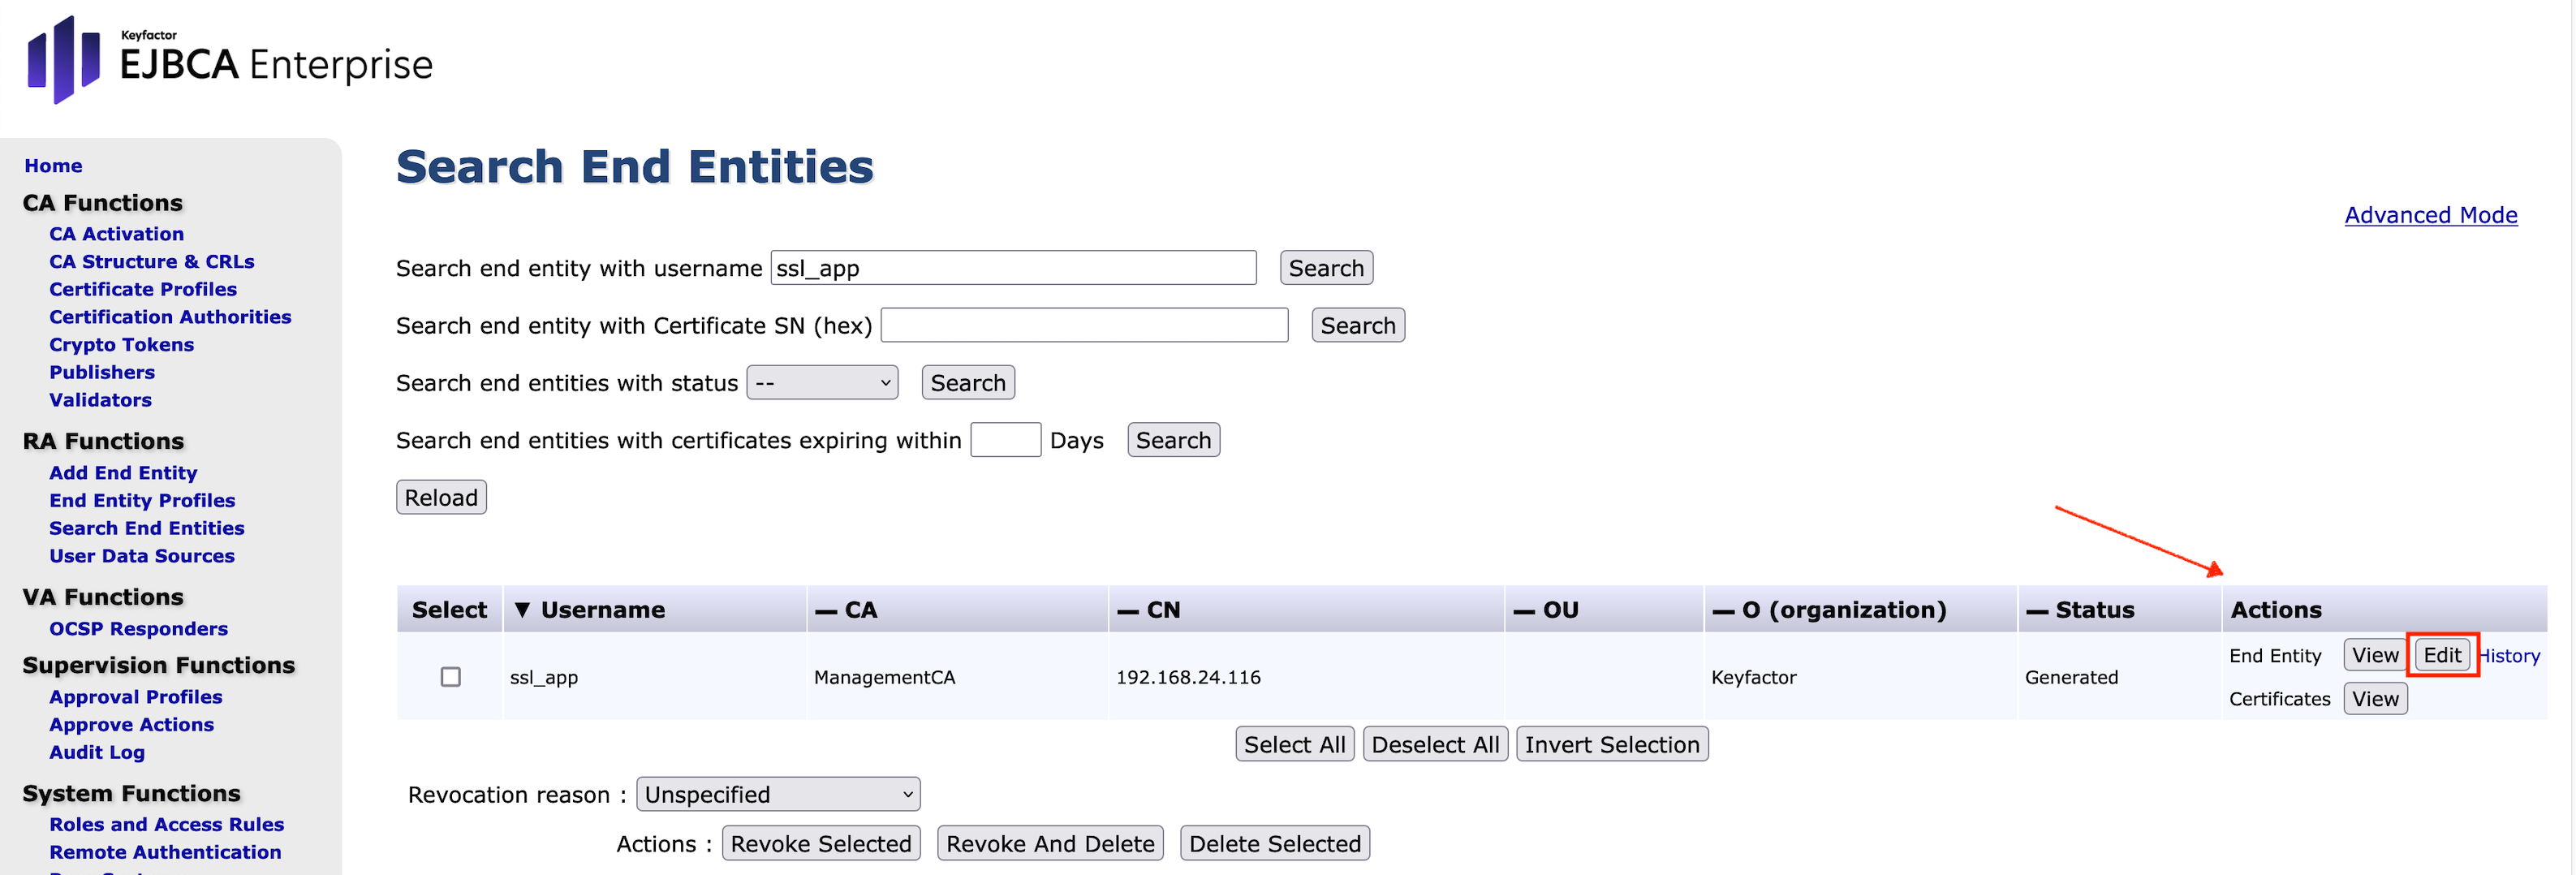
In the search results table go to Actions click Edit next to End Entity.
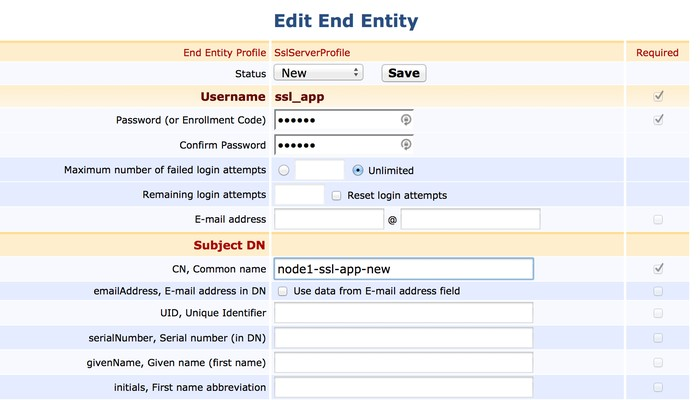
The Edit End Entity form will open. In the Edit End Entity form, specify the following:
Status: Set to New
Password: Set to foo123
CN, Common name: Set to node1-ssl-app-new
Token (section Main certificate data): Set to User Generated
Scroll to end of the page and confirm your settings with Save.
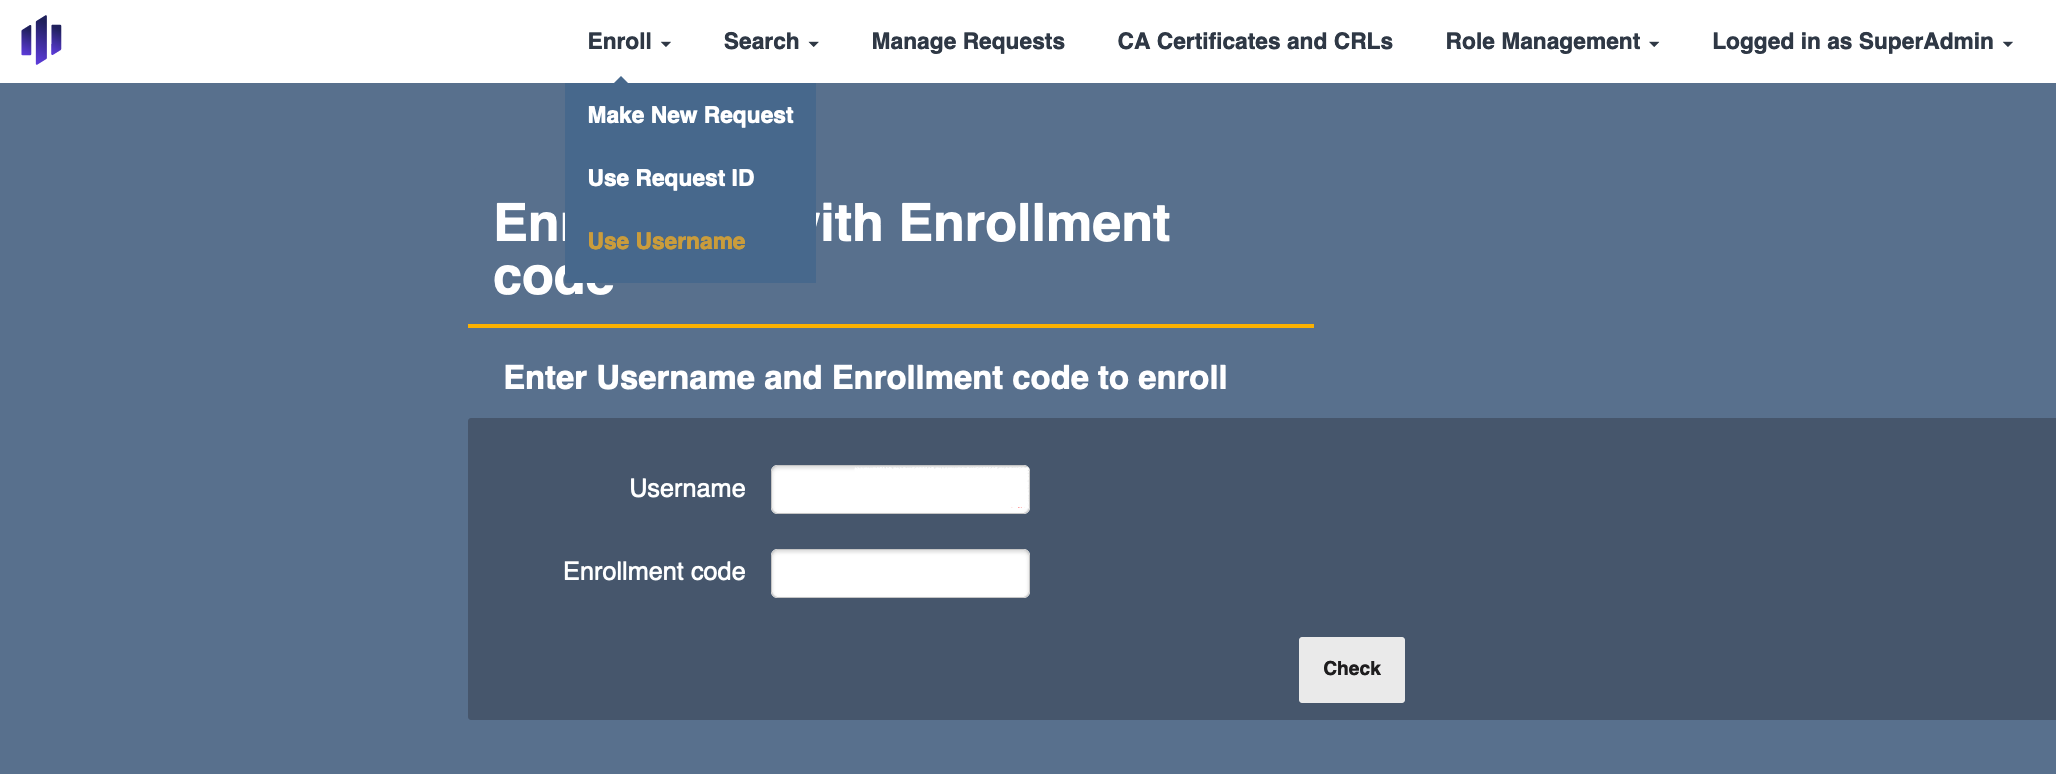
In the EJBCA Enterprise, navigate to the RA Web in the side menu.
Open RA Web.
From the top menu click the drop-down menu for Enroll.
Chose Use Username.
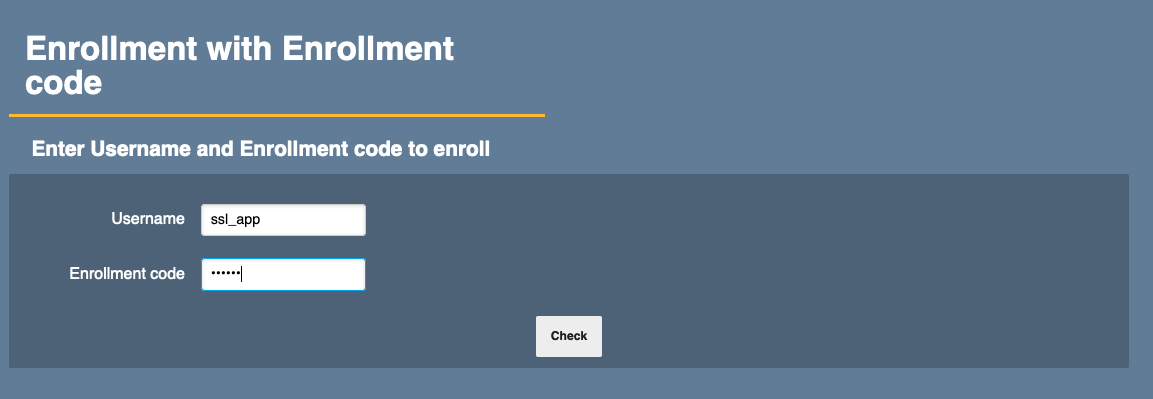
Enter Username and Enrollment code to enroll Username: enter ssl_app Enrollment code: enter foo123
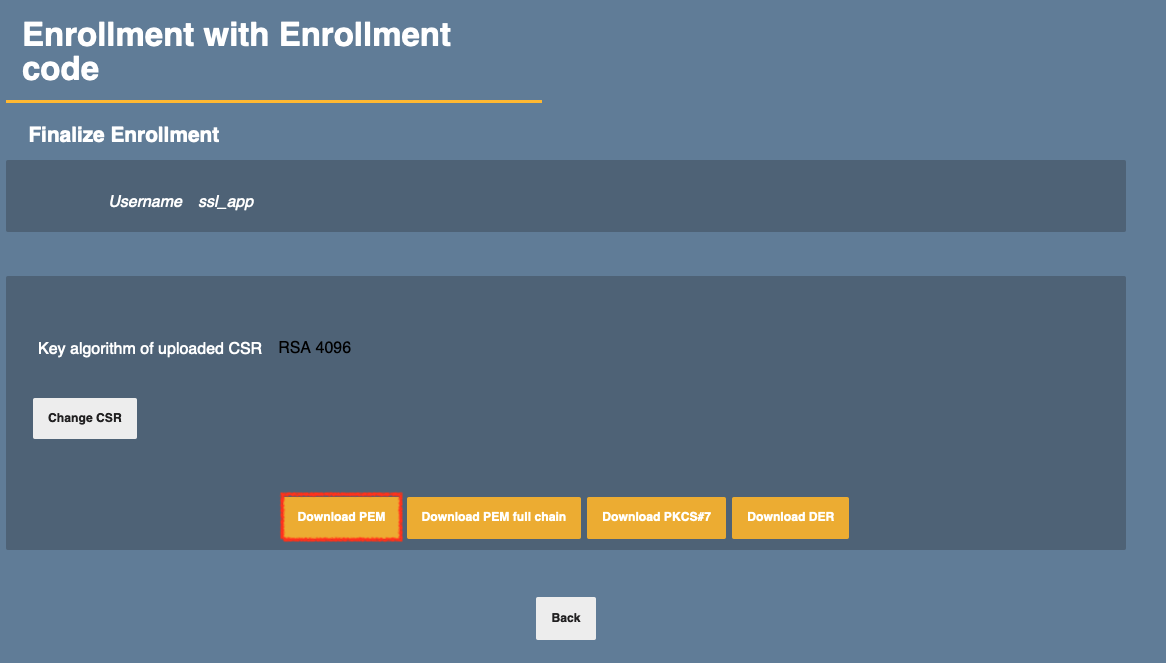
Finalize Enrollment
Click on Download PEM.
Save the PEM file with name node1tlsappnew.pem.
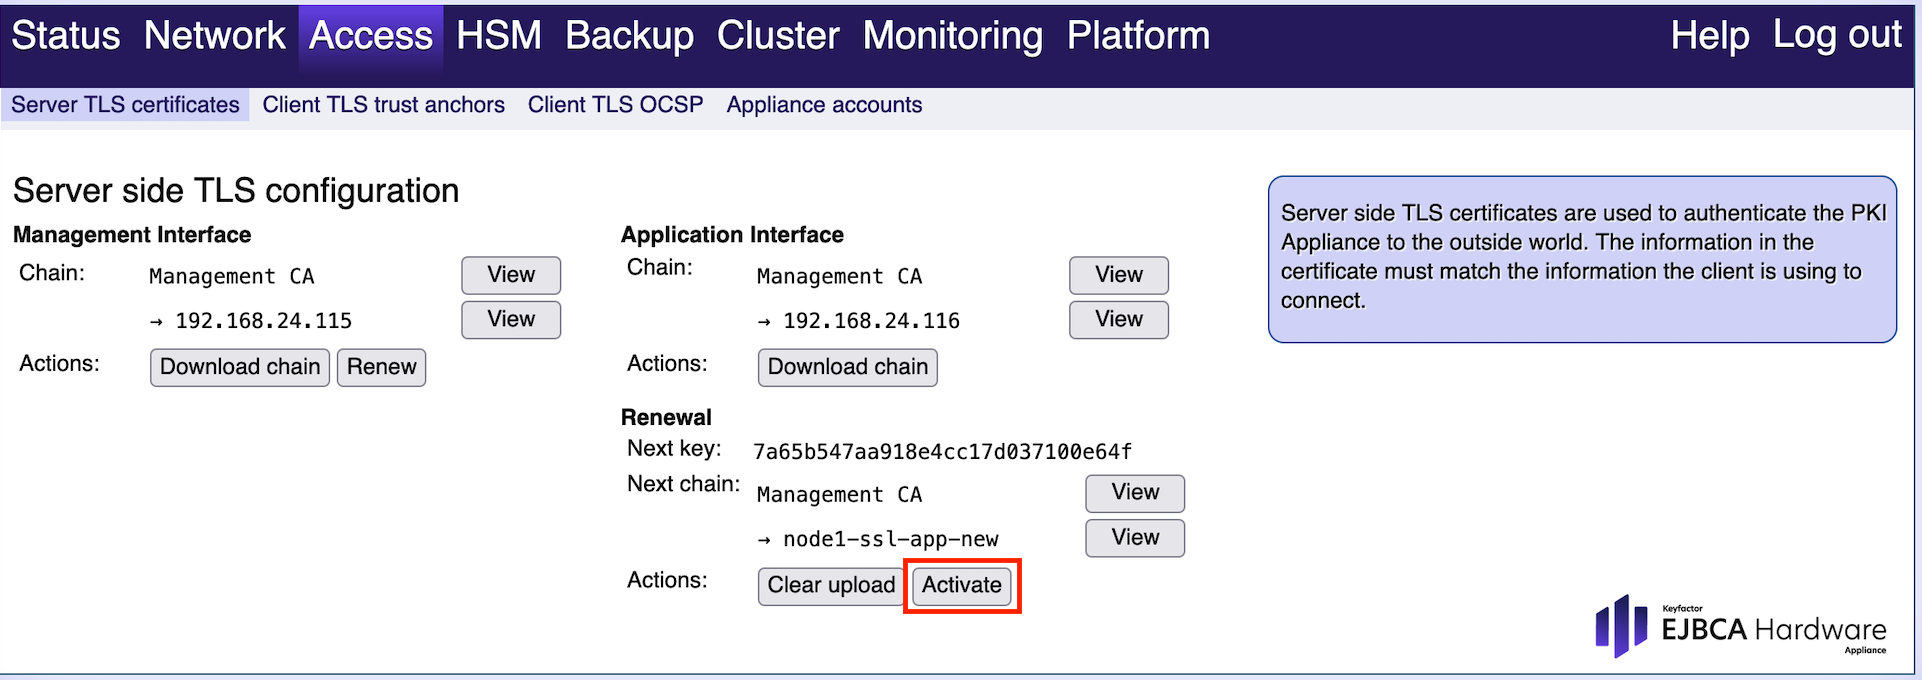
In WebConf navigate to Access > Server TLS certificates
Click the Browsebutton for Next chain to upload the file node1tlsappnew.pem.
Click the action Activate to activate the certificate chain to the server.
The procedure will take a while until the new TLS certificate will be active.
Confirm that the server is using the new certificate by refreshing the application pages and then trust the new connection when prompted. To verify the new certificate, proceed as described in the very first step: check the currently used TLS certificate.
Verify the certificate used for the TLS connection and confirm that it is the new certificate with the new CN node1-tls-app-new. This new TLS certificate will now be used each time you login to the application interface.