EC2
Begin by starting two EJBCA Enterprise Cloud instances. In this example we will have the following 2 nodes:
- Node 1 using IP 172.16.0.144 – US East 1 – 172.16.0.0/16 address space
- Node 2 using IP 172.31.0.115 – US East 2 – 172.31.0.0/16 address space
One of the nodes is in US-East-1 and the other in US-East-2. For the purposes of this guide we are going to be using the instance ID from Node 1 as the password. You can obtain this from the EC2 console in the instance details, or run the following command:
# curl -s http://169.254.169.254/latest/meta-data/instance-id
CODE
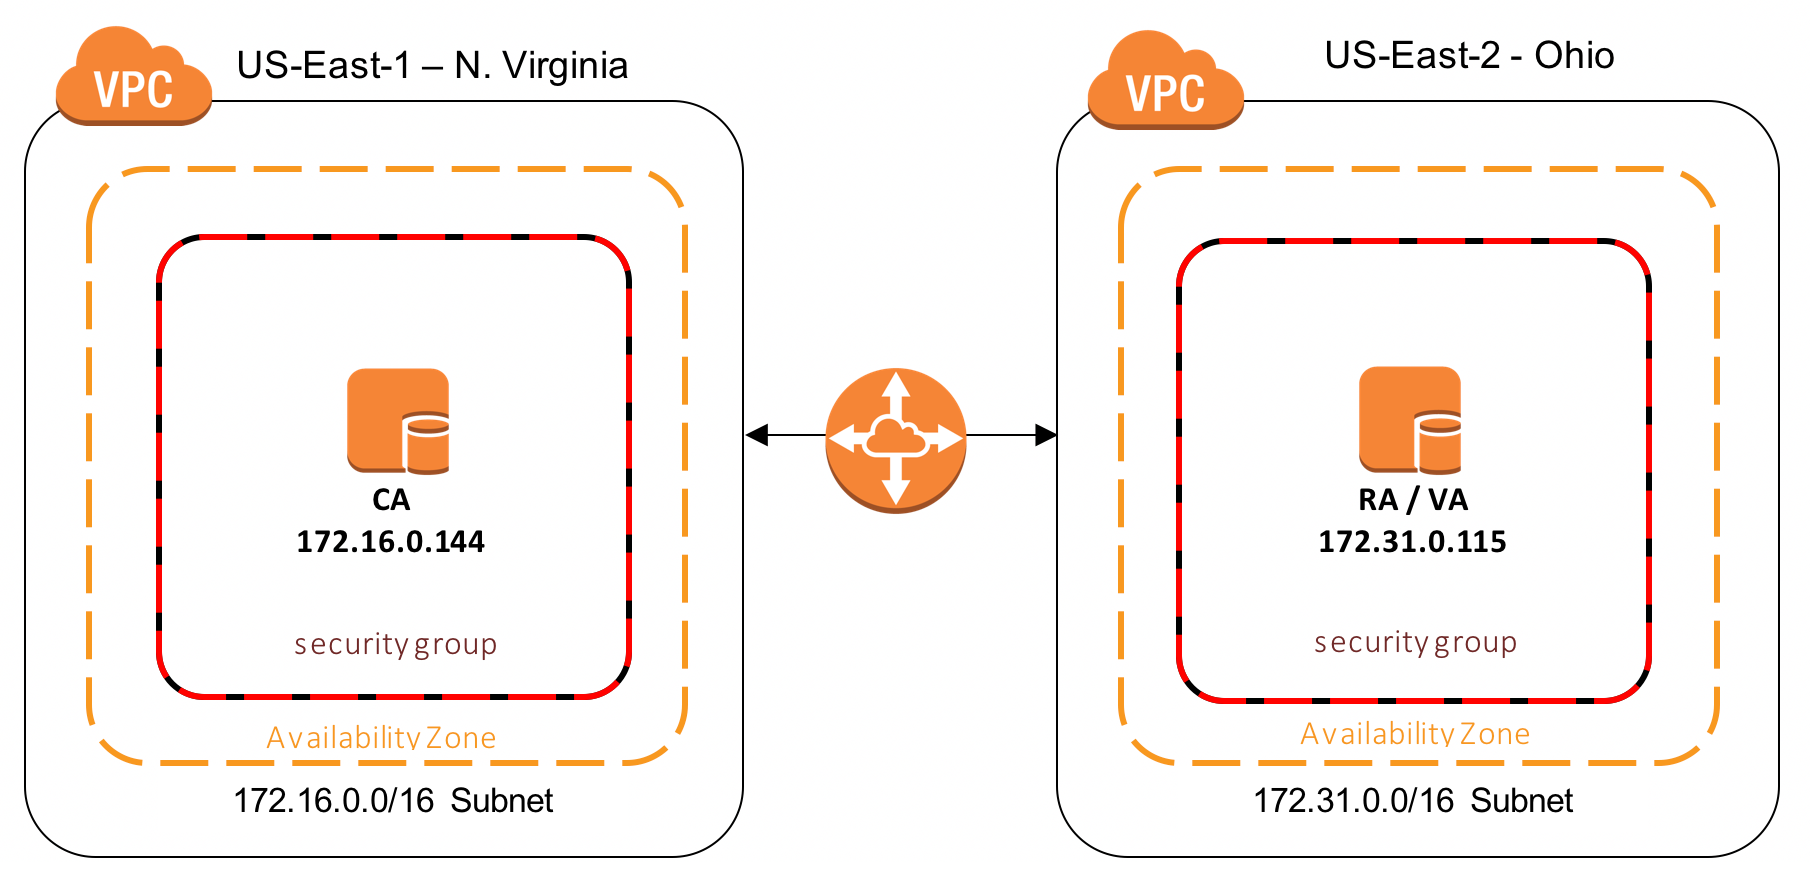
VPC Configuration
To get the nodes to communicate, it is assumed a VPC Peering Connection is setup and in place. For assistance with configuring a VPC Peering Connection, refer to Amazon's VPC Peering Guide.
Optionally, for testing purposes, all nodes can be setup within the same VPC. This is not ideal and does not provide any availability guarantees if one of the AWS sites has an outage.
A Route Table needs to be created that allows these nodes to communicate over the Peering Connection. For more information on configuring Route Tables between VPCs, refer to Amazon's documentation on Updating Your Route Tables for a VPC Peering Connection.
A security group is also needed in each VPC. That configuration will be outlined below since it pertains directly to the Galera communication.