Azure vNet-to-vNet Connections
- ejbca-ca-westus
- ejbca-ra-eastus
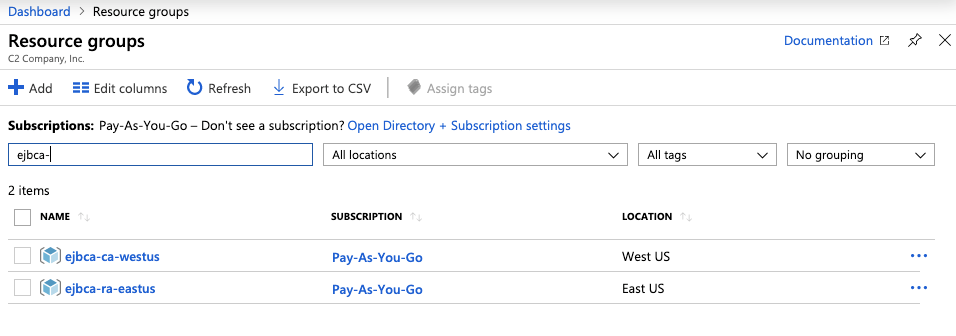
Each one of these resource groups has a vnet01 that was created at privisioning time.
Create a Gateway Subnet
To create a gateway subnet for the CA and the RA/VA hosts, do the following:
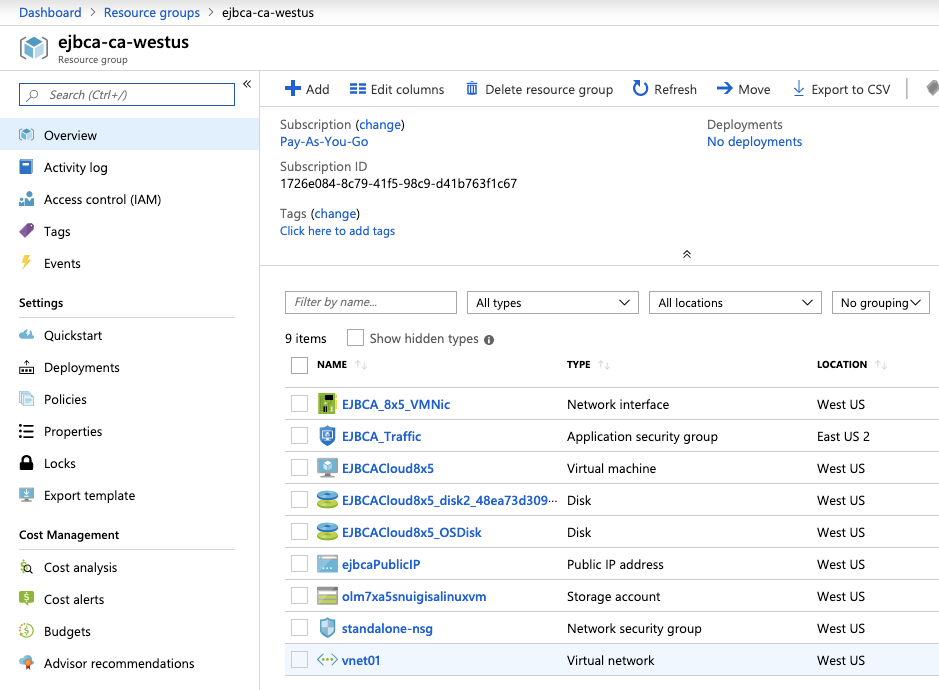
In the Azure portal, select the Resource Group for the instance you are going to connect. In this example, ejbca-ca-westus.
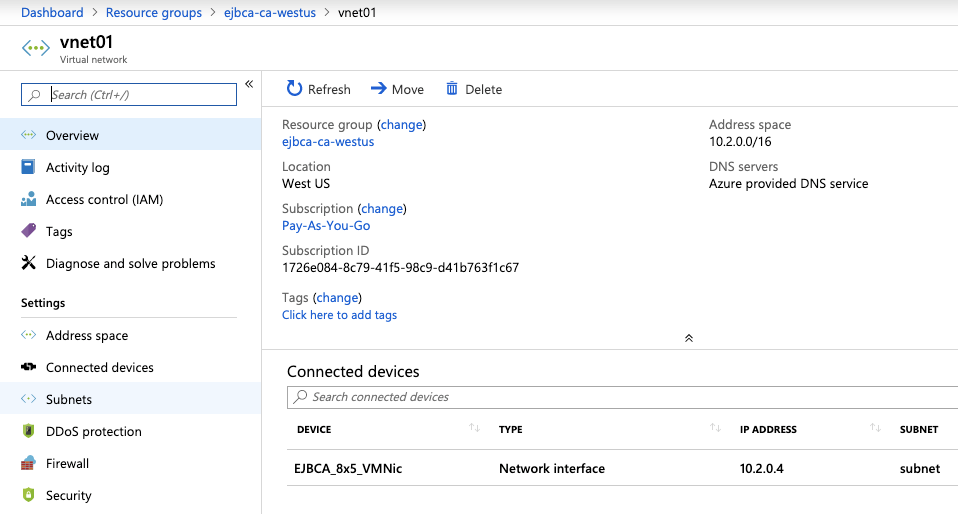
Select the vnet01 virtual network to create a virtual network gateway.
In the Settings section of your virtual network page, select Subnets to expand the Subnets page.
On the Subnets page, select Gateway subnet to open the Add subnet page.

The Name for your subnet is automatically specified with the value GatewaySubnet. This value is required for Azure to recognize the subnet as the gateway subnet. Adjust the default Address range values to match your configuration requirements, then click OK to create the subnet.

- Click OK to create the subnet.
- Perform these same steps for the other host.
Create Virtual Network Gateway
In this step, you create the virtual network gateway for your VNet. Creating a gateway can often take 45 minutes or more, depending on the selected gateway SKU.
To create a virtual network gateway, do the following:
Sign in to the Azure portal and select Create a resource. The New page opens.
In Search the marketplace, enter virtual network gateway, and select Virtual network gateway from the search list.
On the Virtual network gateway page, click Create to open the Create virtual network gateway page.
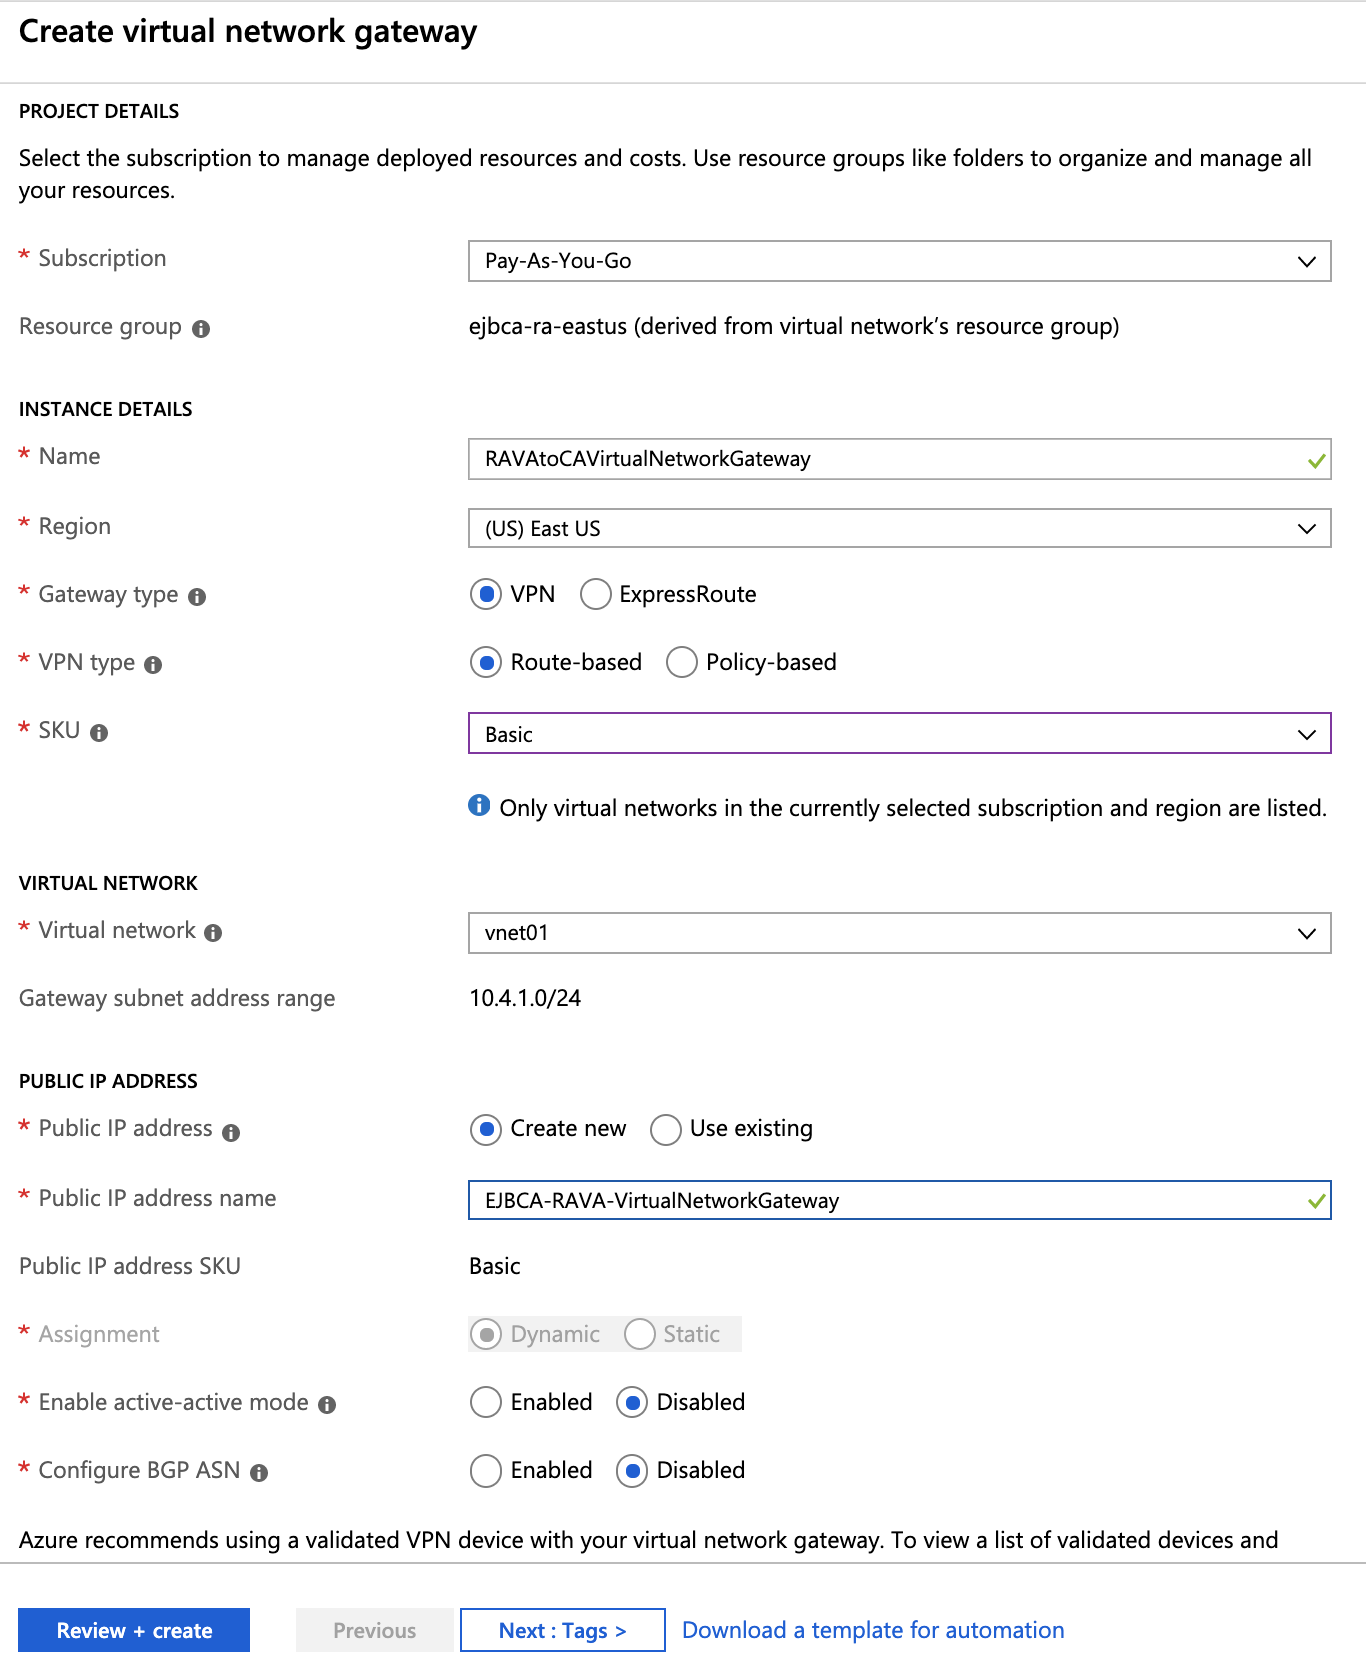
On the Create virtual network gateway page, specify the values for your virtual network gateway:
Name: Enter a name for the gateway object you're creating. This name is different than the gateway subnet name.
Gateway type: Select VPN for VPN gateways.
VPN type: Select the VPN type that is specified for your configuration. Most configurations require a Route-based VPN type.
SKU: Select the gateway SKU from the dropdown. The SKUs listed in the dropdown depend on the VPN type you select. For more information about gateway SKUs, see Gateway SKUs.Only select Enable active-active mode if you're creating an active-active gateway configuration. Otherwise, leave this setting unselected.
Location: You may need to scroll to see Location. Set Location to the location where your virtual network is located. For example, West US. If you don't set the location to the region where your virtual network is located, it won't appear in the drop-down list when you select a virtual network.
Virtual network: Choose the virtual network to which you want to add this gateway. Select Virtual network to open the Choose virtual network page and select the VNet. If you don't see your VNet, make sure the Location field is set to the region in which your virtual network is located.
Gateway subnet address range: You'll only see this setting if you didn't previously create a gateway subnet for your virtual network. If you previously created a valid gateway subnet, this setting won't appear.
Public IP address: This setting specifies the public IP address object that's associated with the VPN gateway. The public IP address is dynamically assigned to this object when the VPN gateway is created. The VPN gateway currently supports only Dynamic public IP address allocation. However, dynamic allocation doesn't mean that the IP address changes after it has been assigned to your VPN gateway. The only time the public IP address changes is when the gateway is deleted and re-created. It doesn't change across resizing, resetting, or other internal maintenance/upgrades of your VPN gateway.
Leave Create new selected.
In the text box, enter a name for your public IP address.
Configure BGP ASN: Leave this setting unselected, unless your configuration specifically requires it. If you do require this setting, the default ASN is 65515, which you can change.
Once filled in, click


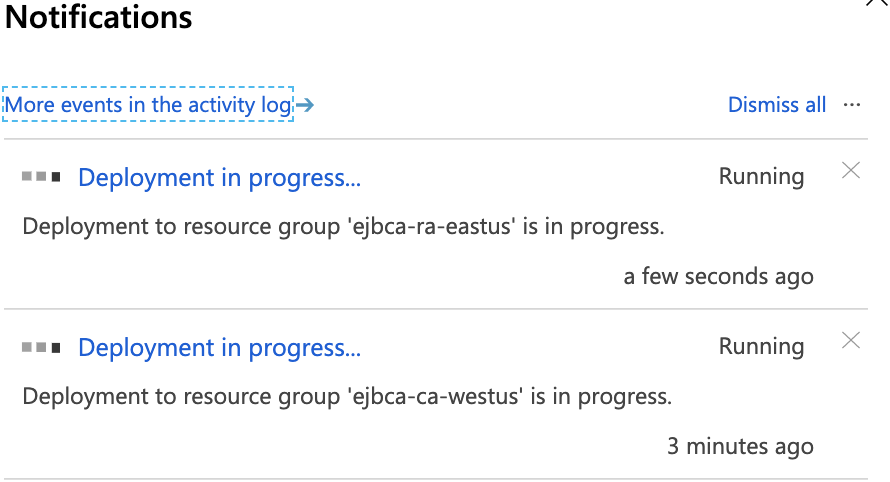
Verify the settings and click Create to begin creating the VPN gateway. The settings are validated and you'll see the Deploying Virtual network gateway tile on the dashboard. Creating a gateway can take up to 45 minutes. You may need to refresh your portal page to see the completed status.
After you create the gateway, verify the IP address that's been assigned to it by viewing the virtual network in the portal. The gateway appears as a connected device. You can select the connected device (your virtual network gateway) to view more information. Proceed to the next section to start configuring the other side.
Create and Configure vNet for the Other Side
After you've configured the vNet for the CA, create the RA/VA vNet by repeating the previous steps and replacing the values with values that reflect the other region. You don't need to wait until the virtual network gateway for the first region has finished creating before you configure the other side. Make sure the address spaces don't overlap with any of the VNets to which you want to connect.
Once filled in, click Review and create, then click Create to begin creating the second VPN gateway.
Configure Gateway Connection
When the virtual network gateways for both regions have completed, you can create your virtual network gateway connections. In this section, you create a connection from the CA West vNet to the RA East vNet. These steps work only for VNets in the same subscription. If your VNets are in different subscriptions, you must use PowerShell to make the connection. However, if your VNets are in different resource groups in the same subscription, you can connect them by using the portal.
In the Azure portal, select All resources, enter virtual network gateway in the search box, and then navigate to the virtual network gateway for your VNet. Select it to open the Virtual network gateway page.

Under Settings, select Connections, and then select Add to open the Add connection page.

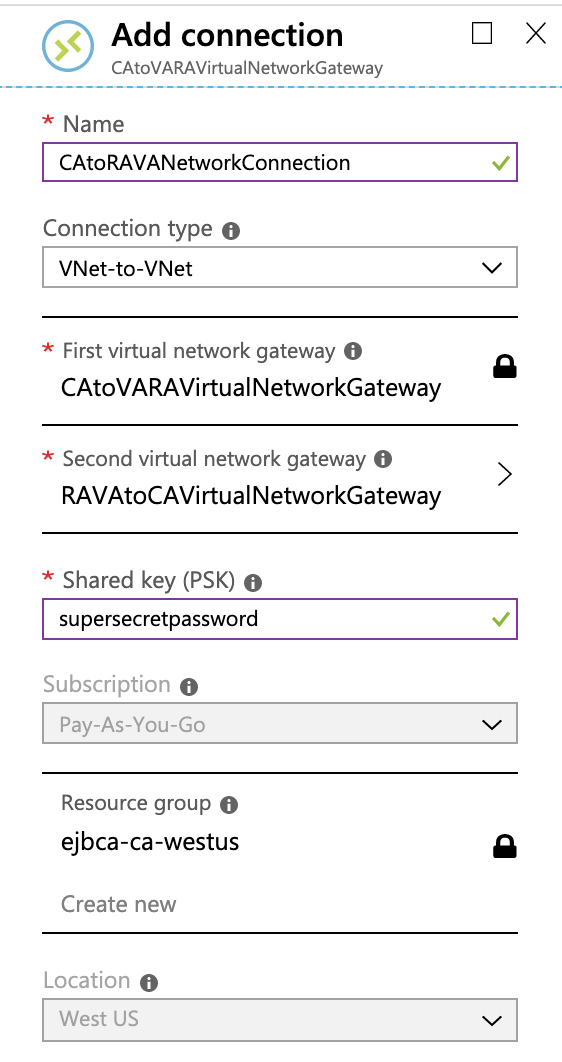
On the Add connection page, fill in the values for your connection:
Name: Enter a name for your connection. For example, CAtoRAVANetworkConnection.
Connection type: Select VNet-to-VNet from the drop-down.
First virtual network gateway: This field value is automatically filled in because you're creating this connection from the specified virtual network gateway.
Second virtual network gateway: This field is the virtual network gateway of the VNet that you want to create a connection to. Select Choose another virtual network gateway to open the Choose virtual network gateway page.
View the virtual network gateways that are listed on this page. Notice that only virtual network gateways that are in your subscription are listed. If you want to connect to a virtual network gateway that isn't in your subscription, use the PowerShell.
Select the virtual network gateway to which you want to connect.
Shared key (PSK): In this field, enter a shared key for your connection. You can generate or create this key yourself. In a site-to-site connection, the key you use is the same for your on-premises device and your virtual network gateway connection. The concept is similar here, except that rather than connecting to a VPN device, you're connecting to another virtual network gateway.
Click OK to save your changes.
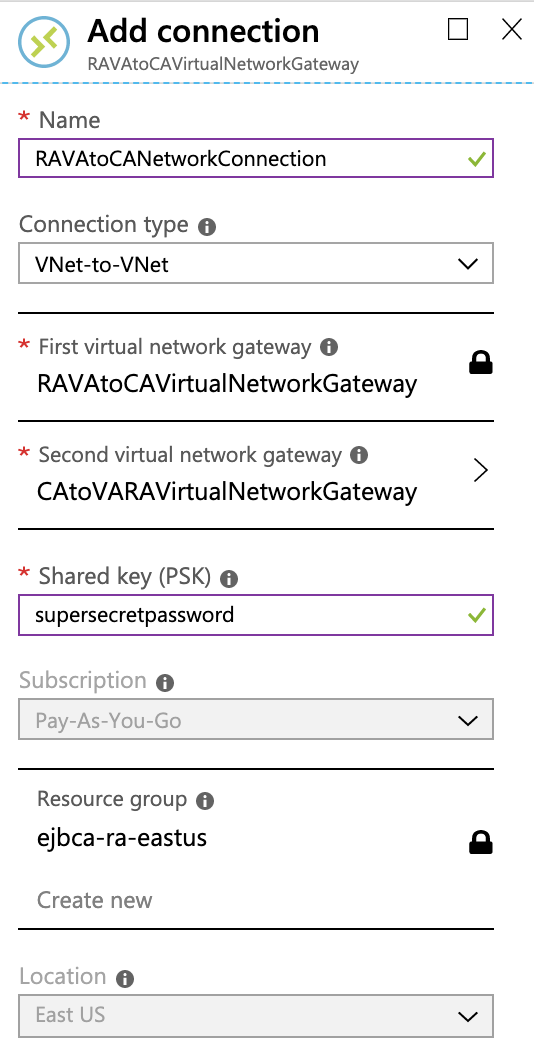
Configure RA/VA to CA Gateway Connection
Next, create a connection on the other side from the RAVAtoCAVirtualNetworkGateway just created to the CAtoVARAVirtualNetworkGateway. In the portal, locate the other virtual network gateway that needs a connection. Follow the steps from the previous section, replacing the values to create a connection from RAVAtoCAVirtualNetworkGateway to CAtoVARAVirtualNetworkGateway. Make sure that you use the same shared key.
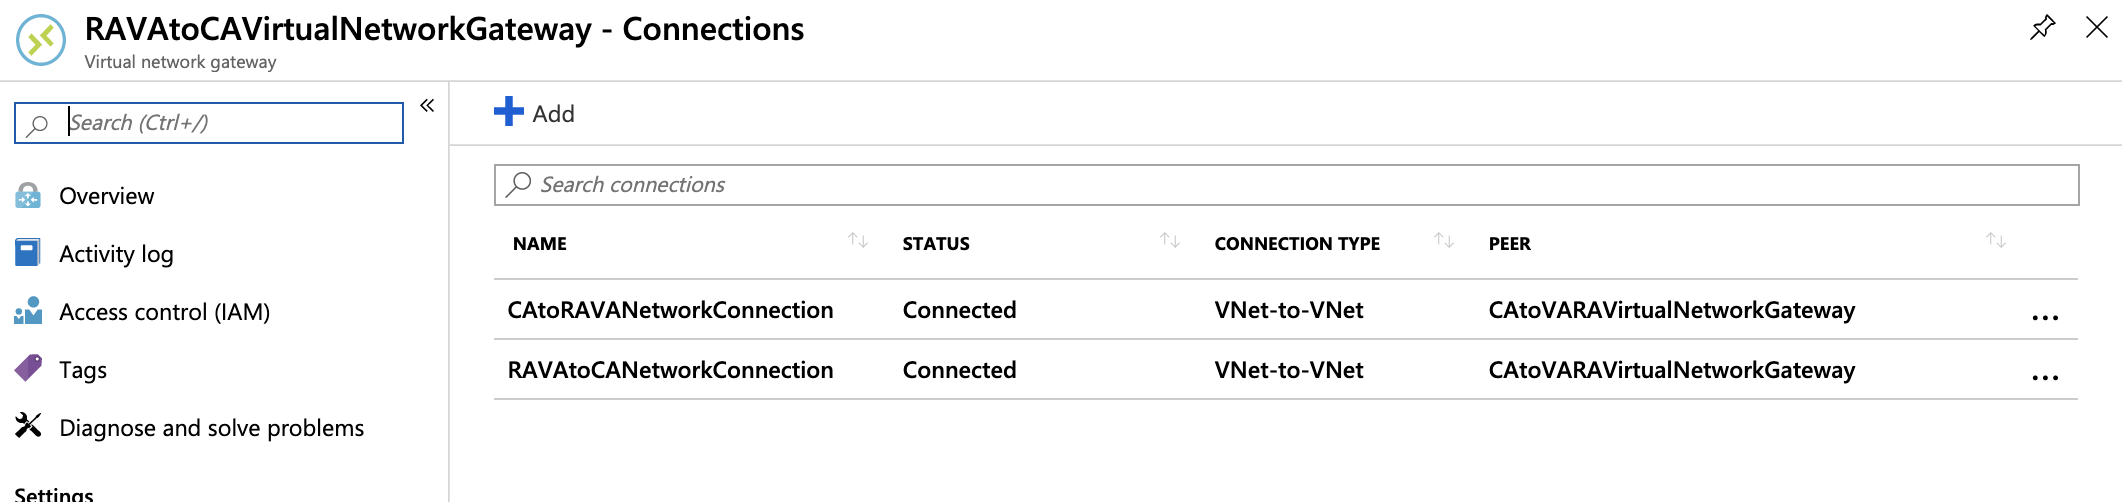
Verify Connections
Locate the virtual network gateway in the Azure portal. On the Virtual network gateway page, select Connections to view the Connections page for the virtual network gateway. After the connection is established, you'll see the Status values change to Succeeded and Connected. Select a connection to open the Essentials page and view more information.
When data begins flowing, you'll see values for Data in and Data out.

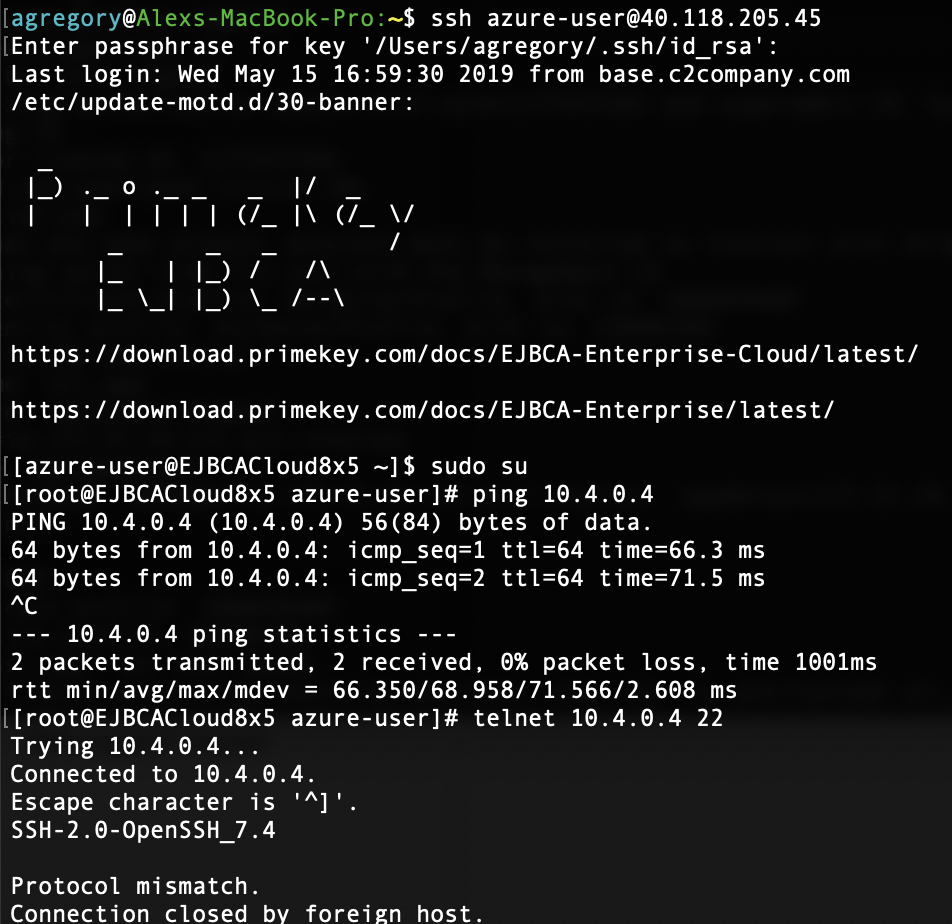
Test access from one of the hosts to the other.