Backup and Restore on ESXi
The following covers how to backup and restore using ESXi import and export functions, as well as how to create and restore a snapshot.
Backup and Restore with Import and Export functions
ESXi offers import and export functions to back up a virtual machine to disk (.ovf, .vmdk), or to restore from it.
Attention!
Make sure the virtual machine you wish to back up and restore is powered off.
Backup with the Export Function
- Open your Navigator and choose Virtual Machines from the sidebar menu.
- Choose and mark the checkbox of the virtual machine you want to back up.
- Before moving on, make sure that your virtual machine is powered off.
Click Actions in the top menu bar to open the list. - Click Export with Images.
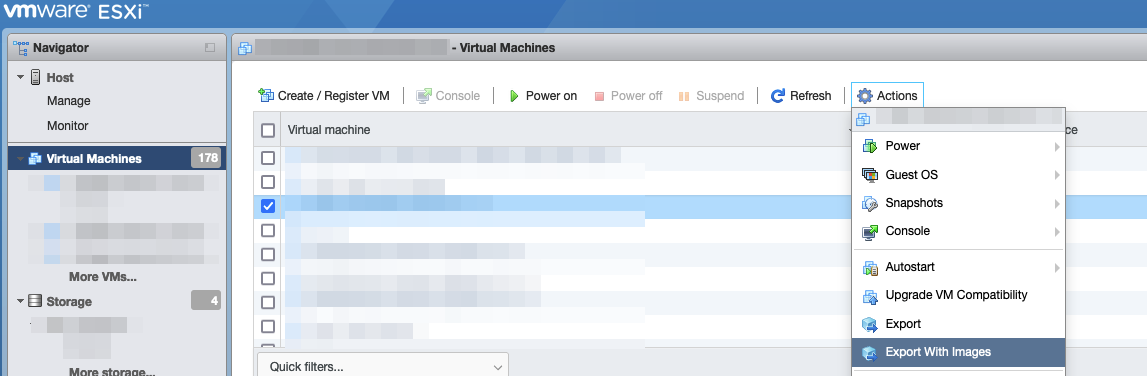
A sub menu opens with preselected settings.
Accept the default settings and continue with Export. - Two files (.ova, .vmdk) will be downloaded to your download folder.
- Once the files are downloaded, the backup is complete.
Restore with the Import Function
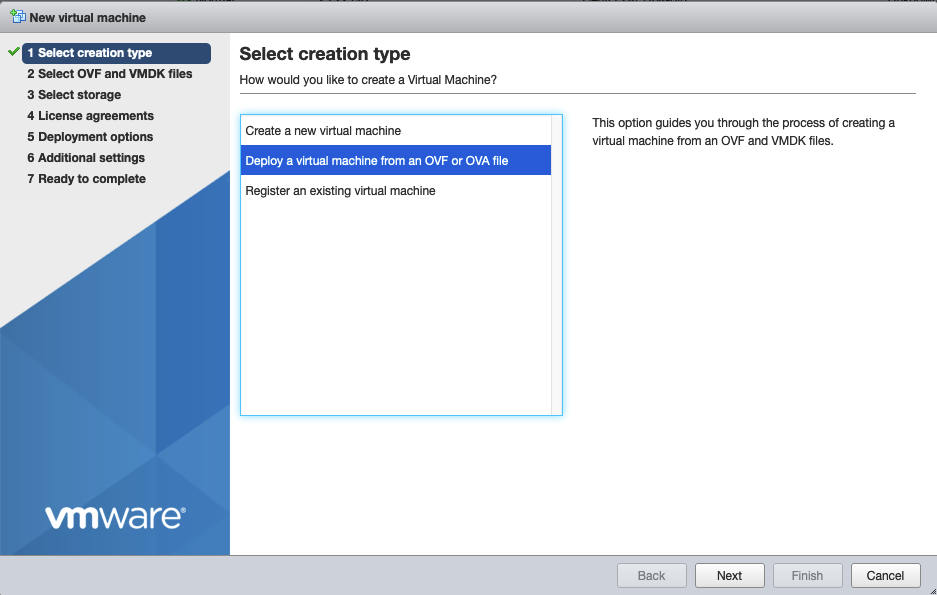
- Open your Navigator and choose Virtual Machines from the sidebar menu.
- Click Create / Register VM in the top menu bar.

- In 1 Select creation type, select Deploy a virtual machine from OVF or OVA file, and then click Next.
- In 2 Select OVF and VMDK files enter the name of the VM you want to restore and select the corresponding files (.ovf and .vmdk).
Continue with Next. - In 3 Select storage select the data storage on your ESXi you want to restore the imported VM.
Continue with Next. - In 4 Deployment option make your selection.
Enter the Network mappings and choose from the menu.
Set the disk provisioning to Thin.
<Optional> Mark the checkbox Power on automatically.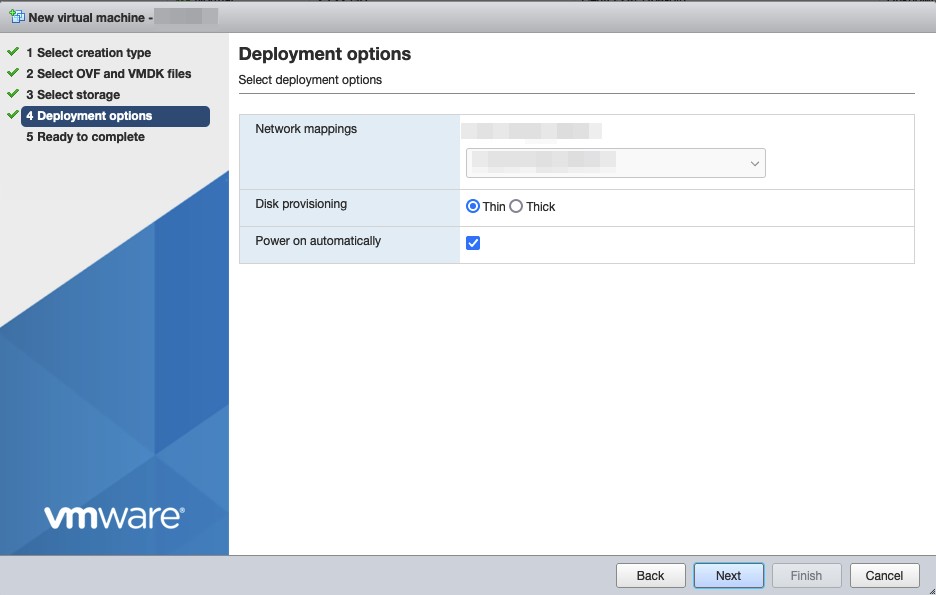
Continue with Next. - In 5 Ready to complete review your settings.
Complete with Finish.
Create and Restore Snapshots
The following sections provide instructions for creating and restoring a snapshot.
A snapshot is not a full backup. It only saves the difference (delta) of your VM between two timestamps.
Attention!
Note that a snapshot will not help if the server becomes corrupted and the VM is deleted.
Create a Snapshot
Before you begin, ensure that the virtual machine you want to take a snapshot from is powered off.
To create a snapshot:
- Open your Navigator and choose Virtual Machines from the sidebar menu.
- Choose and mark the checkbox of the VM you want to snapshot.
- Make sure that your VM is powered off.
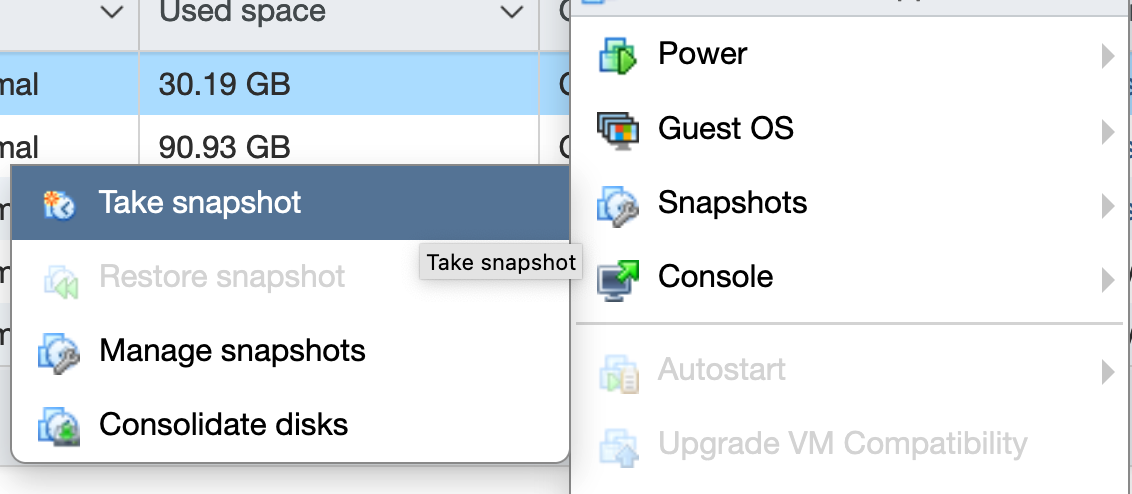
Click Actions in the top menu bar to open the menu. - Click Snapshots to open the sub menu.
- Click Take snapshot to open a form.
- Specify a Name for the snapshot and optionally add a Description.
- Mark the checkbox: Snapshot the virtual machine‘s memory.
- Continue and confirm by clicking Take snapshot.

- In Recent task on your Navigator, you can track the progress under the Result column.
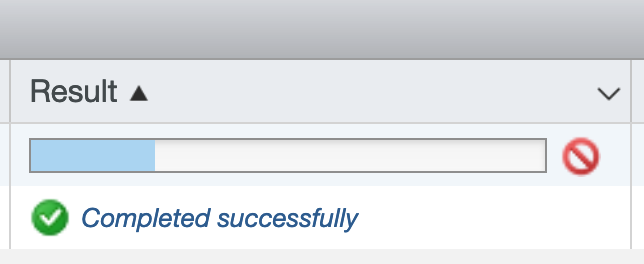
- After completion, the green check mark with Completed successfully will appear.
Restore a Snapshot
- Open your Navigator and choose Virtual Machines from the sidebar menu.
- Choose and mark the checkbox of the VM you want to restore the snapshot from.
- Make sure that your VM is powered off.
Click Actions in the top menu bar to open the menu. - Click Snapshots to open the sub menu.
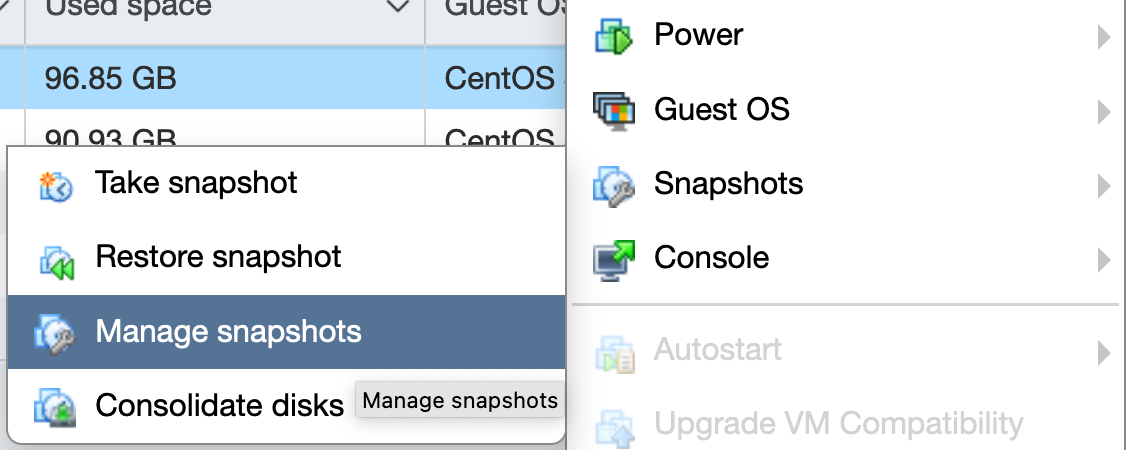
- Click Manage snapshot.
- The snapshot tree shows you the current position of your last snapshot.
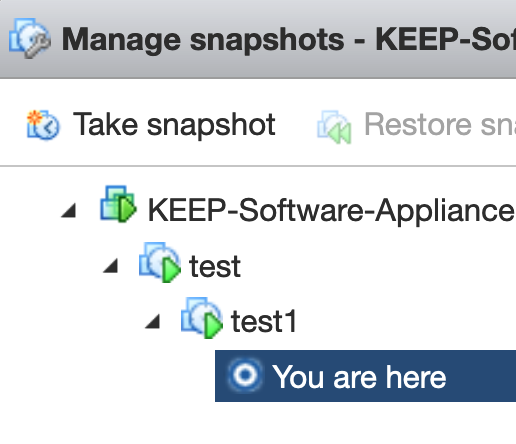
- Click on the snapshot you want to restore. A window with details on that snapshot will open.
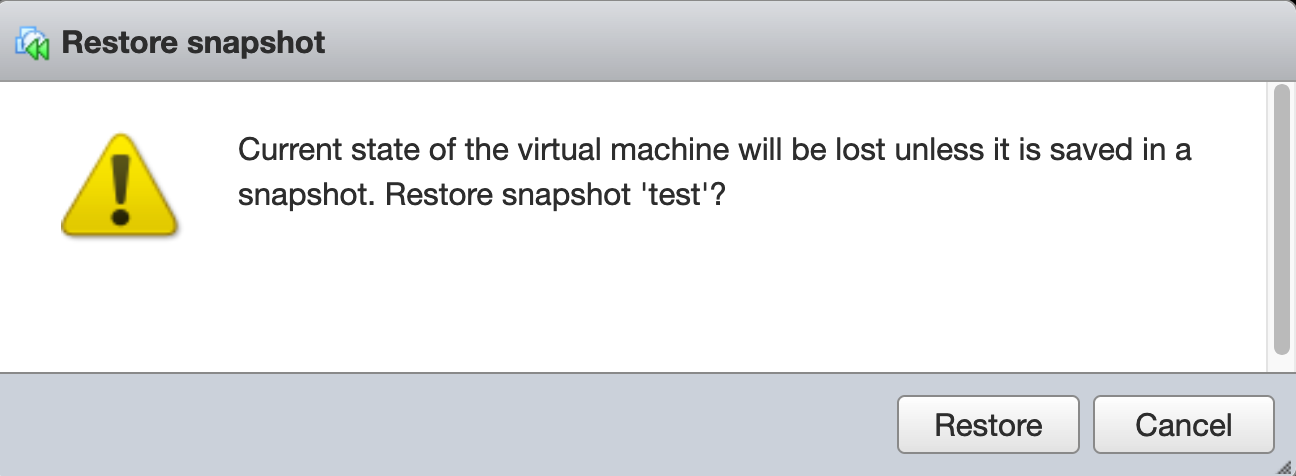
- In the top menu bar, click Restore snapshot.
- A warning appears. Click Restore to continue.
- In Recent task on your Navigator, you can track the progress under the Result column.