Security: Configuring an Entrust nShield Connect HSM
You can configure a Hardware Security Module (HSM) to store and protect your cryptographic keys. Optionally, you can use the software-based SoftHSM implementation for demonstration or testing purposes.
The following covers how to configure an Entrust nShield Connect HSM for the Software Appliance. For more information on the Entrust nShield Connect HSM, refer to the Entrust product documentation that you received with your purchase of the HSM. Please note that 2 versions of the Security World software package from Entrust are available: 12.80.4 and 13.4.4.
Configuring an HSM for the Software Appliance is irrevocable. To change an HSM configuration, you must reset the Software Appliance.
To configure an Entrust nShield Connect HSM for your Software Appliance, follow the steps below.
If you run into issues after the configuration, you can get HSM specific log messages from a HSM Support Package. For further information please refer to Create an HSM Log.
Supported Entrust HSM features
The Software Appliance supports the following Entrust nShield Connect features:
- Softcards
- Operator card sets with a 1/N quorum
Not supported are all setups that need the preload command.
Connect the Software Appliance with the Entrust nShield Connect HSM
To connect the Software Appliance with the HSM:
- Log in to your Software Appliance and open the Security page or click Configure HSM in the Overview.
In the HSM Configuration section, select Entrust nShield Connect to access the Configuration fields:

The client version selection shows the available Entrust nShield HSM drivers. Chose the one to install.

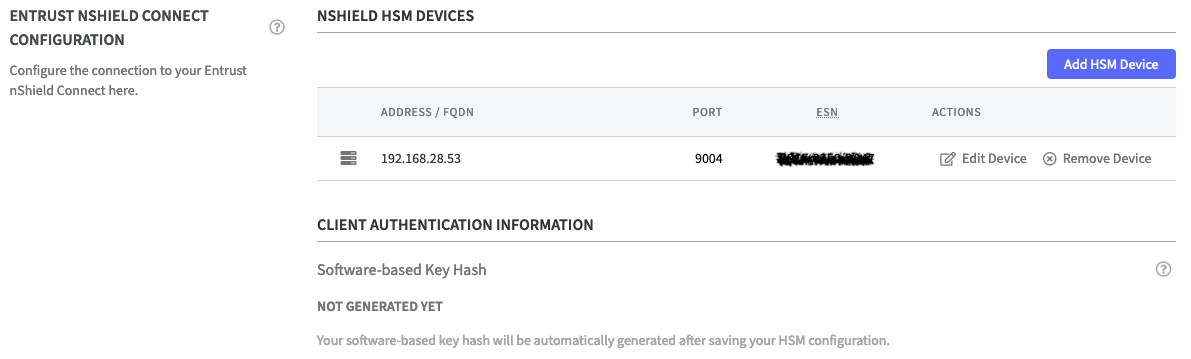
Click Add HSM Device.
The form Add HSM Device opens.
Enter the Connection Settings.
Enter the Device Information.
Confirm your entries with Add HSM Configuration.
A warning appears to inform you that after saving HSM configuration you can no longer switch to a different HSM.
To change the HSM configuration, you need to reset your EJBCA Software Appliance. Proceed by clicking Activate.

The Entrust nShield HSM device is now listed but the Software-based Key Hash is not generated yet. To do so configure the RFS IP Address in the next step.
Remote File System Settings
- RFS Mode: Select the appropriate option. Recommended: Read and Write
Readonly: (default)
Local changes will not be synchronized with the RFS server. External changes will be loaded by the RFS server every 2 minutes.
Read and Write:
Local changes will be detected every 3 seconds and, if necessary, transmitted to the RFS server. External changes will be loaded by the RFS server every 2 minutes. RFS IP Address and RFS Port: Enter the IP address and the port of the RFS server.
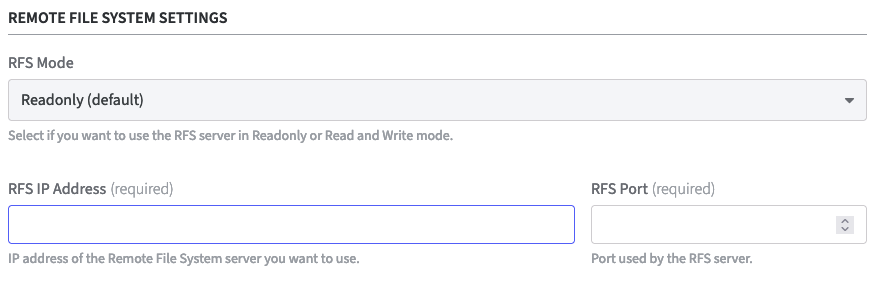
Click Save HSM Configuration to continue.

A warning appears to inform you that changing HSM configuration will restart your applications on the Software Appliance.
Proceed by clicking Save.The Software-based Key Hash will be generated.

Local Key Management Data:
Use the Wipe Local Key Management Data function to delete this data, including keys that have not yet been synchronized with the RFS.
A warning will appear asking you to confirm the decision. As confirmation type:
WIPE LOCAL KEY MANAGEMENT DATACODEin the confirmation field.


The function Wipe Local Key Management Data is not available for the next 30 seconds after pressing the button!
- RFS Mode: Select the appropriate option. Recommended: Read and Write
- Remote Operator Cards
To support remote operator cards for Entrust nShield HSM's activate the checkbox.
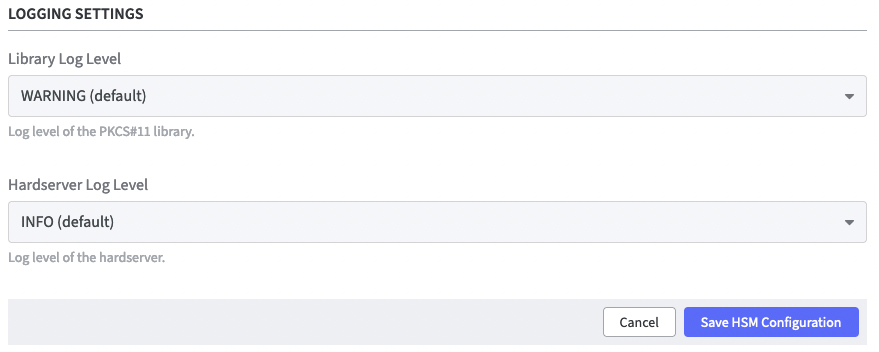
Logging Settings
- Library Log Level: Select the appropriate log level option of the PKCS#11 library.
Hardserver Log Level: Select the appropriate log level option of the hardserver.
Click Save HSM Configuration to confirm.
Another warning appears to inform you that changing the configuration of your HSM will restart all applications on your Software Appliance.
Click Save to confirm.
- Library Log Level: Select the appropriate log level option of the PKCS#11 library.
Client Authentication Information
Software-based Key Hash: The software-based key hash will appear automatically once you added at least 1 HSM and provided information about the RFS (Remote File System). The value displayed here can be used to register the Software Appliance to the HSM using the software-based authentication.
Optional!
Enable: Allow nShield HSMs to fetch software-based key hash.
This opens port 9004 on the Software Appliance to allow the Software Appliance to be registered as an nShield client with software-based authentication.
This step is only required if you want to further secure the connection between the Software Appliance and the Entrust nShield Connect HSM.
Register the Software Appliance as a client to the Entrust nShield Connect HSM.
If you have performed the optional additional authentication by means of software-based key hash it is recommended to disable this function now.
On the Security page of the application, the status of the HSM Driver Status will change from Not Connected to Connected as soon as the configuration is completed.
The connection is now listed in the table nShield HSM Devices. Here you can now preform actions such as Edit Device or Remove Device.
On the Overview page of the application, the status in the HSM Overview also changes to Connected as soon as the configuration is completed. During configuration, the appliance is in the Restarting status. During this time, it is not available.
To achieve Load Sharing, just add an additional or multiple HSMs with the Add HSM Device operation.
Once EJBCA is running again, you can proceed with adding a crypto token.
Add a Crypto Token in EJBCA Enterprise
To create a crypto token:
- In the Overview page of the Software Appliance, click Admin Web for EJBCA.
- The EJBCA Enterprise page opens. Leave the settings on the Installation page as they are.
- In the sidebar, in the CA Functions section, select Crypto Tokens.

- On the Manage Crypto Tokens page, click Create New...
The individual configuration of the Crypto Token depends on the configuration of the HSM! For detailed Information please see managing crypto tokens.
HSM Troubleshooting
In the section HSM Driver Controls the current HSM Driver Status is displayed.
In case of HSM problems, the HSM driver can be restarted via the Restart button.