Security: Configuring an Utimaco CryptoServer LAN
You can configure a Hardware Security Module (HSM) to store and protect your cryptographic keys. Optionally, you can use the software-based SoftHSM implementation for demonstration or testing purposes.
The following covers how to configure an Utimaco CryptoServer LAN for the Software Appliance. For more information on the Utimaco CryptoServer LAN, refer to the Utimaco SecurityServer product CD that you received with your purchase of the HSM.
If you are using the Firmware Version: SecurityServer-Se2-Series-4.32.0.3-FIPS from Utimaco, you should select this driver: SecurityServer 4.32.0.6 FIPS.
Choose between one of the following Utimacto software packages:
- SecurityServer 4.32.0.6 FIPS
- SecurityServer 4.45.5.1
- SecurityServer 4.51.0.1
Configuring an HSM for the Software Appliance is irrevocable. To change an HSM configuration, you must reset the Software Appliance.
To configure an Utimaco CryptoServer LAN for your Software Appliance, follow the steps below.
Connect the Software Appliance With the Utimaco CryptoServer LAN
To connect the Software Appliance with the HSM:
- Log in to your Software Appliance and open the Security page or click Configure HSM in the Overview.
In the HSM Configuration section, select Utimaco CryptoServer LAN to access the Configuration fields.

HSM Client Version
Click on the HSM Client you want to use.
Connection Settings
- HSM IP Address / FQDN:
Enter the IP address or the Fully Qualified Domain Name (FQDN) of the HSM. Only IPv4 addresses are supported. - HSM Port:
Enter the Port of the Utimaco CryptoServer LAN. Connection Timeout:
Enter the timeout in milliseconds to wait for a non-responding device.
- HSM IP Address / FQDN:
PKCS#11 Related Settings
- Command Timeout:
Enter the time in milliseconds to wait for the answer from CryptoServer after sending a command.
Increase the default value if you know your device to be slow. Slot Count:
Enter the amount of slots configured on your Utimaco CryptoServer LAN.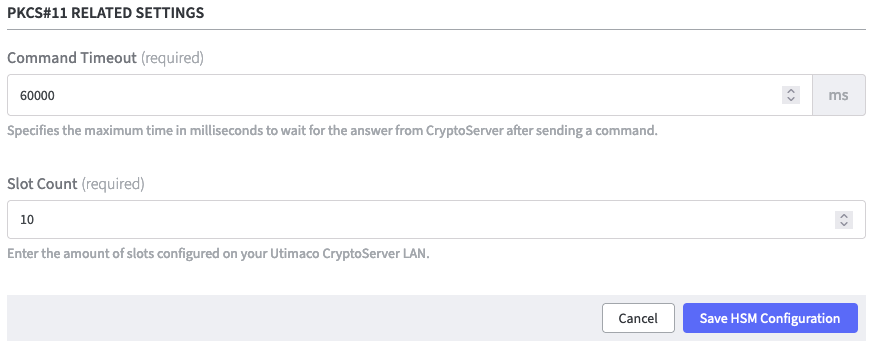
- Command Timeout:
Finalize with Save HSM Configuration.
A warning appears to inform you that after saving HSM configuration you can no longer switch to a different HSM.
To change the HSM configuration, you need to reset your EJBCA Software Appliance. Proceed by clicking Activate.

Proceed with Activate.
The CryptoServer LAN Status information will be shown.
On the Security page of the application, the status of the HSM Driver will change from Not Connected to Connected as soon as the configuration is completed.
On the Overview page of the application, the status in the HSM Overview also changes to Connected as soon as the configuration is completed. During configuration, the appliance is in the Restarting status. During this time, it is not available.
Once EJBCA is running again, you can proceed with adding a crypto token.
Add a Crypto Token in EJBCA Enterprise
To create a crypto token:
- In the Overview page of the Software Appliance, click Admin Web for EJBCA.
- The EJBCA Enterprise page opens. Leave the settings on the Installation page as they are.
- In the sidebar, in the CA Functions section, select Crypto Tokens.

- On the Manage Crypto Tokens page, click Create New...
The individual configuration of the Crypto Token depends on the configuration of the HSM! For detailed Information please see managing crypto tokens.
If you are using the PKCS#11 Reference Type Slot ID, please make sure that the value you enter at the PKCS#11 Reference is smaller as the value you have previously entered for the Slot Count.
For the default Slot Count entry of 10, for example, the slot numbers 0-9 are possible.
HSM Troubleshooting
In the section HSM Driver Controls the current HSM Driver Status is displayed.
In case of HSM problems, the HSM driver can be restarted via the Restart button.