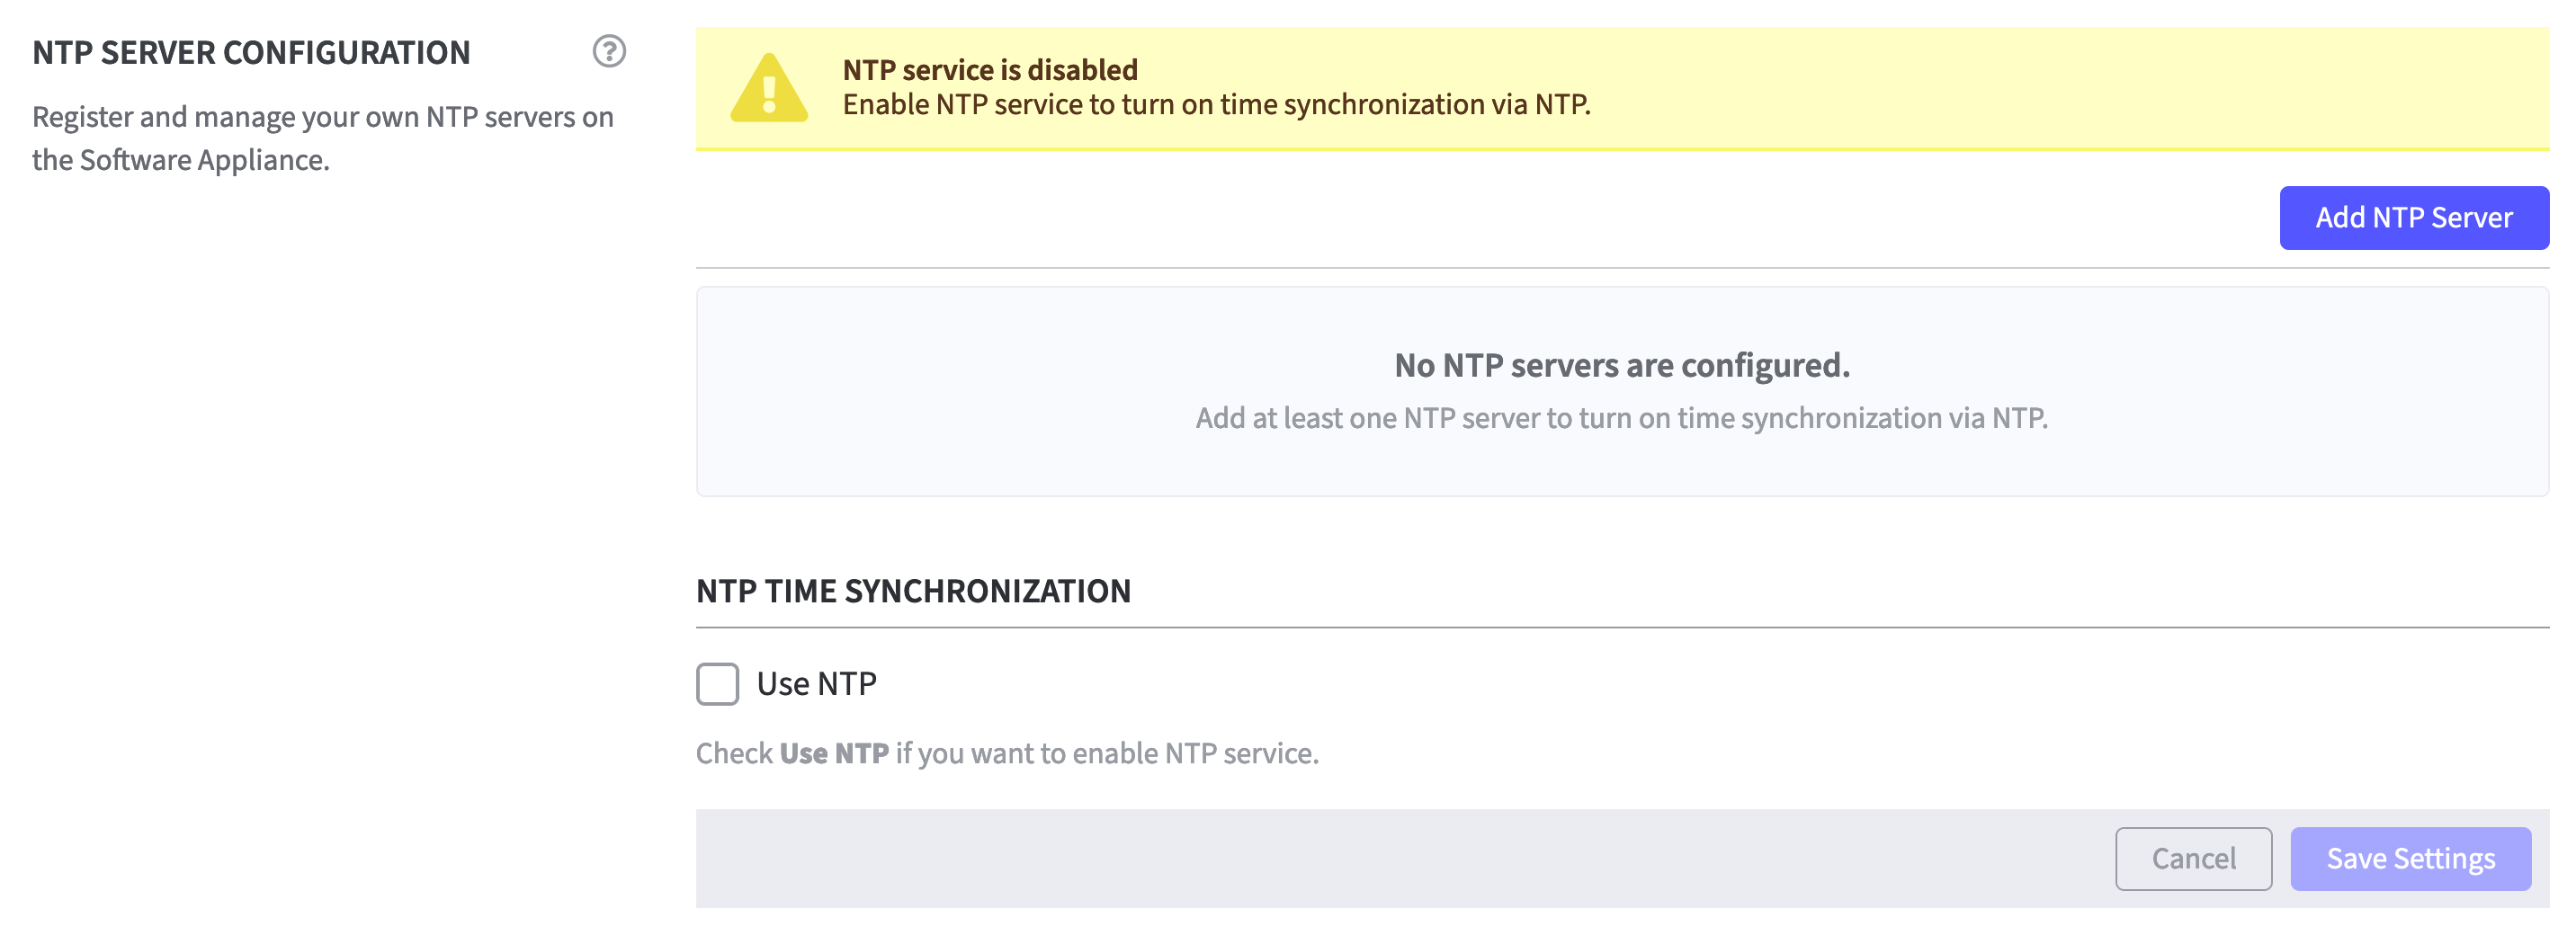
To use NTP Time Synchronization it is possible to register and manage NTP (Network Time Protocol) Server(s) on the Software Appliance. The first step is to configure NTP Server(s), which can then be activated for NTP Time Synchronization.
Log in to your Software Appliance and open the Settings page.
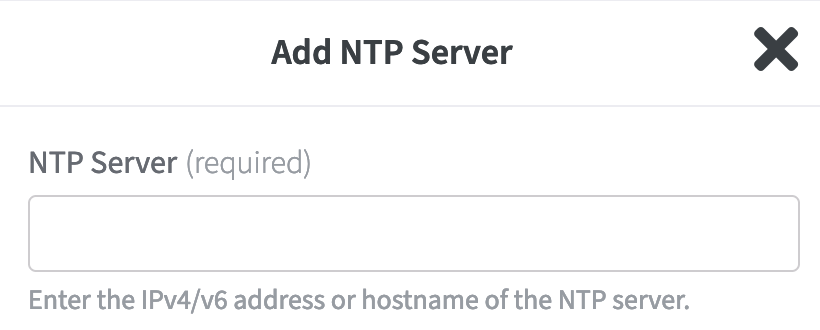
Click Add NTP Server to open the corresponding form.
Enter the IPv4/IPv6 address or hostname of the NTP server.
Click Add NTP Server in the form.
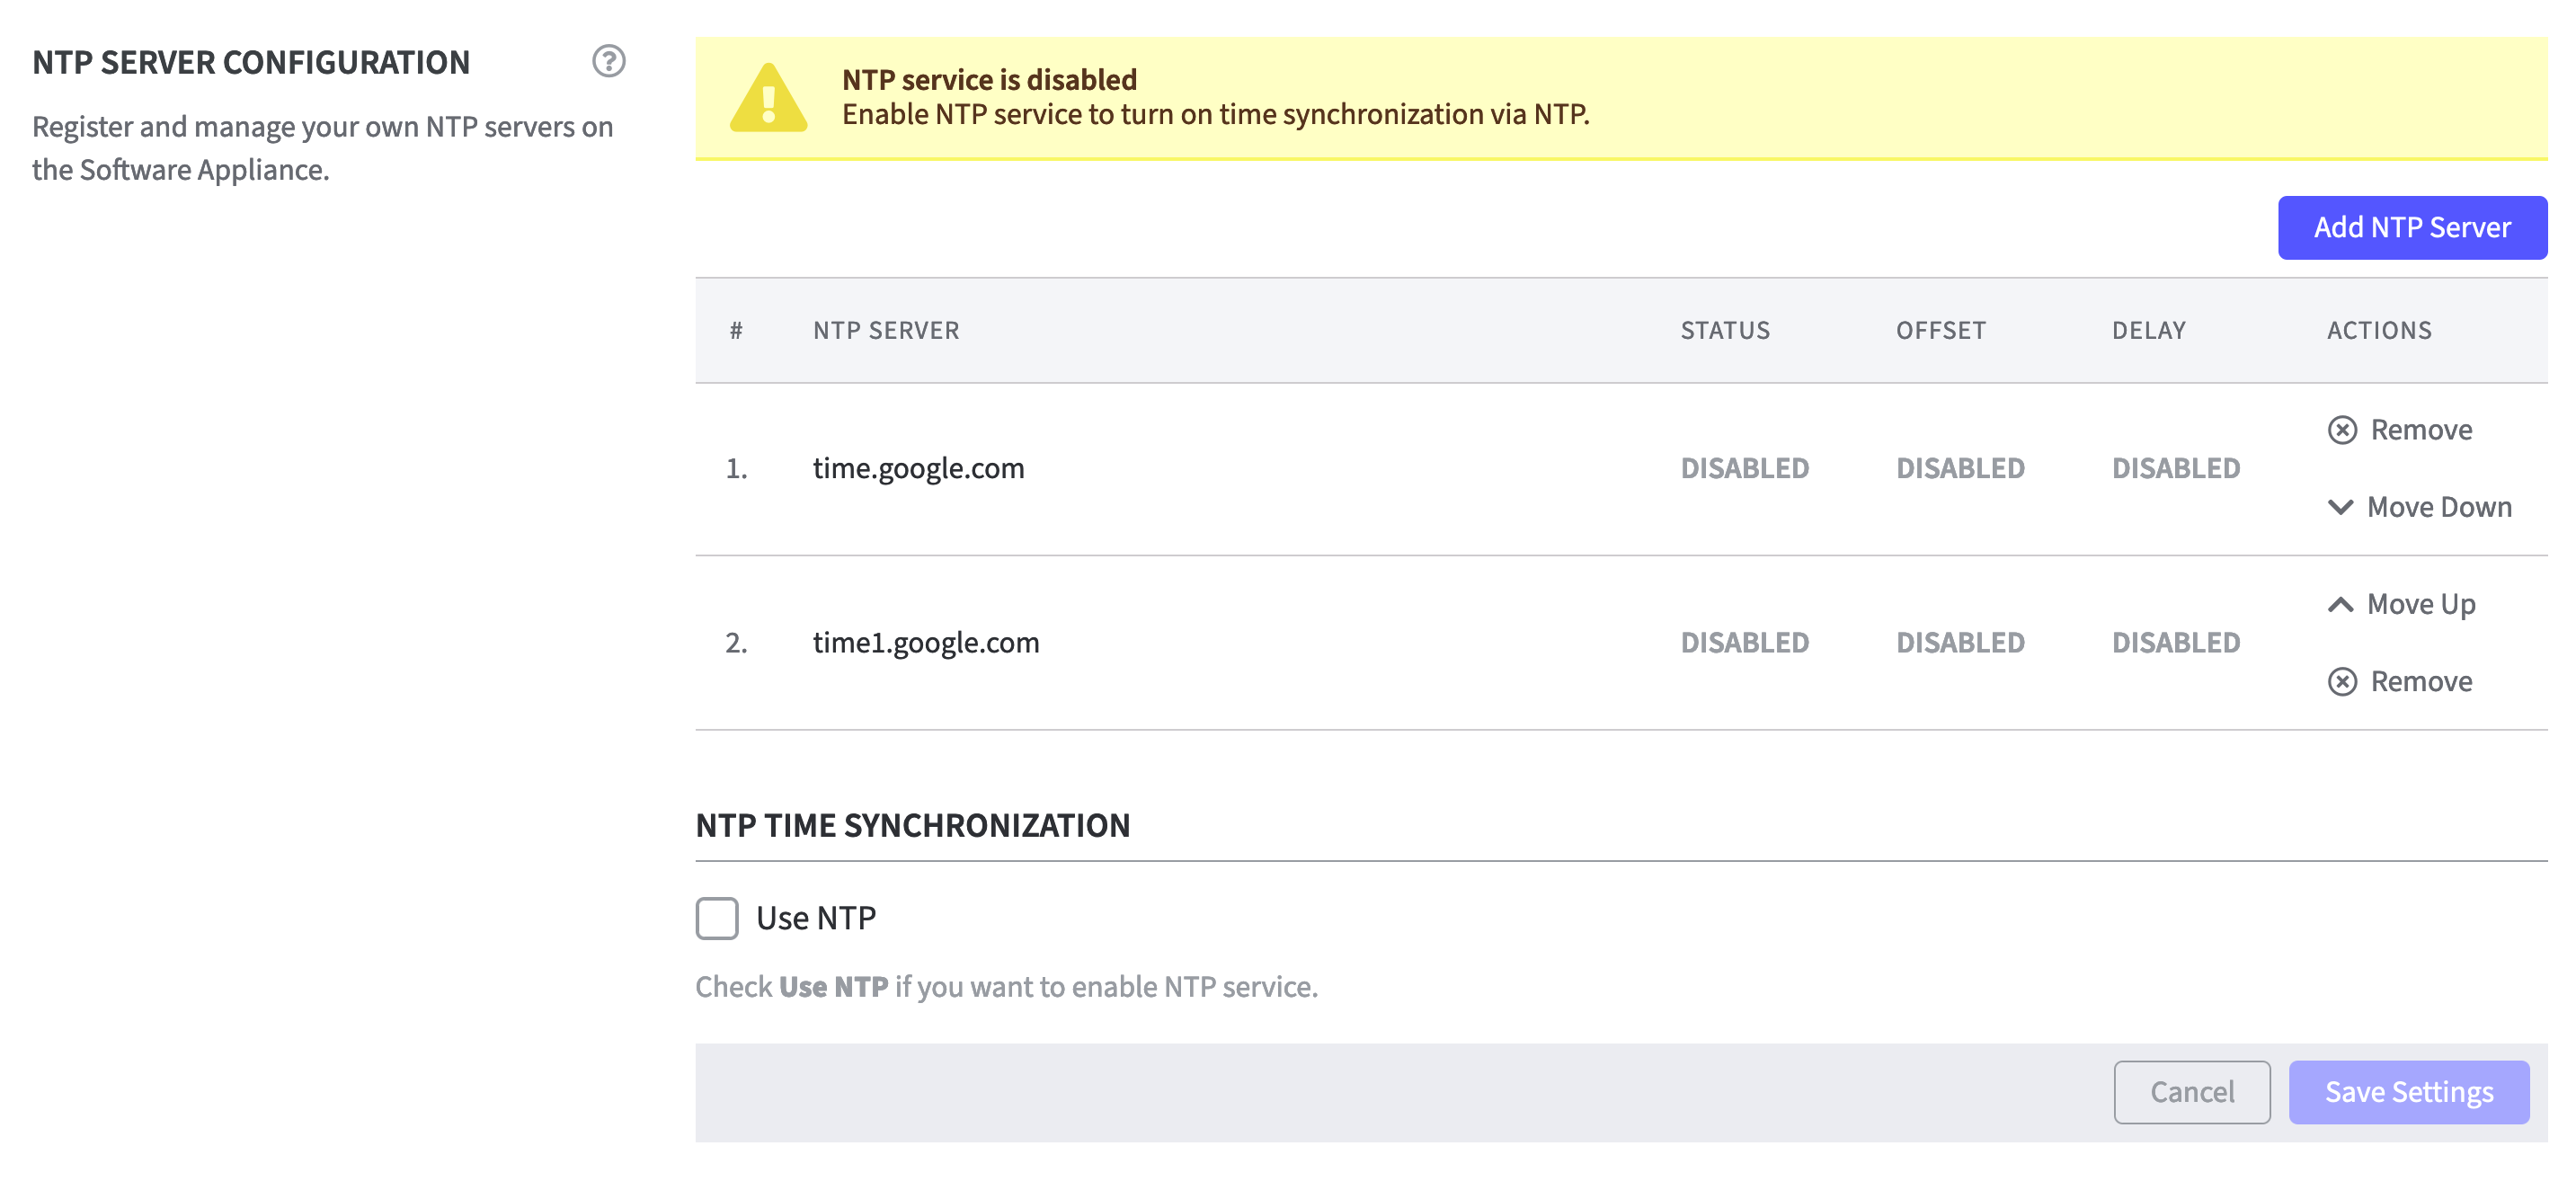
The added NTP server is now listed on the Settings page.
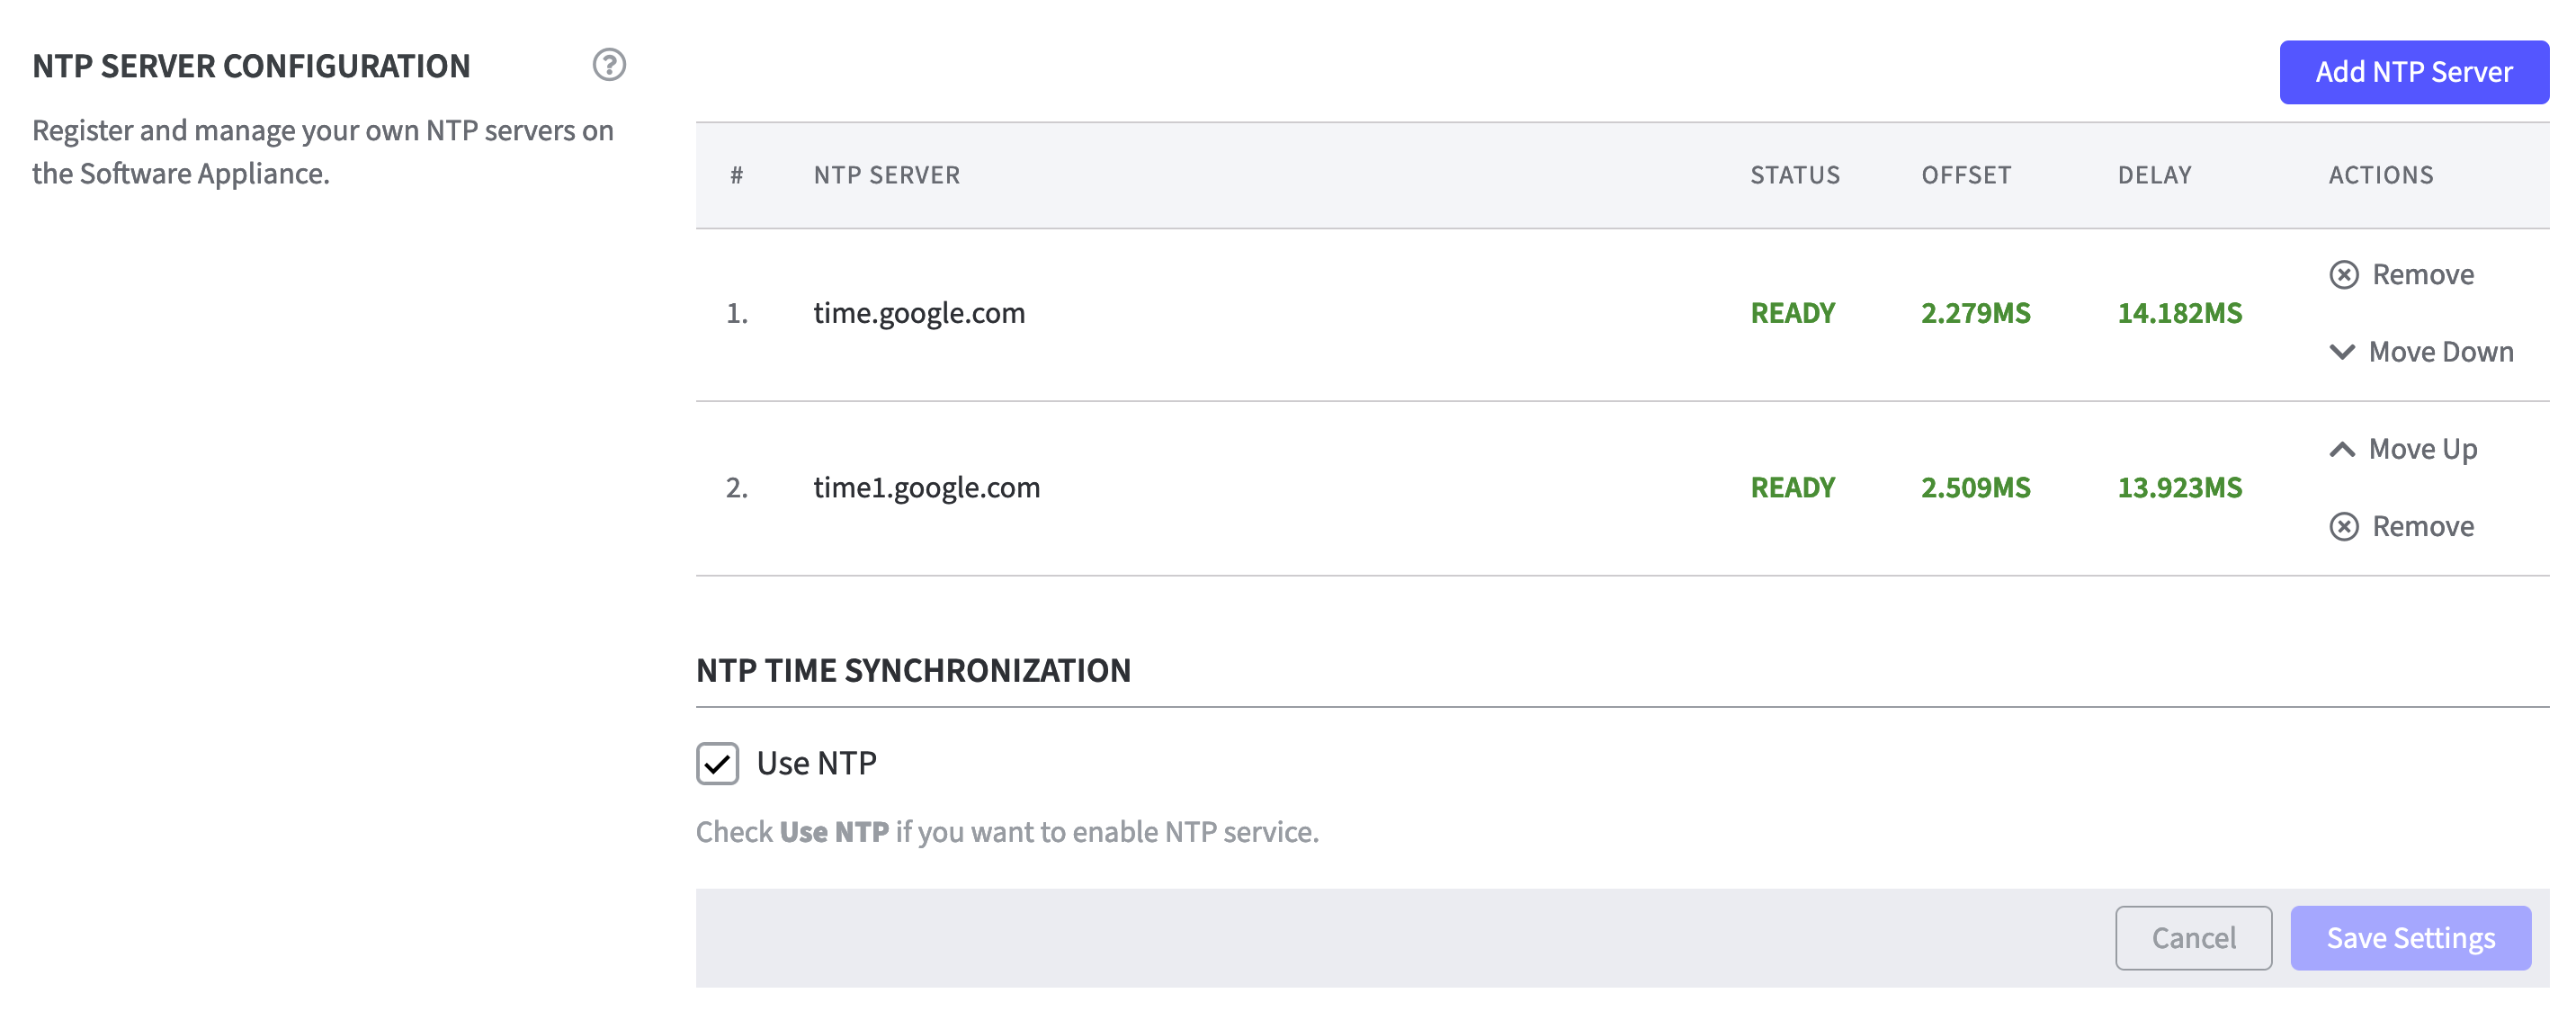
There are 4 columns behind each NTP server: Status: Disabled Offset:Disabled Delay: Disabled Actions: remove the configured NTP server(s). To do this, click Remove and confirm the overlay message. If more than one NTP server is configured, use the Move Up / Move Down function to change the order of the NTP servers.
No more than 5 NTP servers can be configured.
NTP Time Synchronization
Set up NTP Time Synchronization by activating the NTP Service.
Check Use NTP to enable the NTP Service.
Click Save Settings to confirm the configuration.
The synchronization may take a few seconds.
If the synchronization was successful, the following information is displayed: Status: Ready Offset: time displayed in MS Millisecond Delay: time displayed in MS Millisecond Actions:Remove and Move Up / Move Down function