Step 1: Create the RootCA in Node B
The following instructions show you how to create a ROOT Certification Authority named RootCA in the EJBCA Hardware Appliance (Node B).
Create a Certificate Profile for the RootCA in Node B
The first step is to create a certificate profile for the RootCA. This will be done in the EJBCA Enterprise. We will use a template (ROOTCA) for this, which we will clone first.
When the CA is renewed, it looks for the default values in the profile, which simplifies the renewal process.
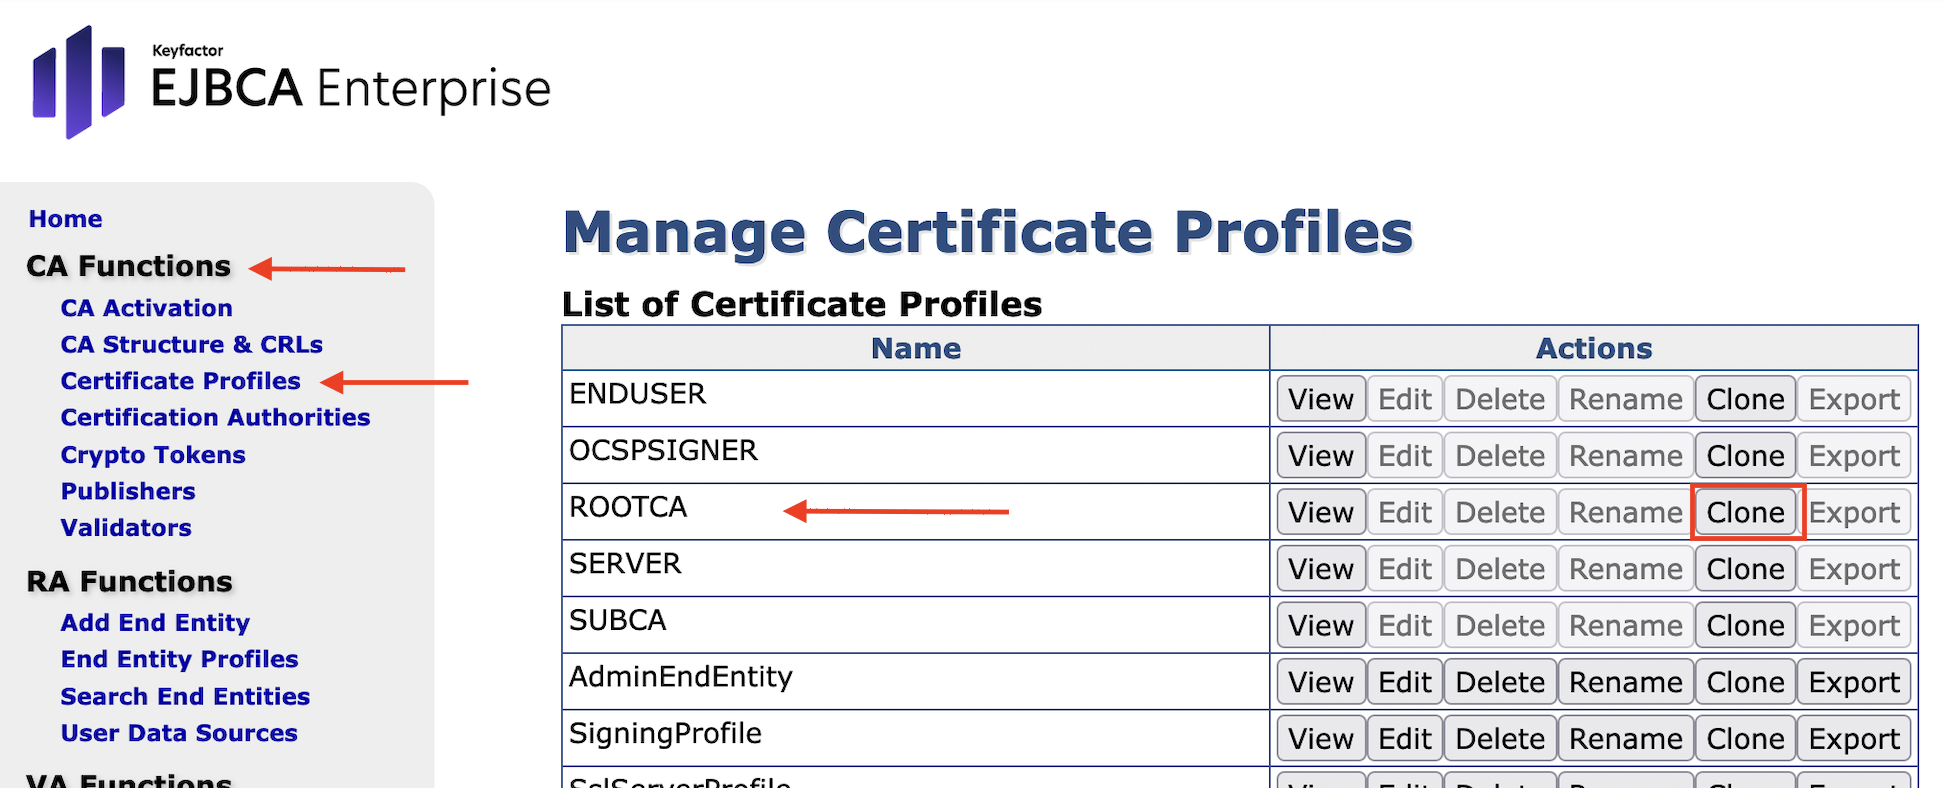
- Open EJBCA Enterprise.
In the sidebar, in the CA Functions section, select Certificate Profiles.
Click Clone for ROOTCA.
Set Name of new certificate profile to RootCACertificateProfile:
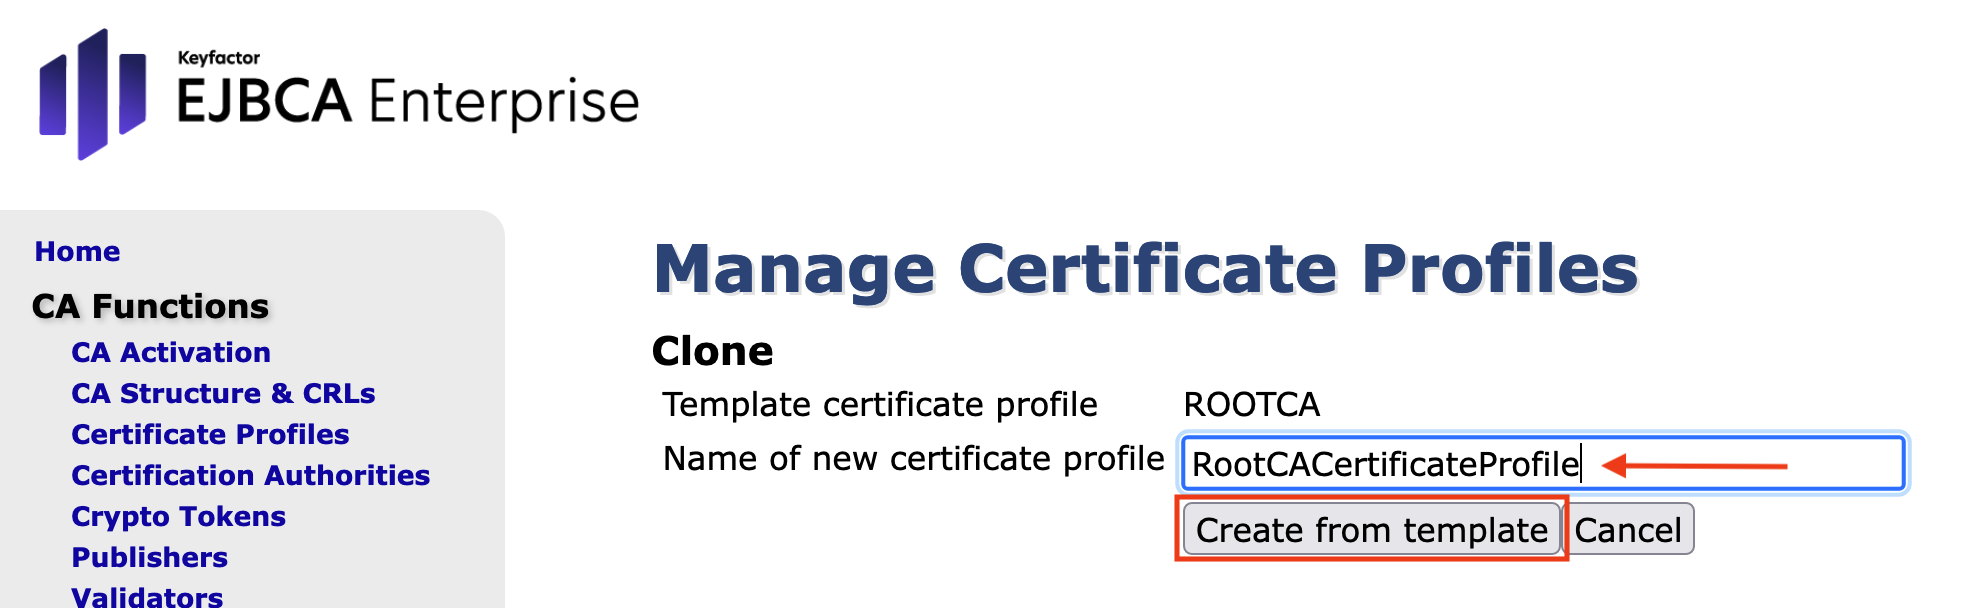
Click Create from template. The new profile is now displayed in the List of Certificate Profiles:
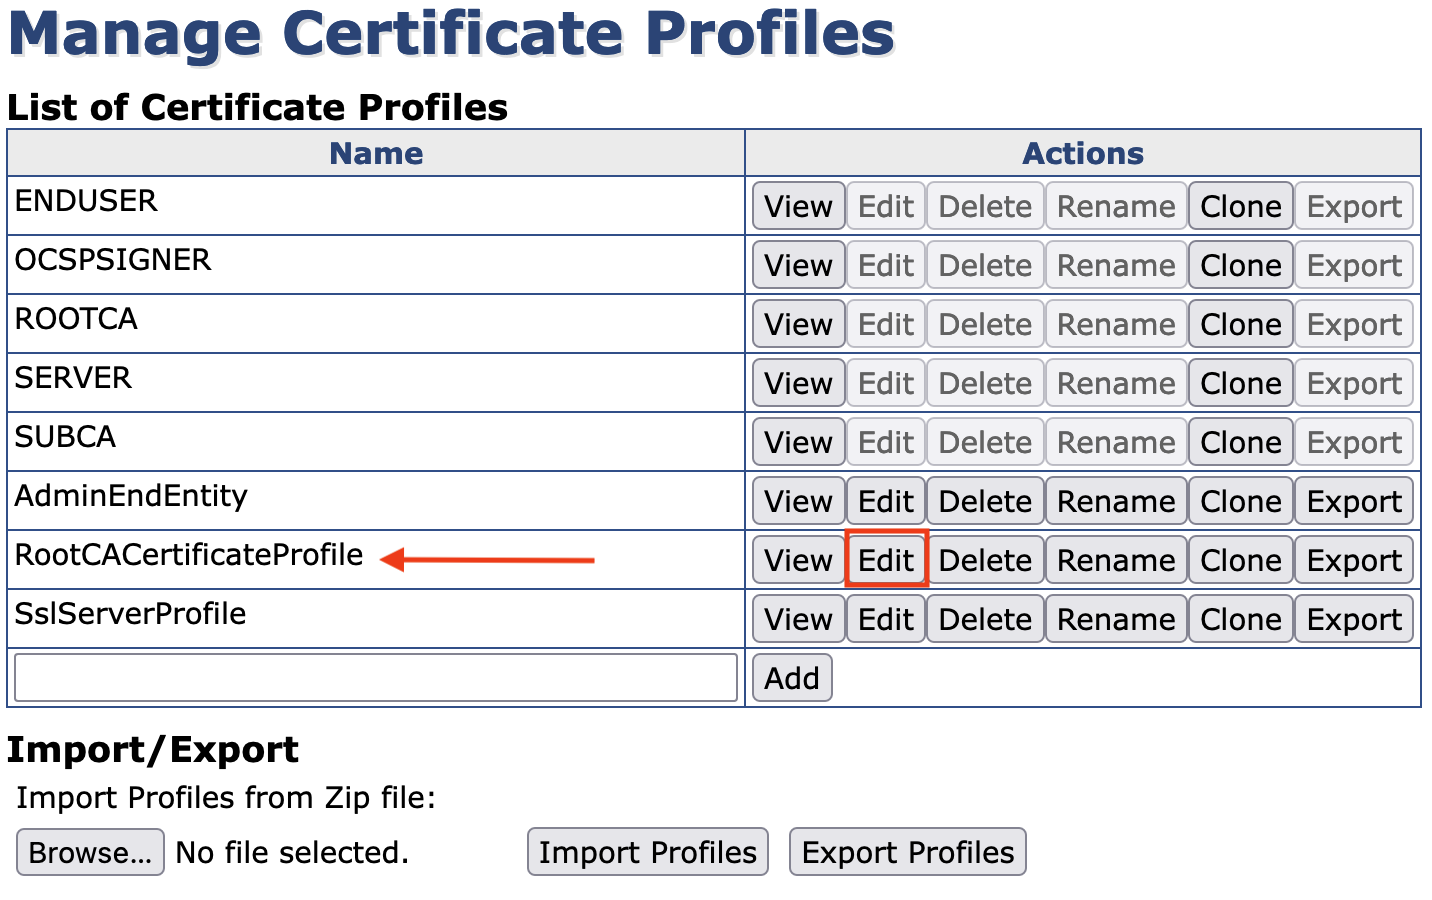
Click Edit for the newly created profile.
- Make the following changes:
Type: is set automatically
Available bit lengths: select 4096 only
Validity or end date of the certificate: Enter 10y ( or use ISO 8601 date)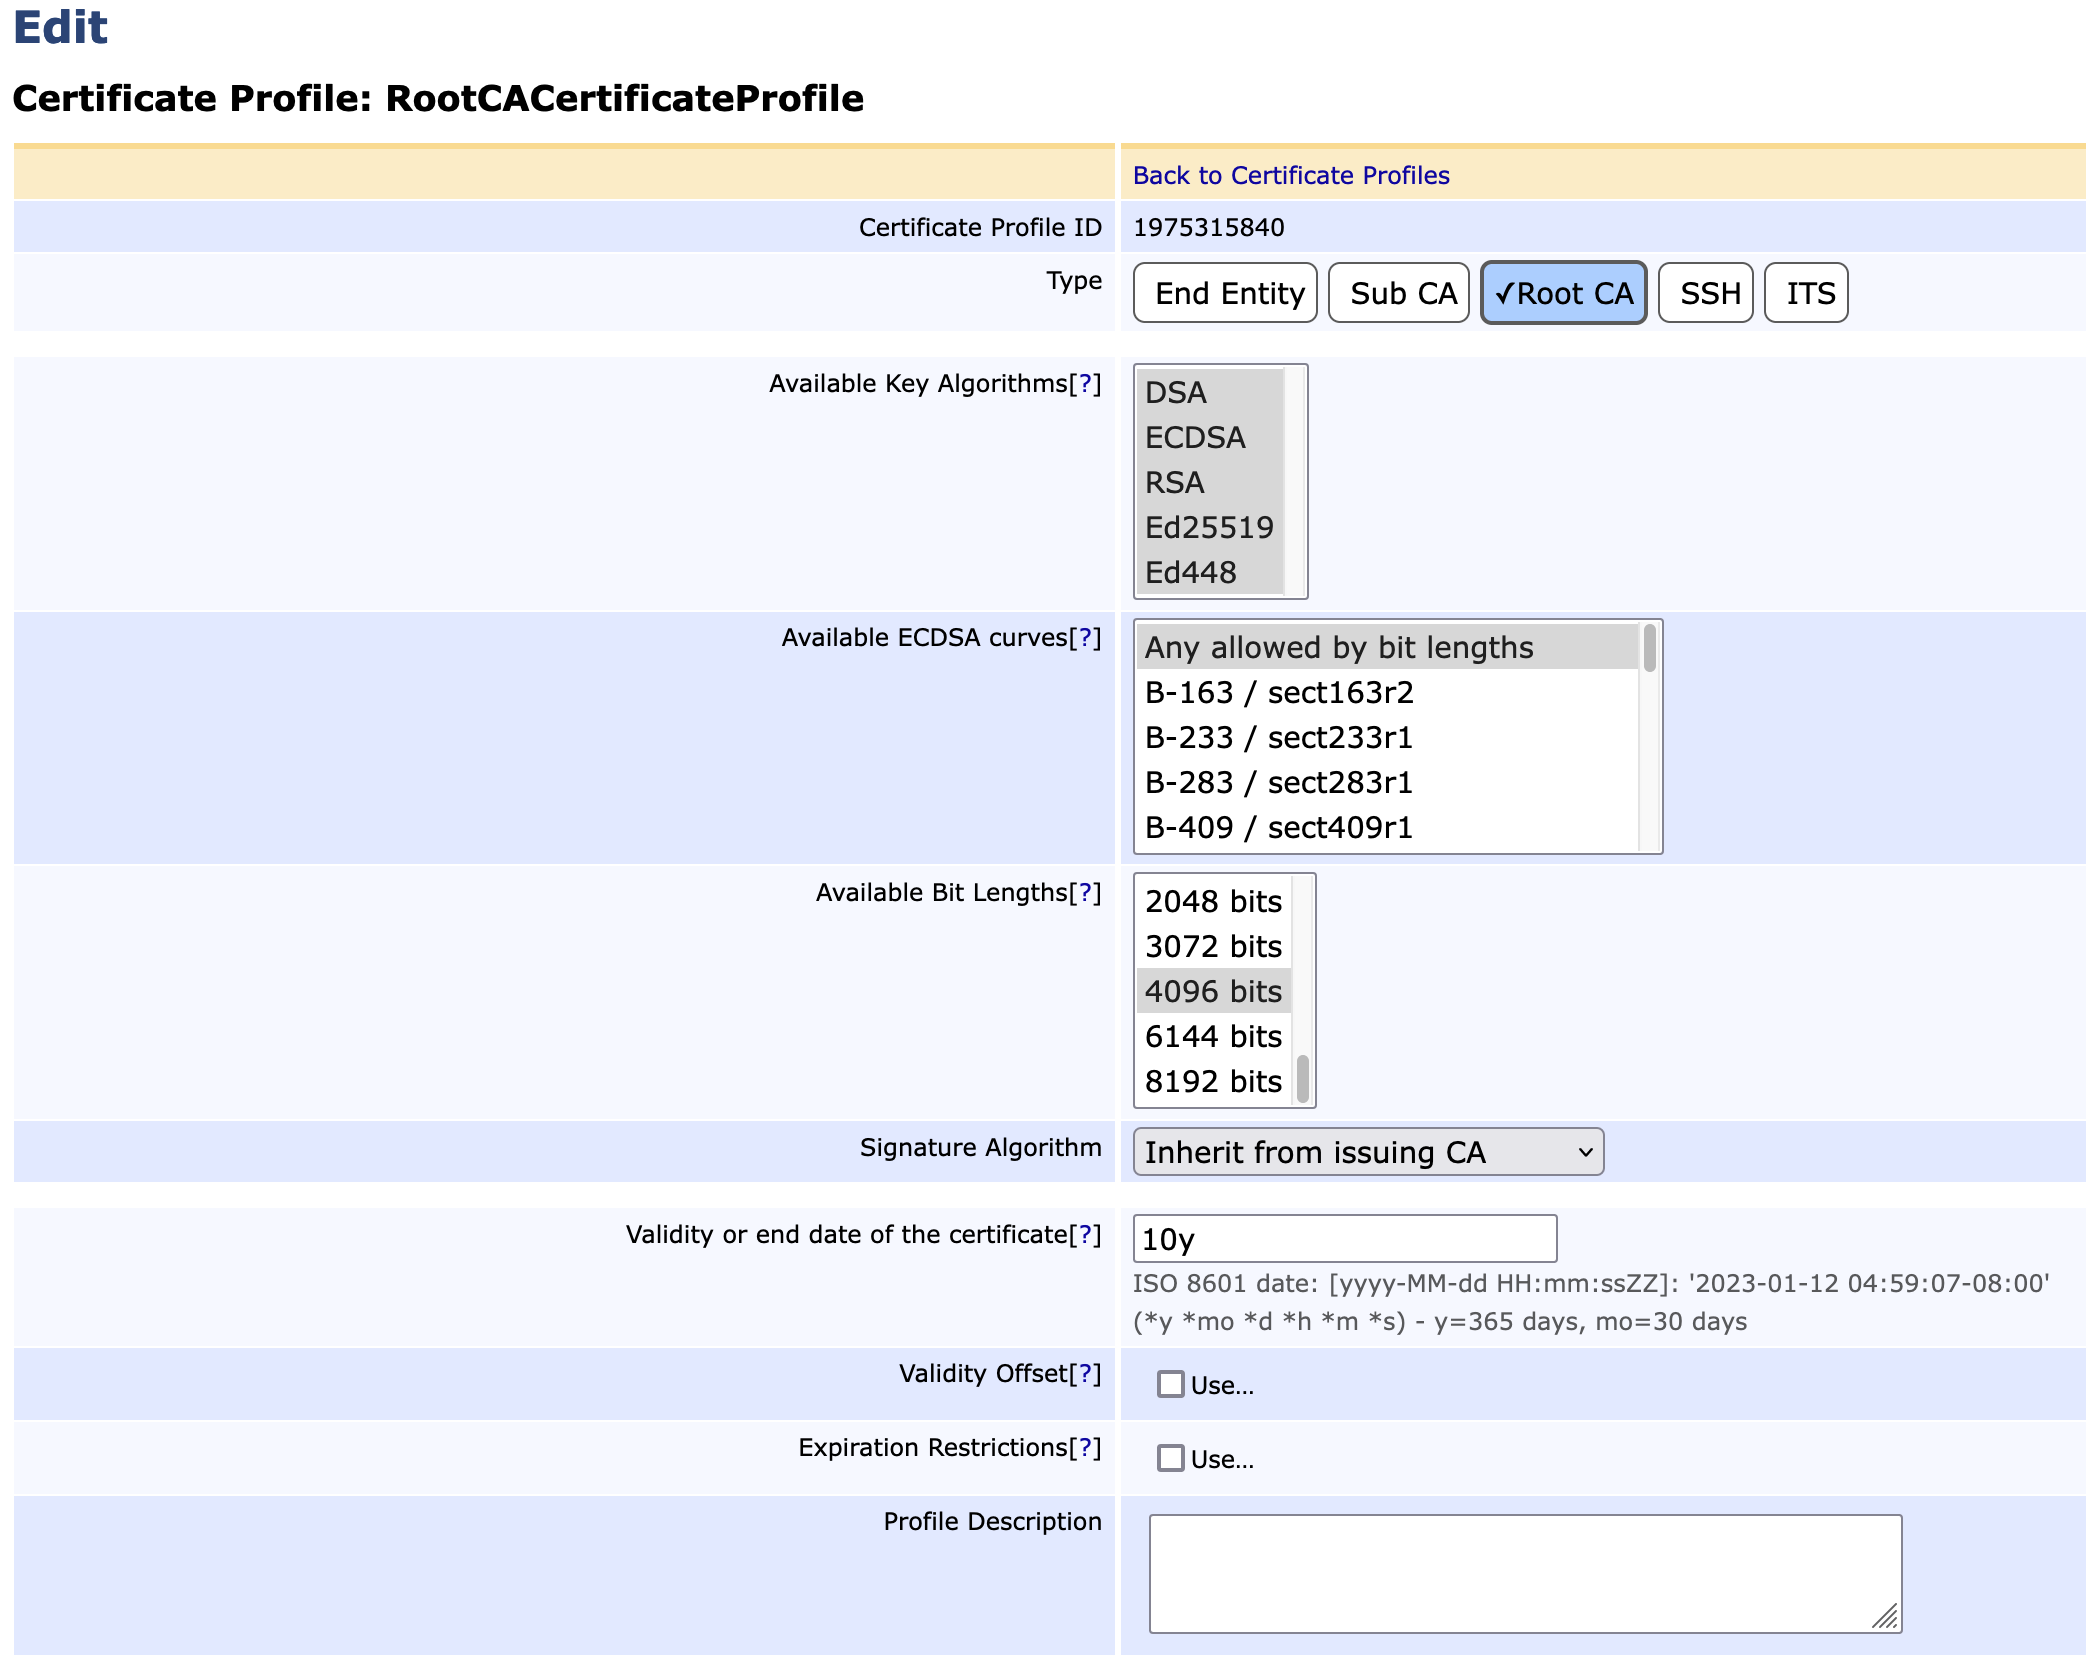
- Section 'X.509v3 extensions'
Path Length Constraint: check Add and set Value to 1
- In the last section 'Other Data'
Available CAs: Select Any CAThe EJBCA Enterprise opens a form: Certificate Profile: RootCACertificateProfile.
There are some default settings in the various sections. We will not go into all entries, but only those where changes are required. For more information about the form, refer to Certificate Profiles Overview.
- Make the following changes:
- Click Save.
Create a Crypto Token for RootCA in Node B
Create a CryptoToken and generate public keys which will be used from RootCA.
- Open EJBCA Enterprise.
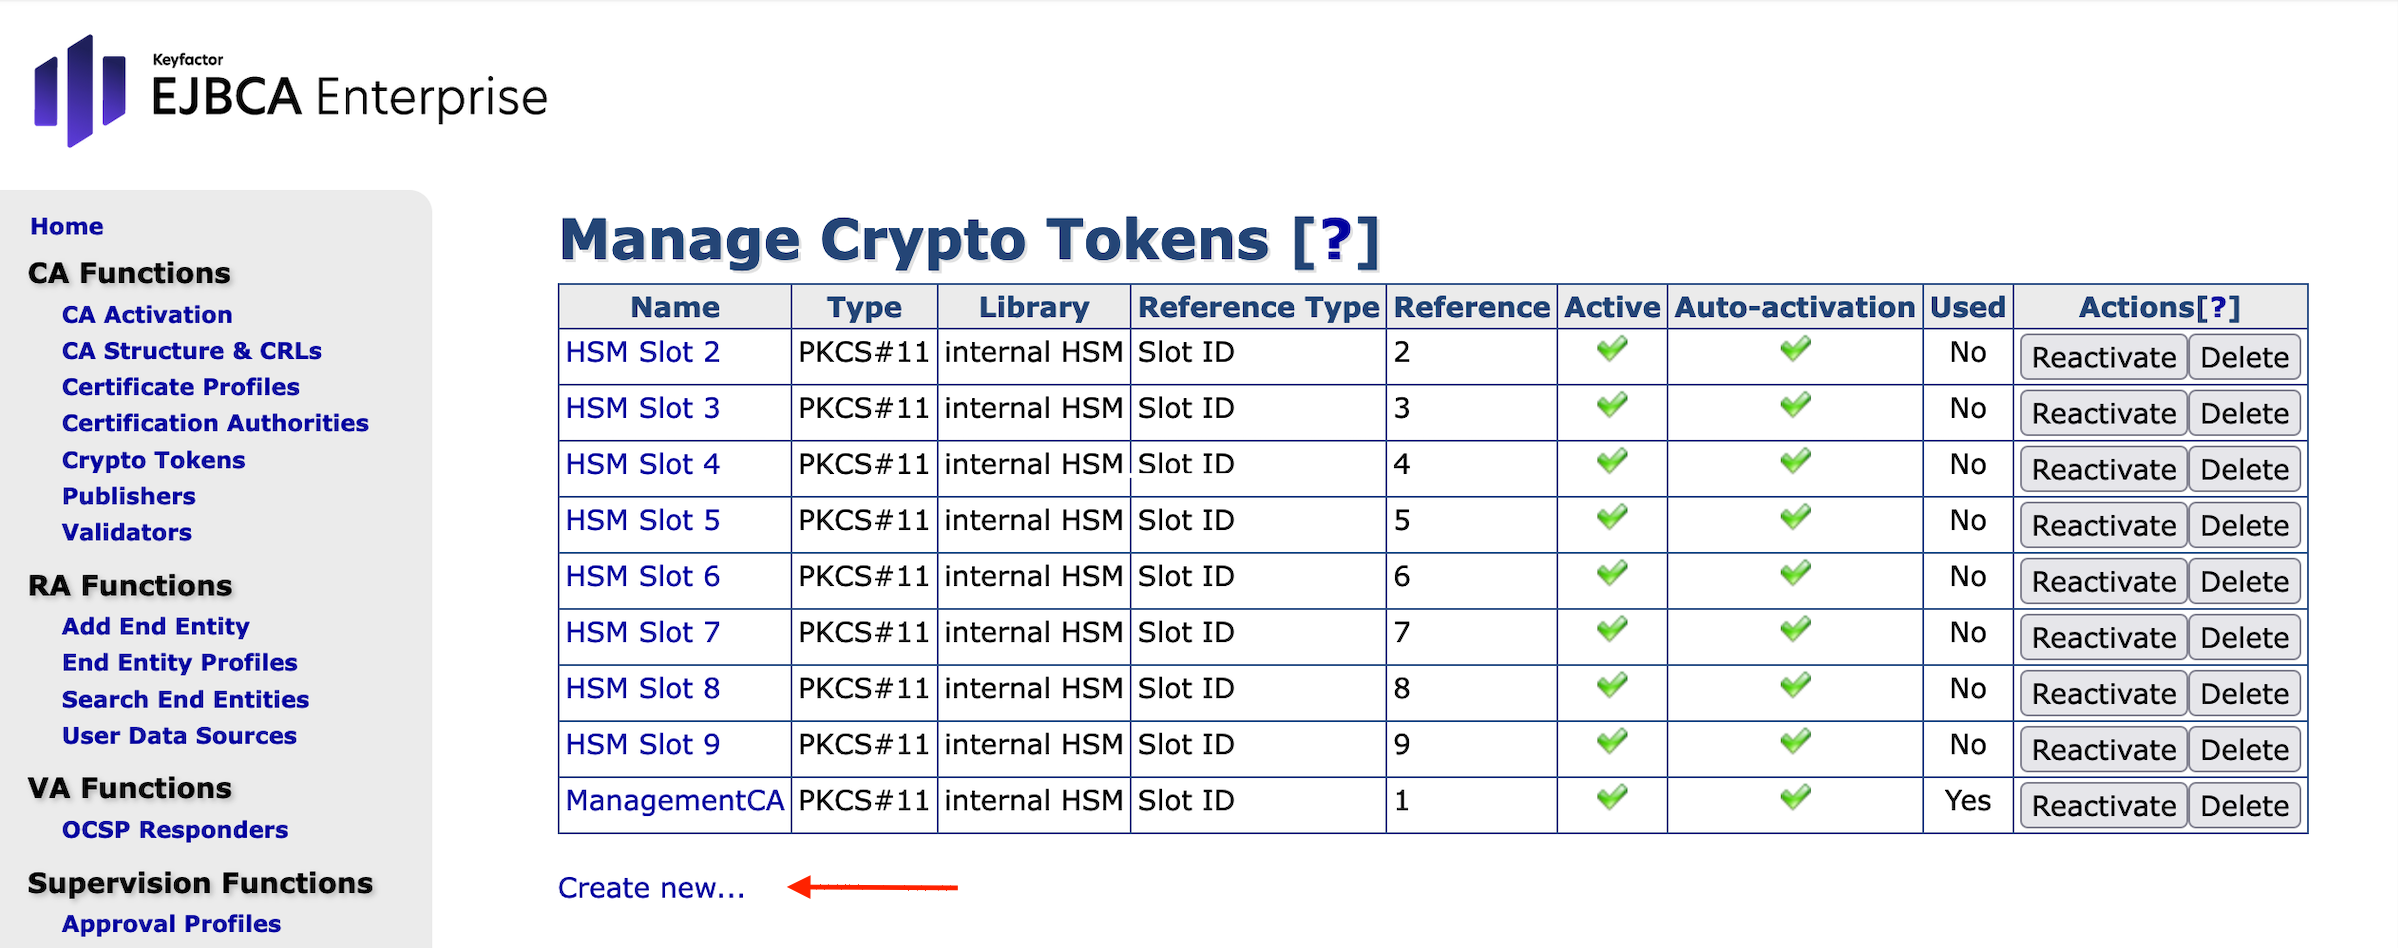
- In the sidebar, in the CA Functions section, select CryptoTokens.
Click Create New...
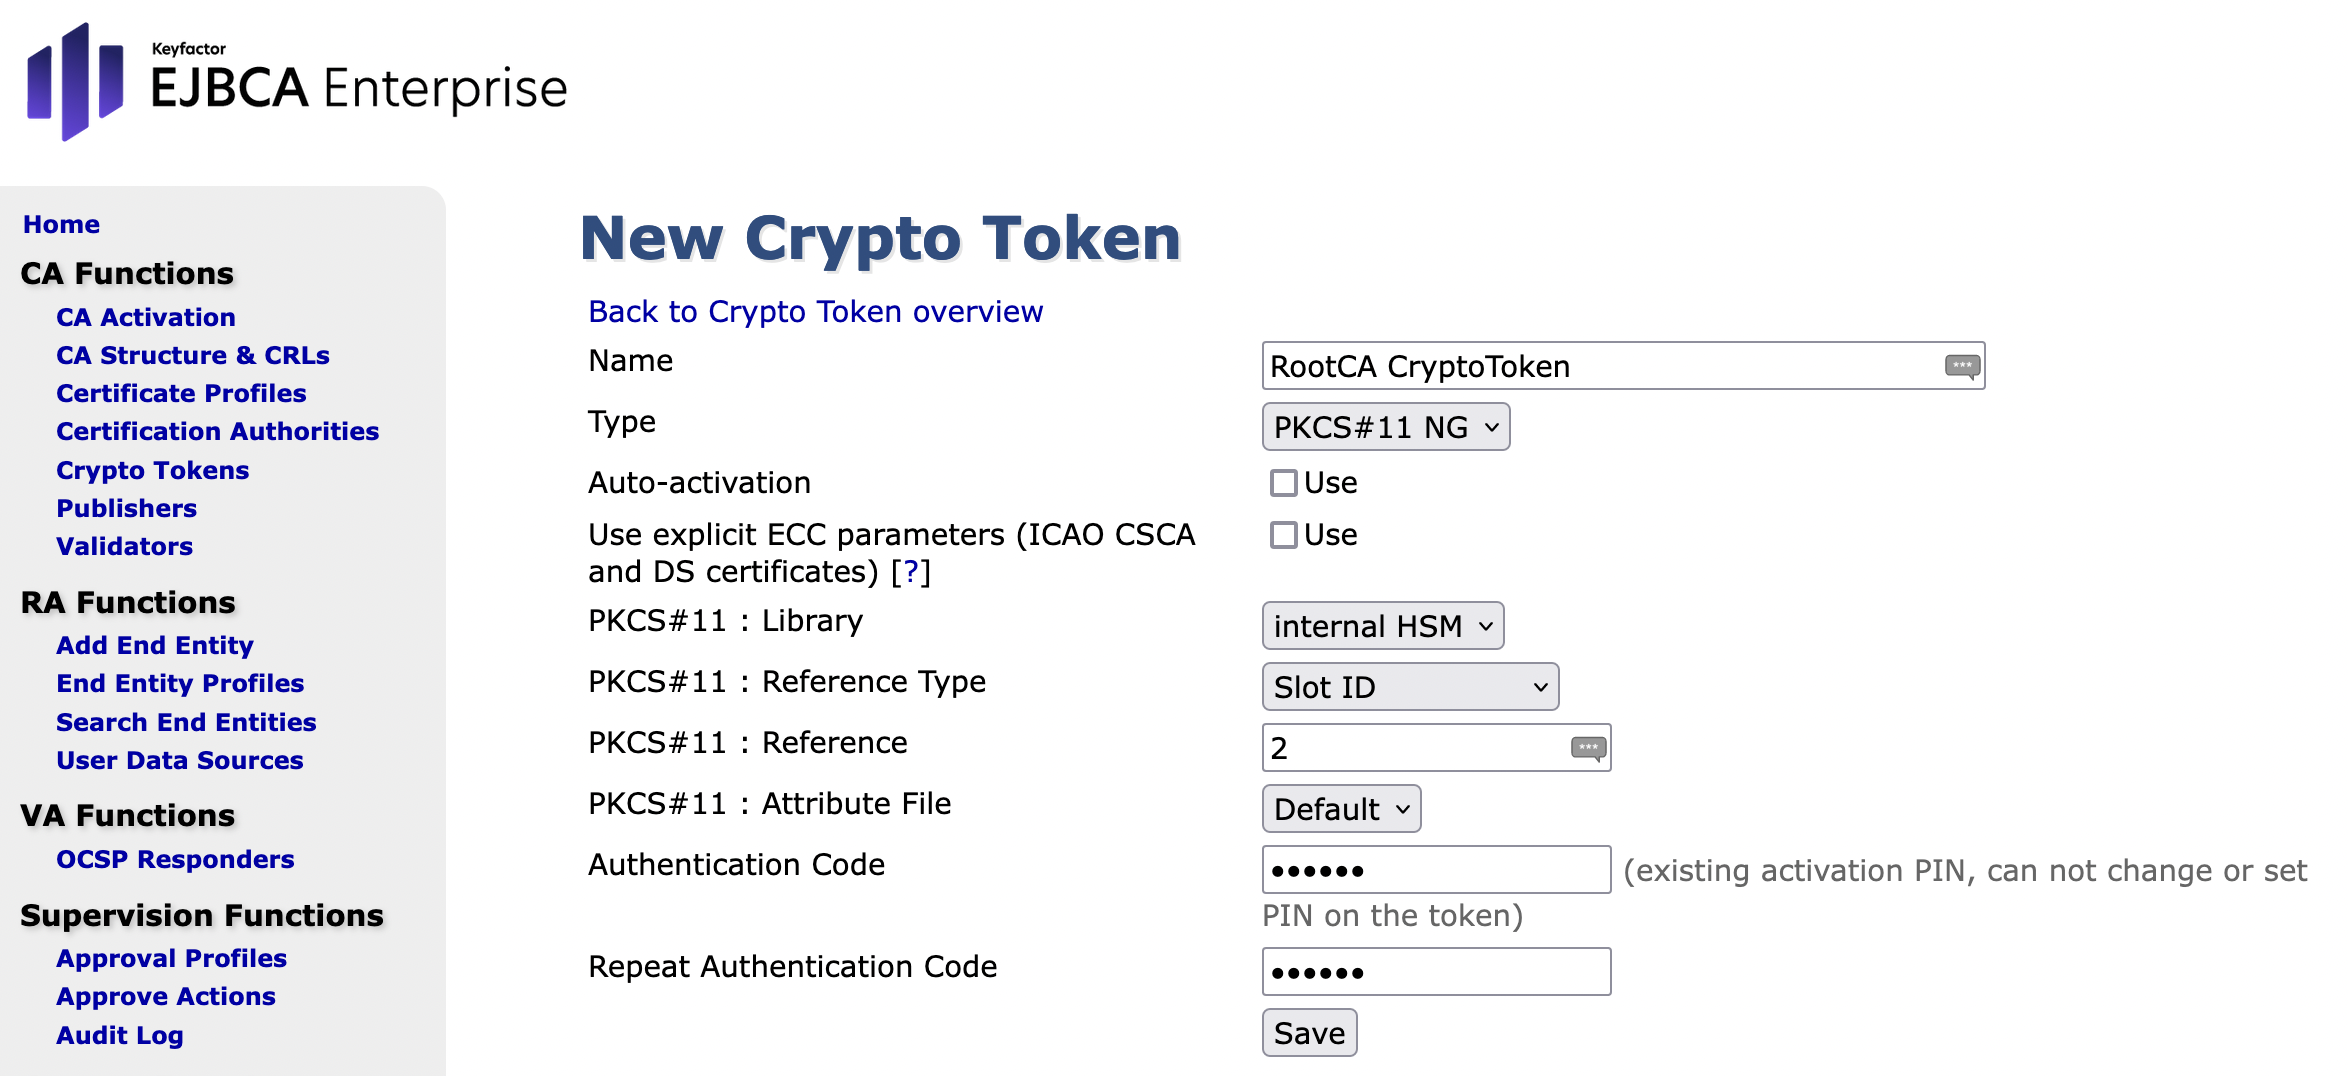
In the form New Crypto Token, enter the following values and then click Save:
- Name: Set to RootCA Crypto Token

- Type: Set to PKCS#11 NG
- Auto-activation: Leave the box unchecked.
- Use explicit .....: Leave the box unchecked
- PKCS#11 Library: P11 Proxy
- PKCS#11 Reference Type: Set to Slot ID
- PKCS#11 Reference: Set to 2
The index numbers will be different, depending on the installation - PKCS#11 Attribute File: Default
- Authentication Code: Set the PKCS#11 password
(which was the password previously set)
Make sure that you have manually generated slot password for that slot! - Repeat Authentication Code
- Click Save
- Name: Set to RootCA Crypto Token
In the Settings page the following message will be visible : Crypto Token created successfully.
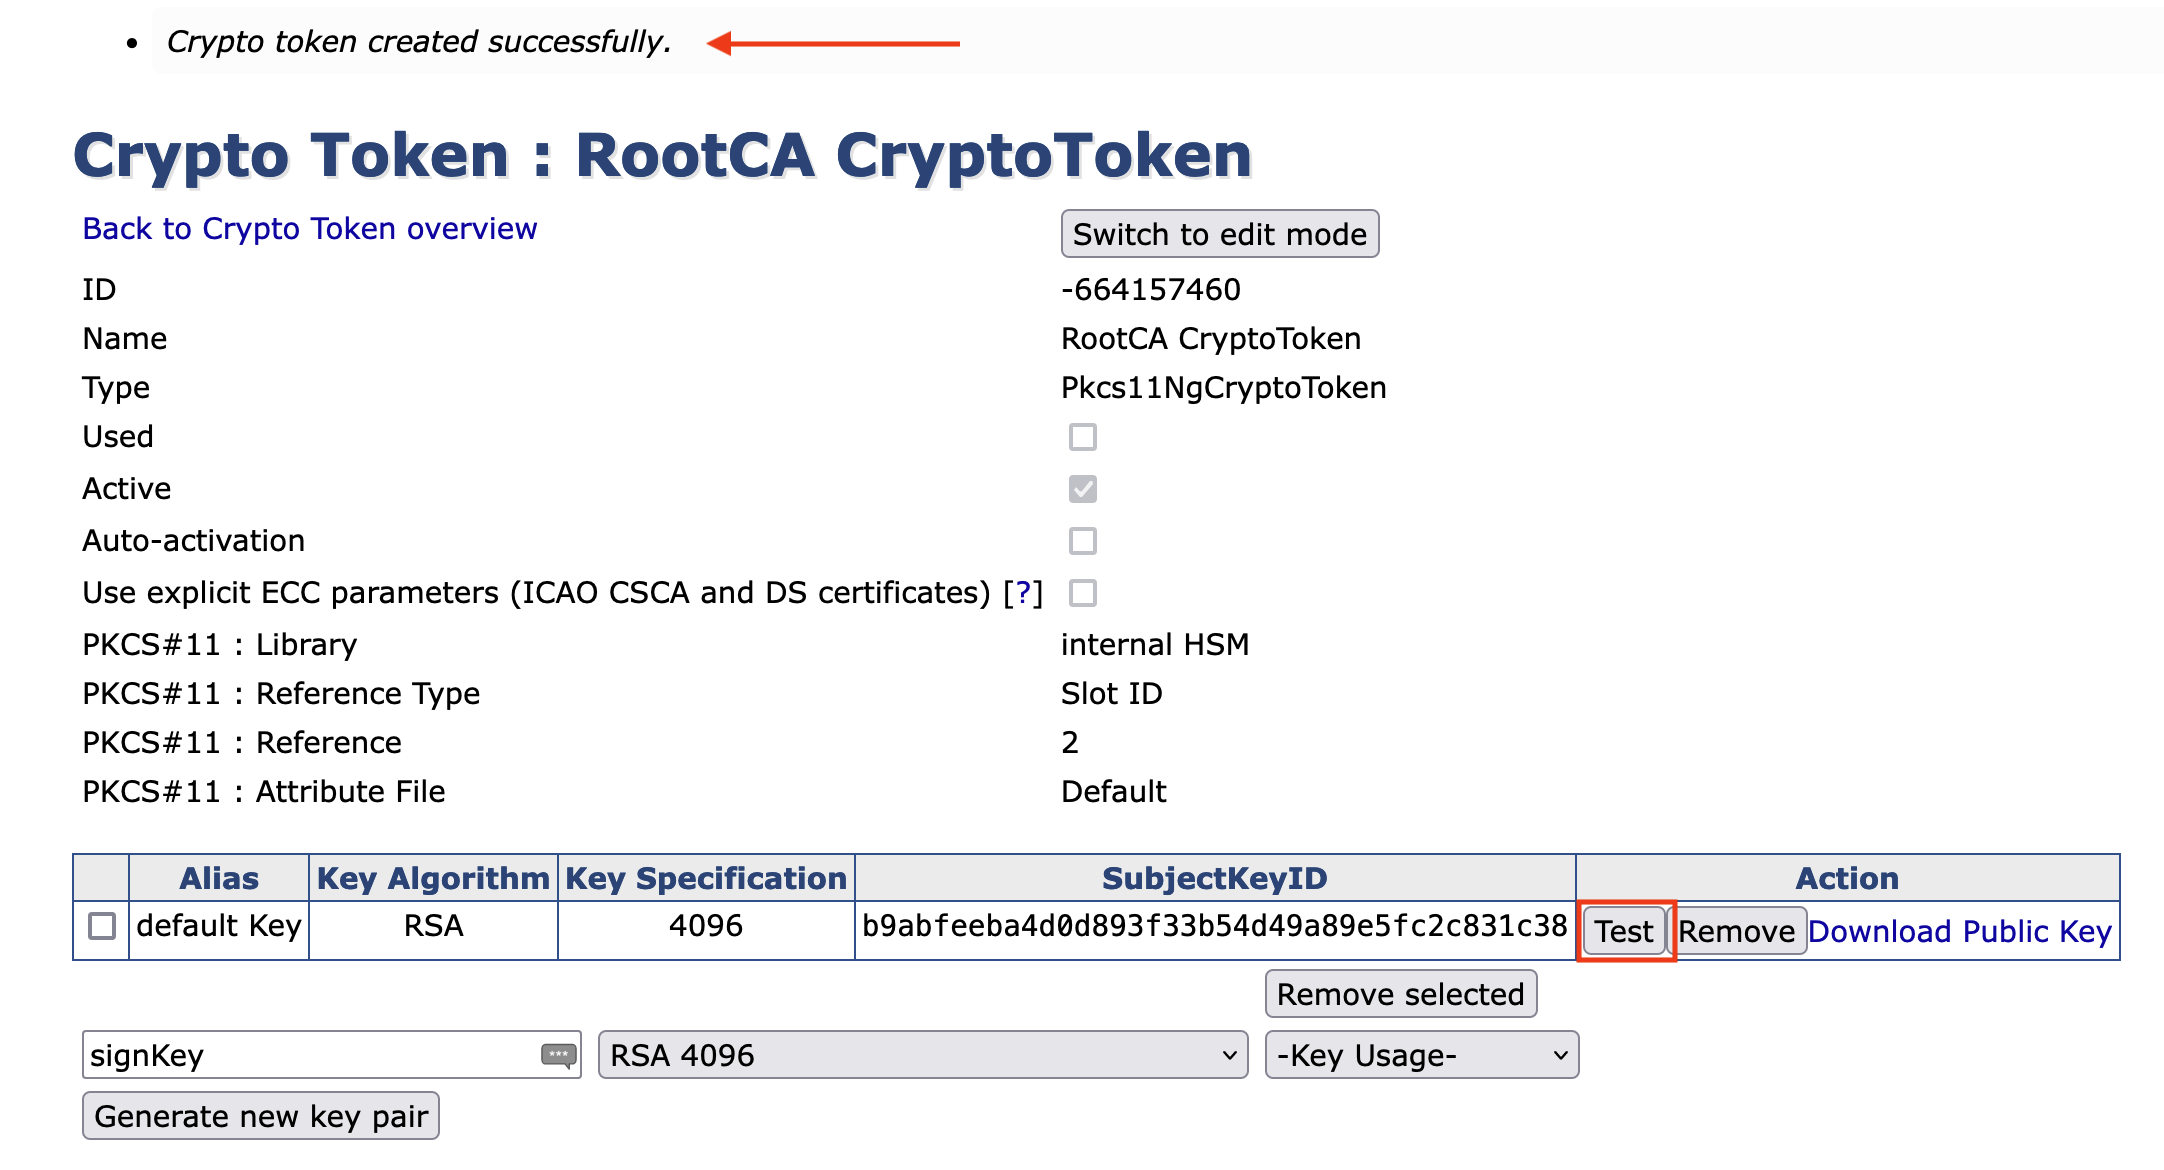
To create the keys proceed as follows.
- Enter default Key.
- Chose RSA 4096 and set the -Key Usage- to Sign / Verify.
- Click Generate new key pair.
- Click Test. The following message should be visible"default Key tested successfully".
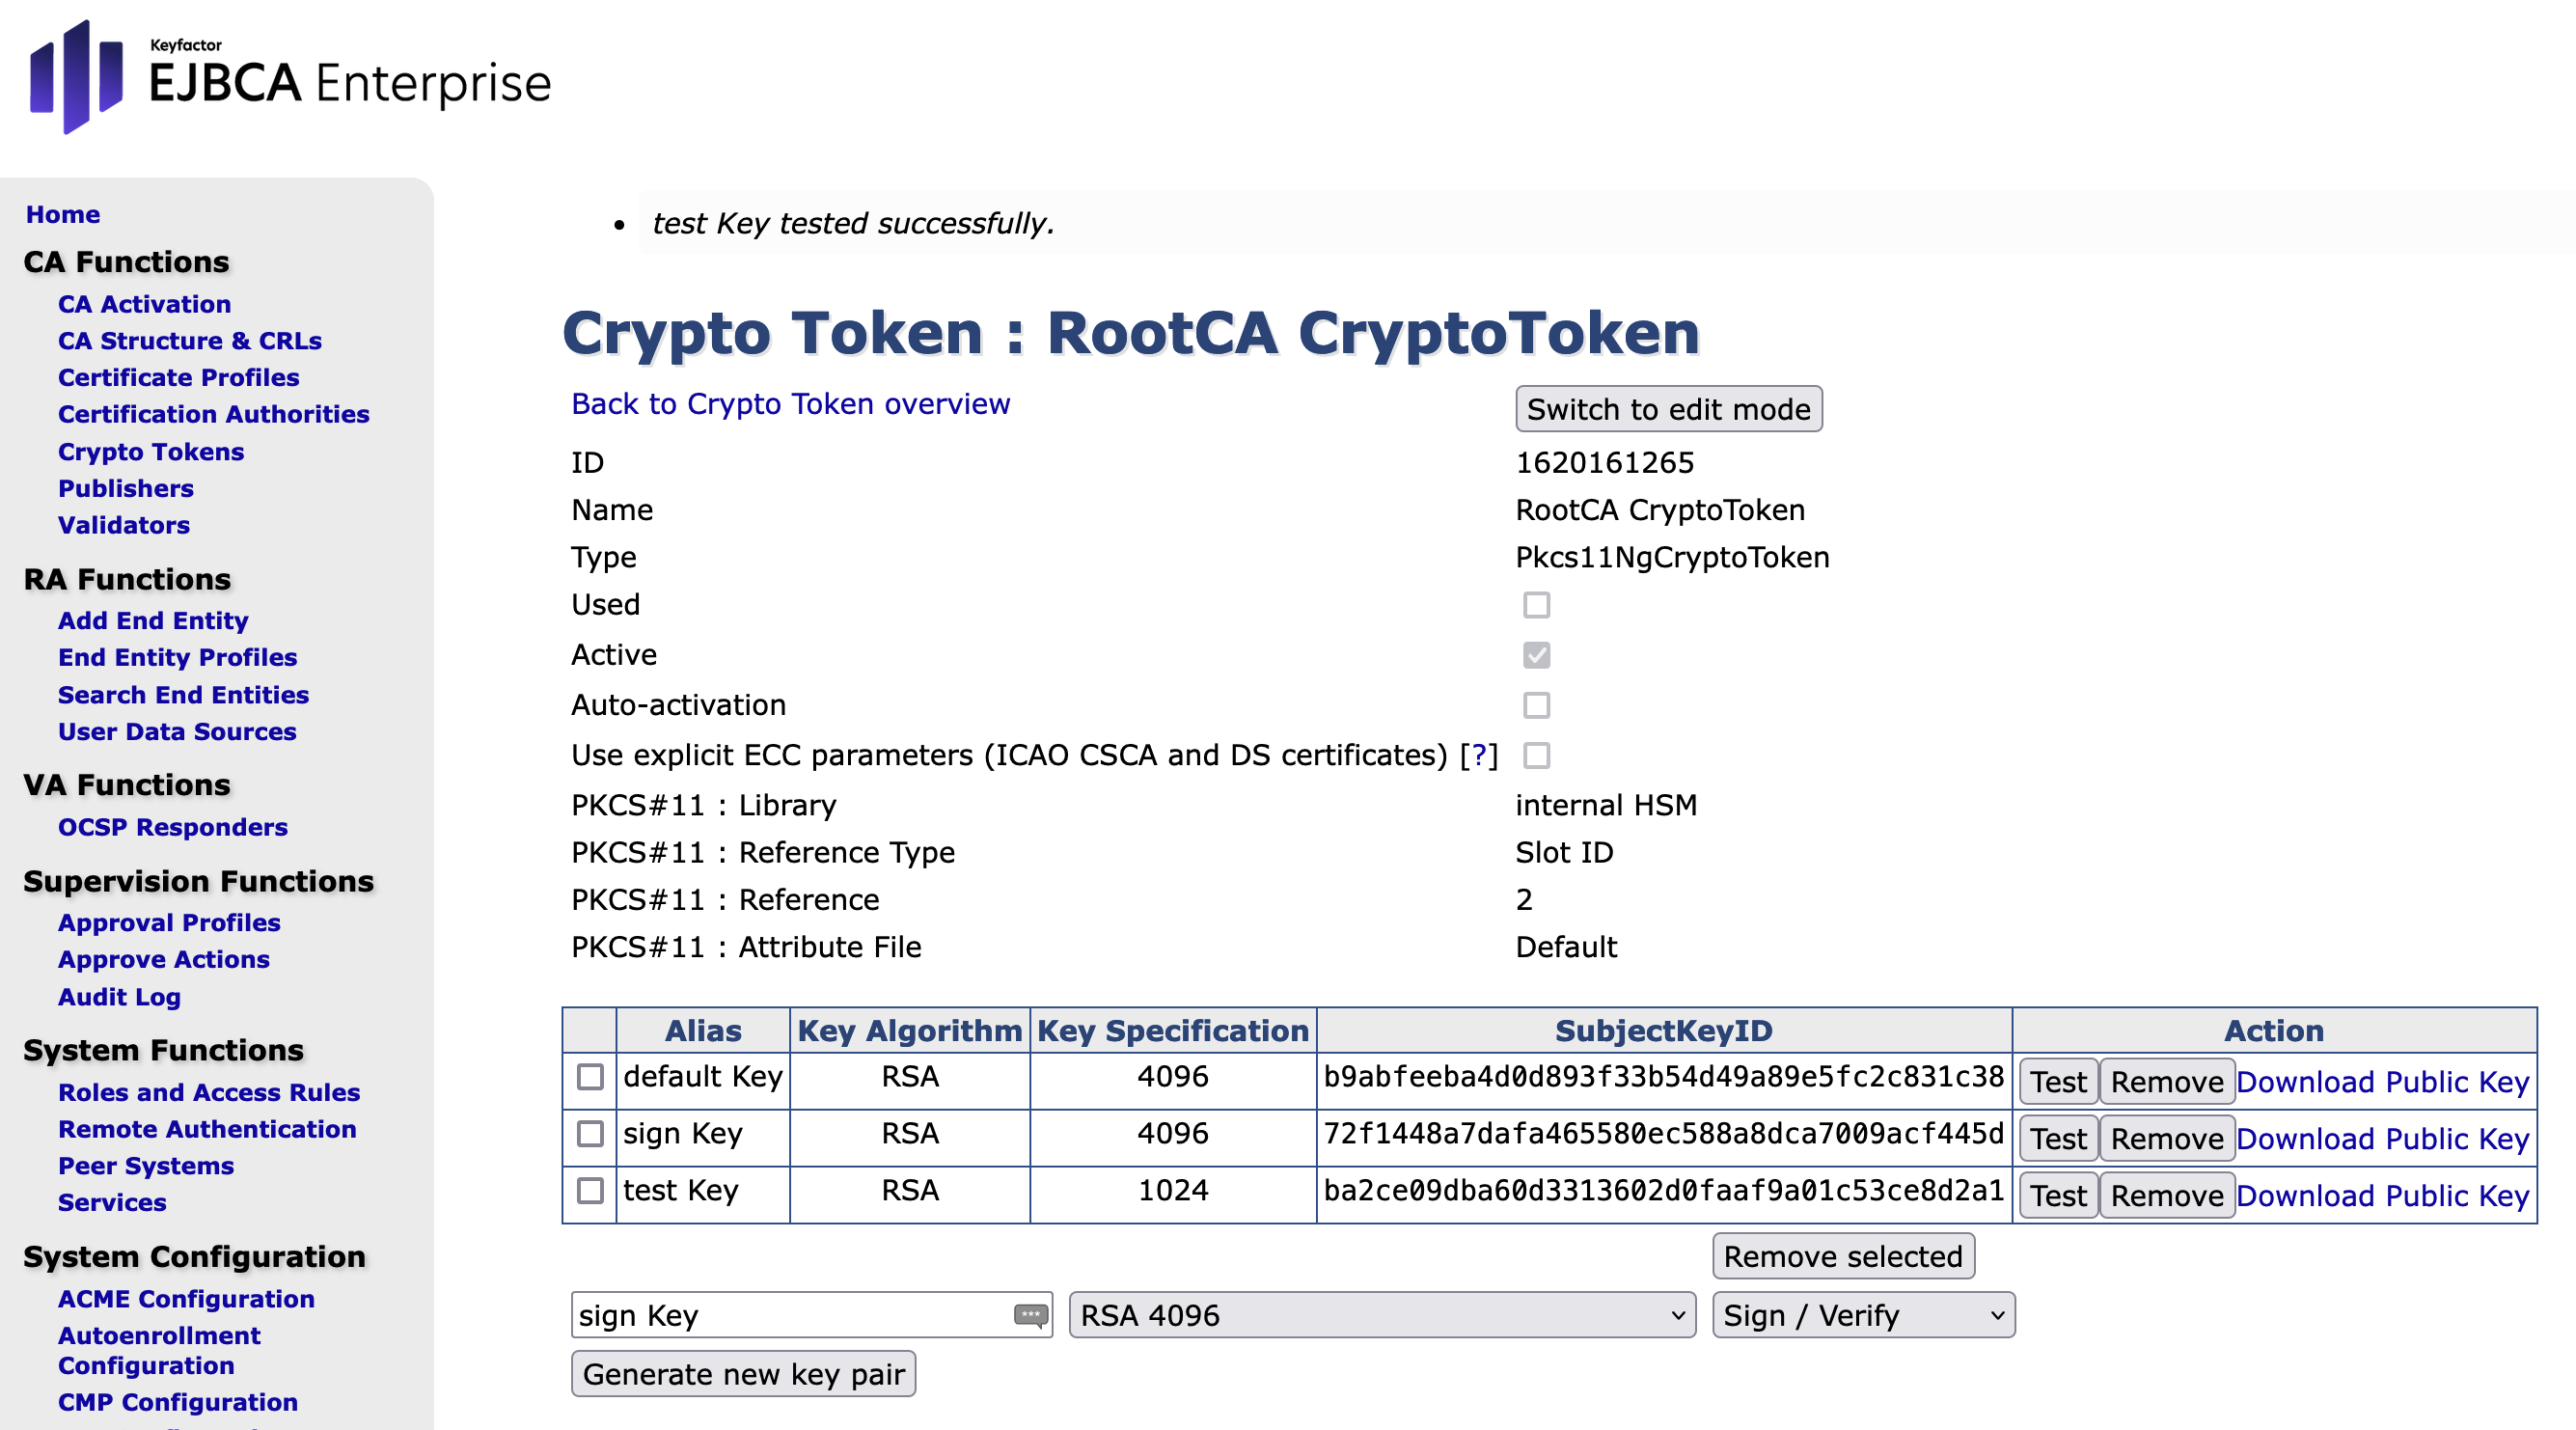
- Enter sign Key with RSA 4096 and set the -Key Usage- to Sign / Verify.
- Click Generate new key pair.
- Click Test. The following message should be visible "sign Key tested successfully".
Enter test Key with RSA 1024 and set the -Key Usage- to Sign / Verify.
Click Generate new key pair.
Click Test. The following message should be visible "test Key tested successfully".
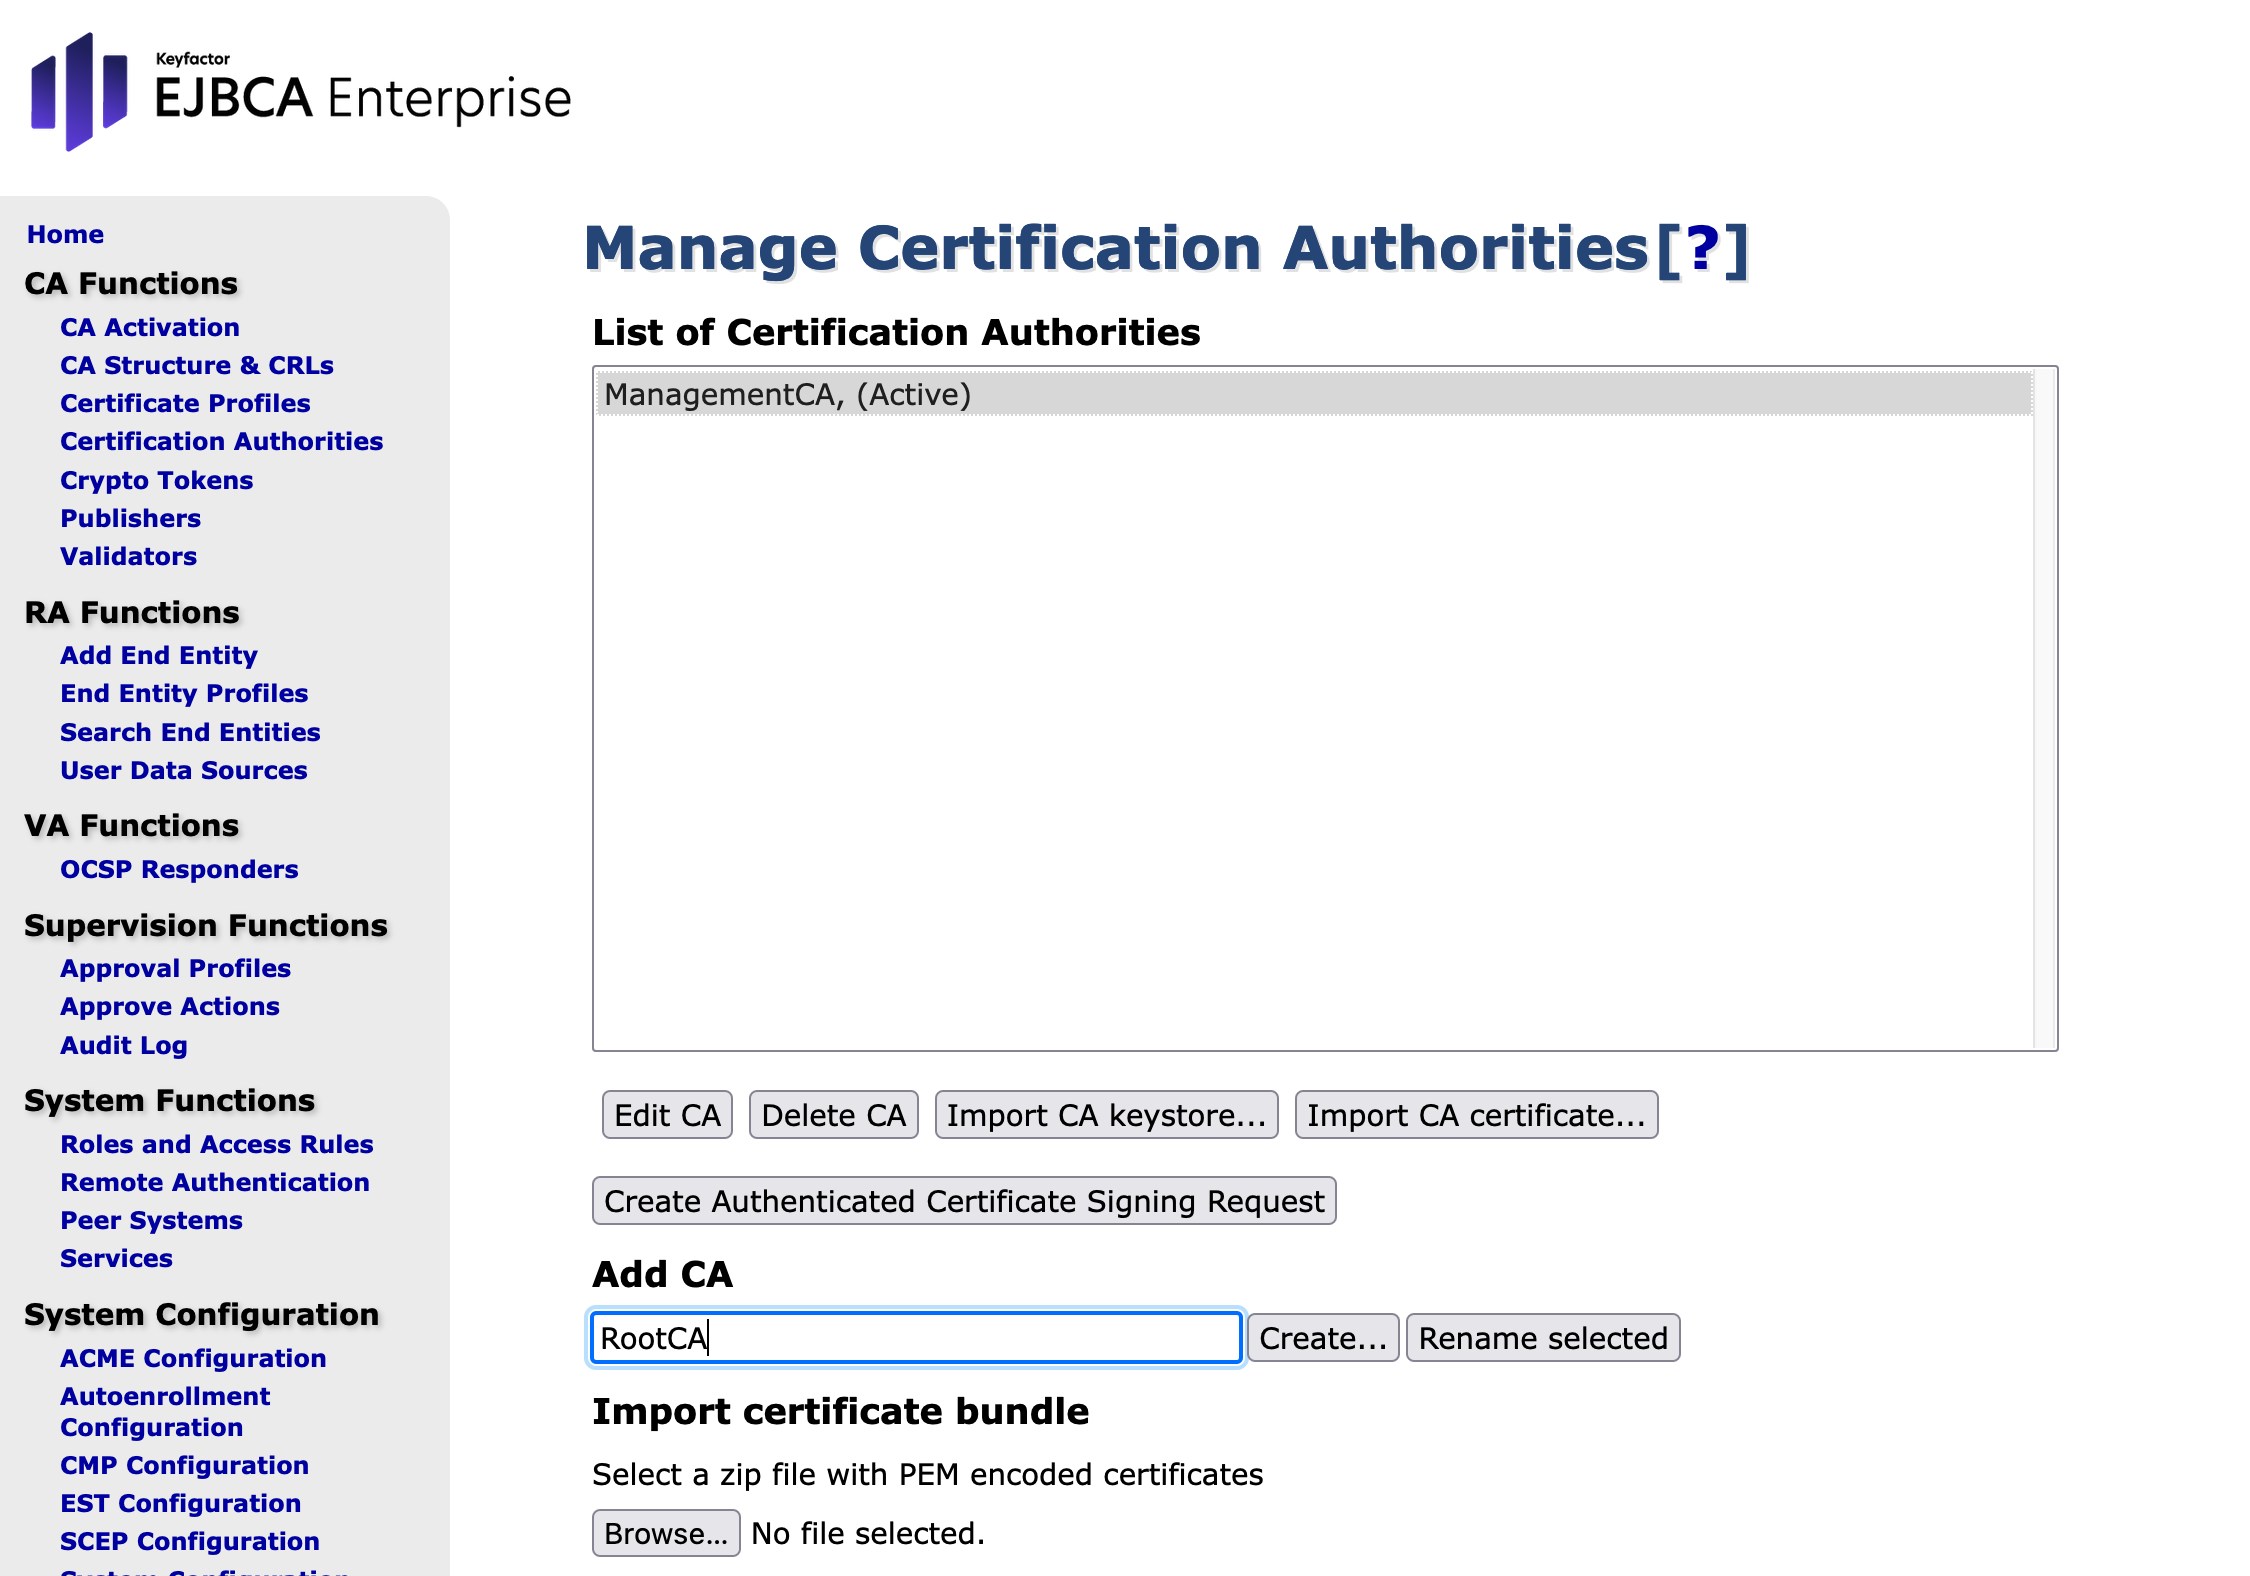
Create a RootCA in Node B
This section involves the actual creation of the RootCA.
Open EJBCA Enterprise.
In the sidebar. in the CA Functions section, select Certification Authorities.
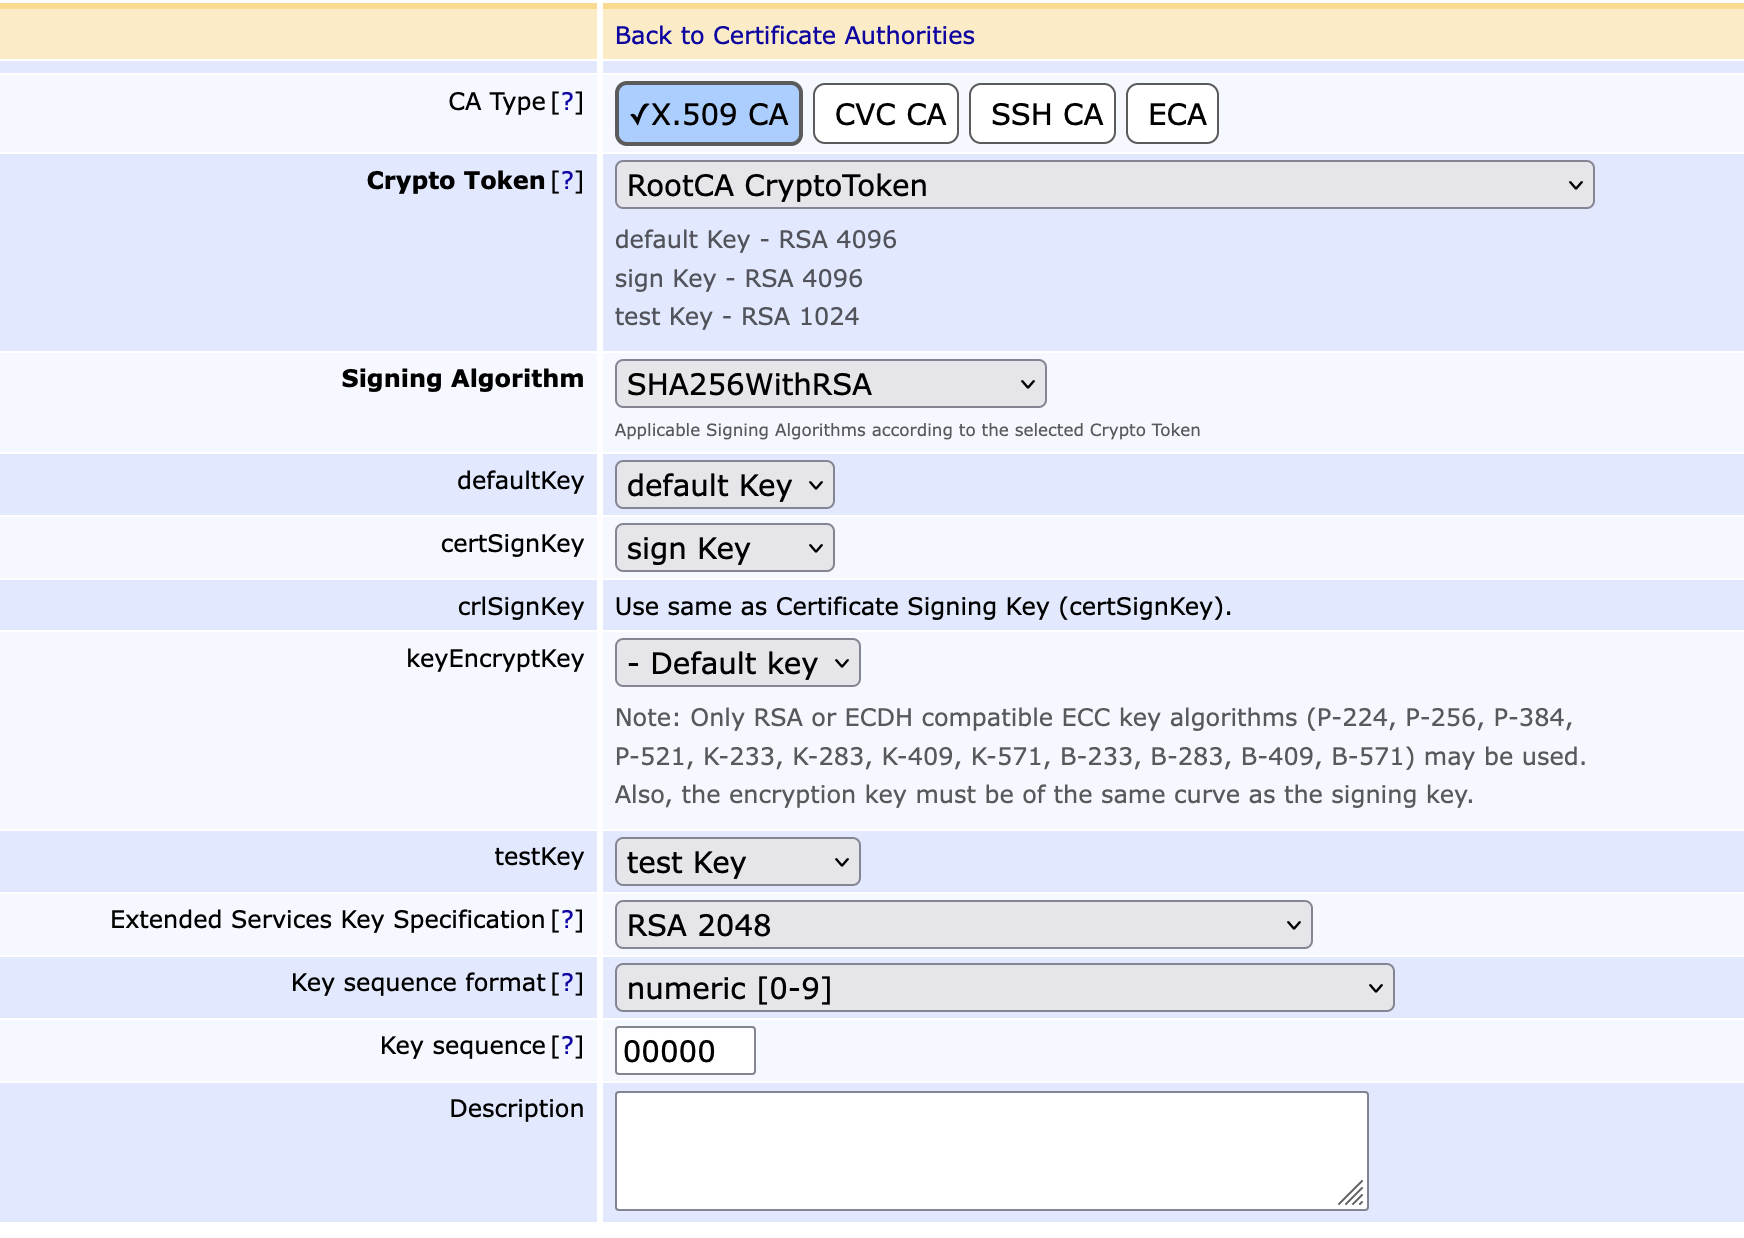
Enter RootCA in the AddCA field and click Create...
- CA Type: is set automatically
- CryptoToken: Set to RootCA Crypto Token
- Signing Algorithm: Set to SHA256WithRSA
- Section 'CA Certificate Data'
Subject DN: Set to CN=RootCA
Certificate Profile: Select RootCACertificateProfile
Validity (*y *mo *d *h *m *s) or end date of the certificate: Enter 10y ( or use ISO 8601 date)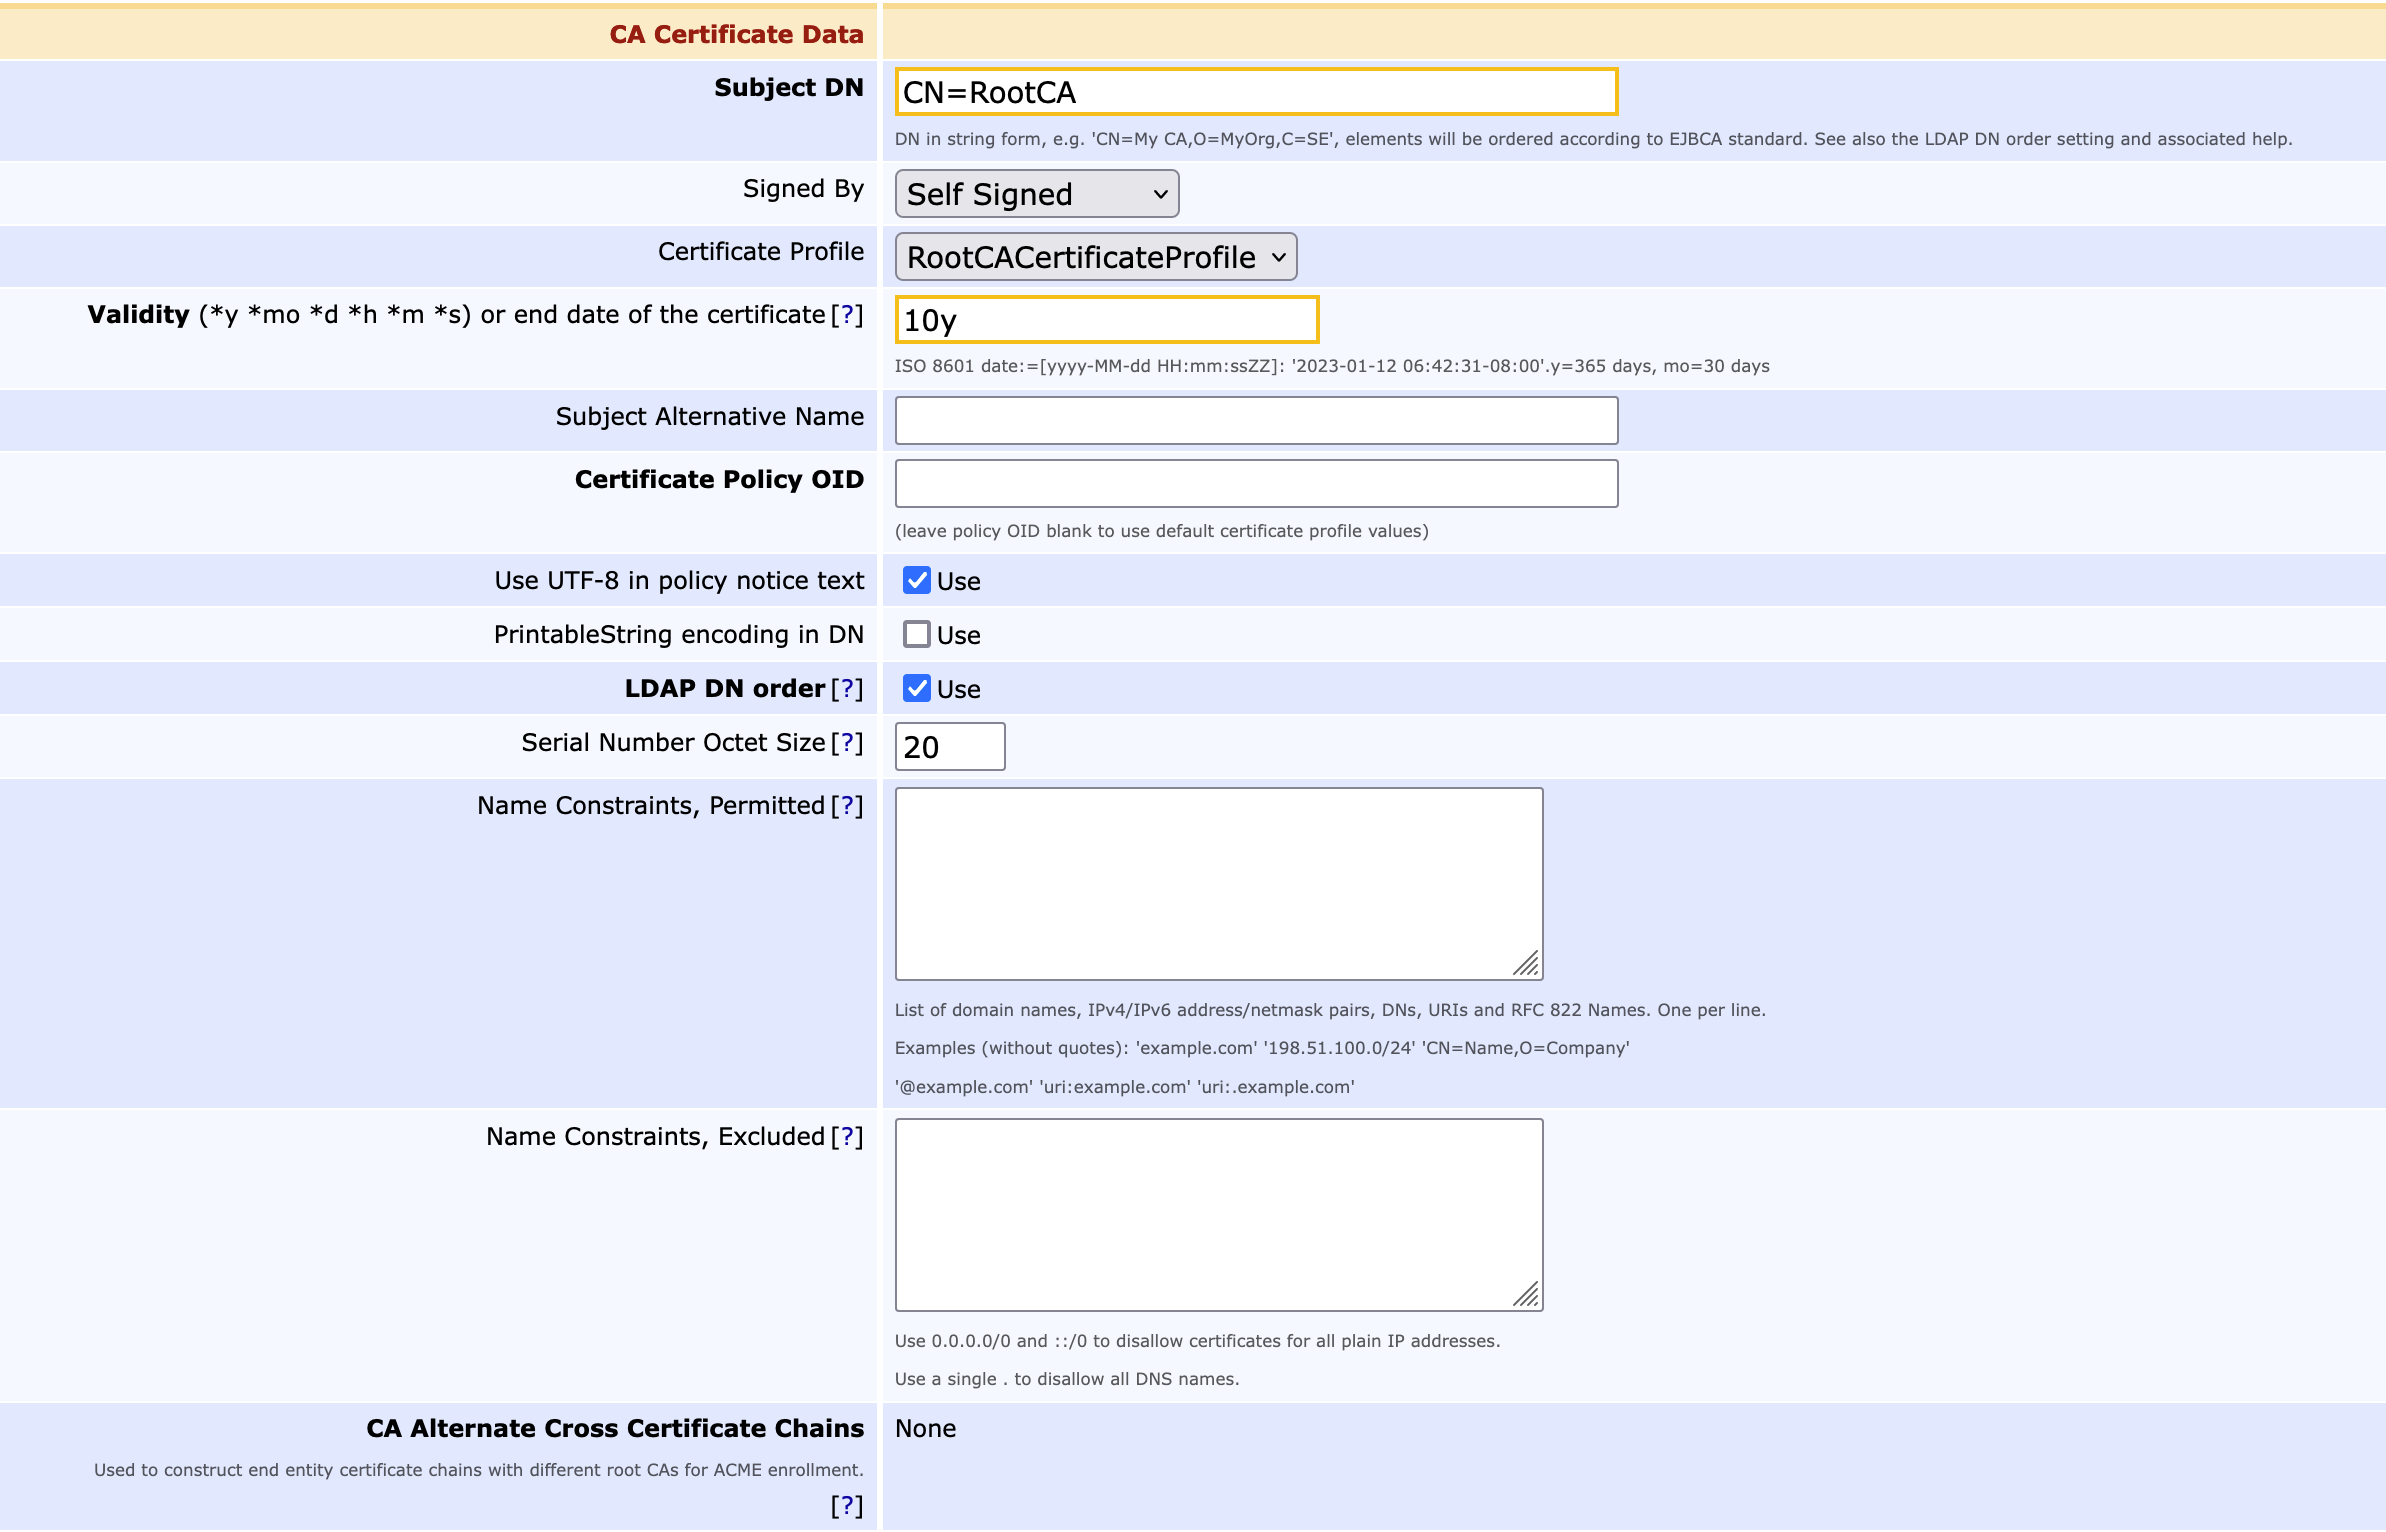
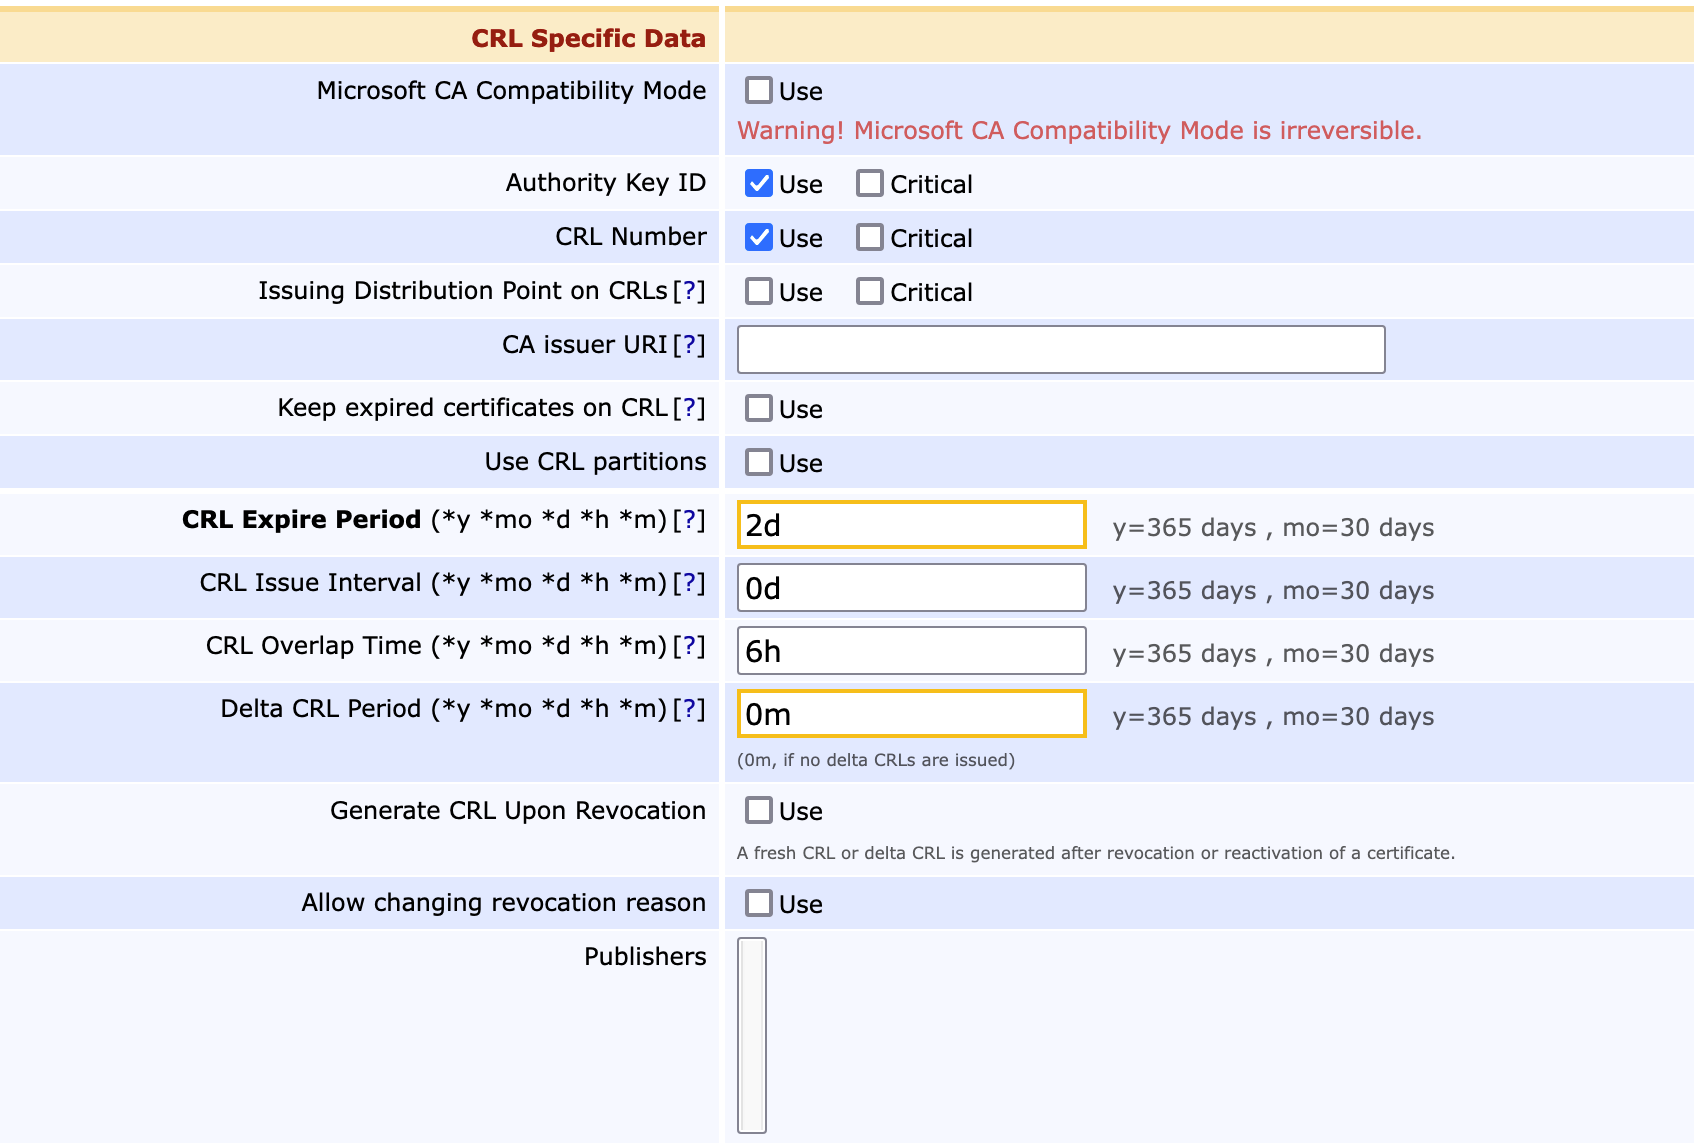
- Section 'CRL Specific Data'
CRL Expire Period (*y *mo *d *h *m): Set to 2d. The value defines how long a CRL is valid for. - CRL Issue Interval (*y *mo *d *h *m): Set to 0d. The value defines how often the CRLs are to be issued. In this case the CRLs are issued once a day, but will be valid for two days.
- CRL Overlap Time (*y *mo *d *h *m): Set to 6h. The value defines the number of hours for which both CRLs are valid. A new CRL is created six hours before the first CRL expires.
The EJBCA Enterprise opens a form: Create CA: CA Name : RootCA.
There are some default settings in the various sections. Leave these settings unchanged. We will not go into all entries, but only those where changes are required. For more information about the form, refer to Creating a Root CA.
The values in this profile are for renewal.
- Click Create.