Step 7: Create SSLCA as SubCA in Node A
This section describes how to create the third of the SubCAs which is SSLCA. This CA is installed along with the other SubCAs in the EJBCA Hardware Appliance (Node A) and is signed by RootCA.
The following sections describe the actions you have to perform.
Create Crypto Token for SSLCA in Node A
Create a Crypto Token and generate public keys which will be used from SSLCA:
- Open EJBCA Enterprise.
- In the sidebar, in the CA Functions section, select Crypto Tokens.
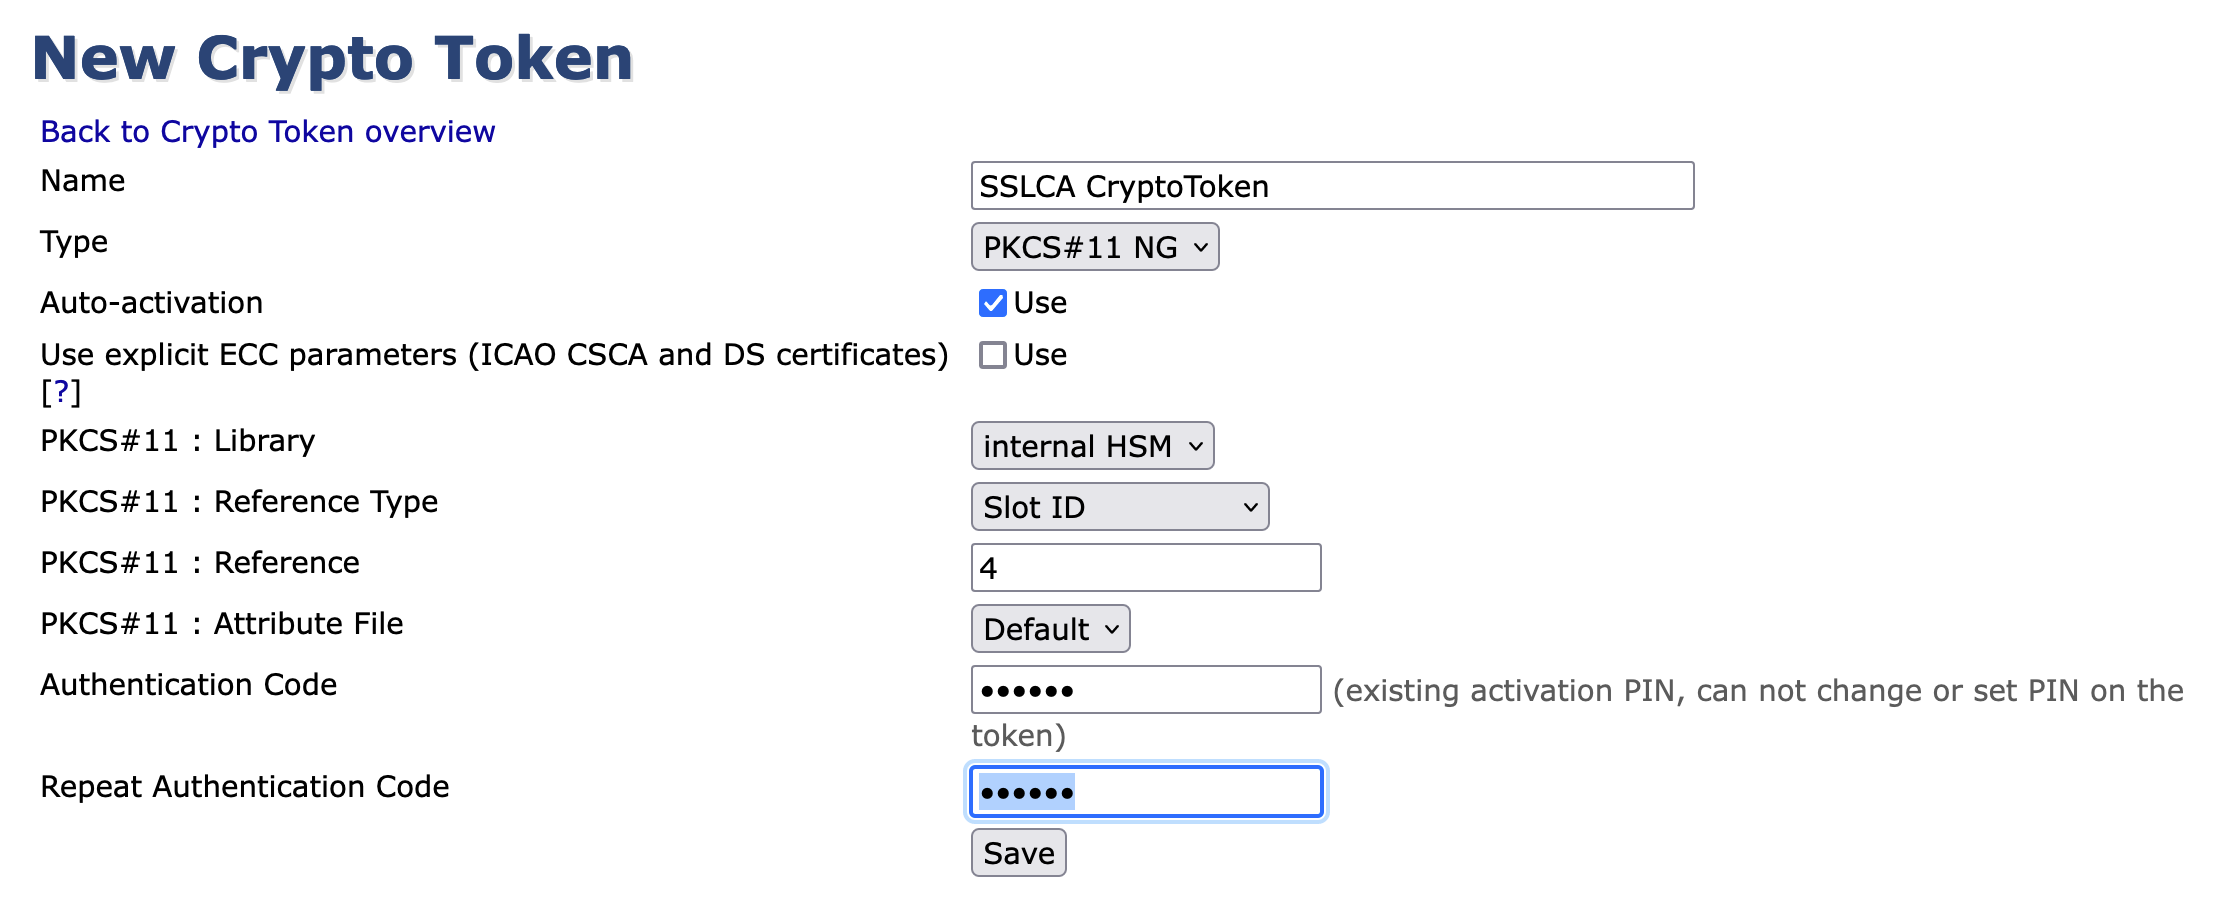
Click Create New... to open the New Crypto Token form:
- Name: Enter SSLCA CryptoToken
- Type: Select PKCS#11 NG
- Enable Auto-activation
- PKCS#11 : Library : choose Internal HSM from drop-down
- PKCS#11 : Reference Type : choose Slot ID from drop-down
- PKCS#11 : Reference : set to 4
- PKCS#11 : Atribute File : choose Default from drop-down
- Authentication Code : enter foo123
Make sure that you have manually generated slot password for that slot. - PKCS#11 Reference Type: select Slot ID
PKCS#11 Reference: Enter 4
- Click Save to continue.
The settings page displays the following message: CryptoToken created successfully.
Create Keys for the SSLCA as SubCA in Node A
Continue with creating the following keys.
- Underneath the table, enter defaultKeySSLCA (value for Alias)
Choose RSA 4096 (value for Key Algorithm and Key Specification) from the drop -down menu.
For the Key Usage: choose Sign / Verify
Click Generate new key pair to continue.
- Select the Test button in the table. The following message is displayed: defaultKeySSLCA tested successfully.

Repeat for sign- and testKey. - Underneath the table, enter signKeySSLCA (value for Alias)
Choose RSA 4096 (value for Key Algorithm and Key Specification) from the drop -down menu.
For the Key Usage: choose Sign / Verify
Click Generate new key pair to continue.
Select the Test button in the table. The following message will appear: signKeySSLCA tested successfully. Underneath the table, enter testKeySSLCA (value for Alias)
Choose RSA 1024 (value for Key Algorithm and Key Specification) from the drop -down menu.
For the Key Usage: choose Sign / Verify
Click Generate new key pair to continue.
Select the Test button in the table. The following message is displayed: testKeySSLCA tested successfully.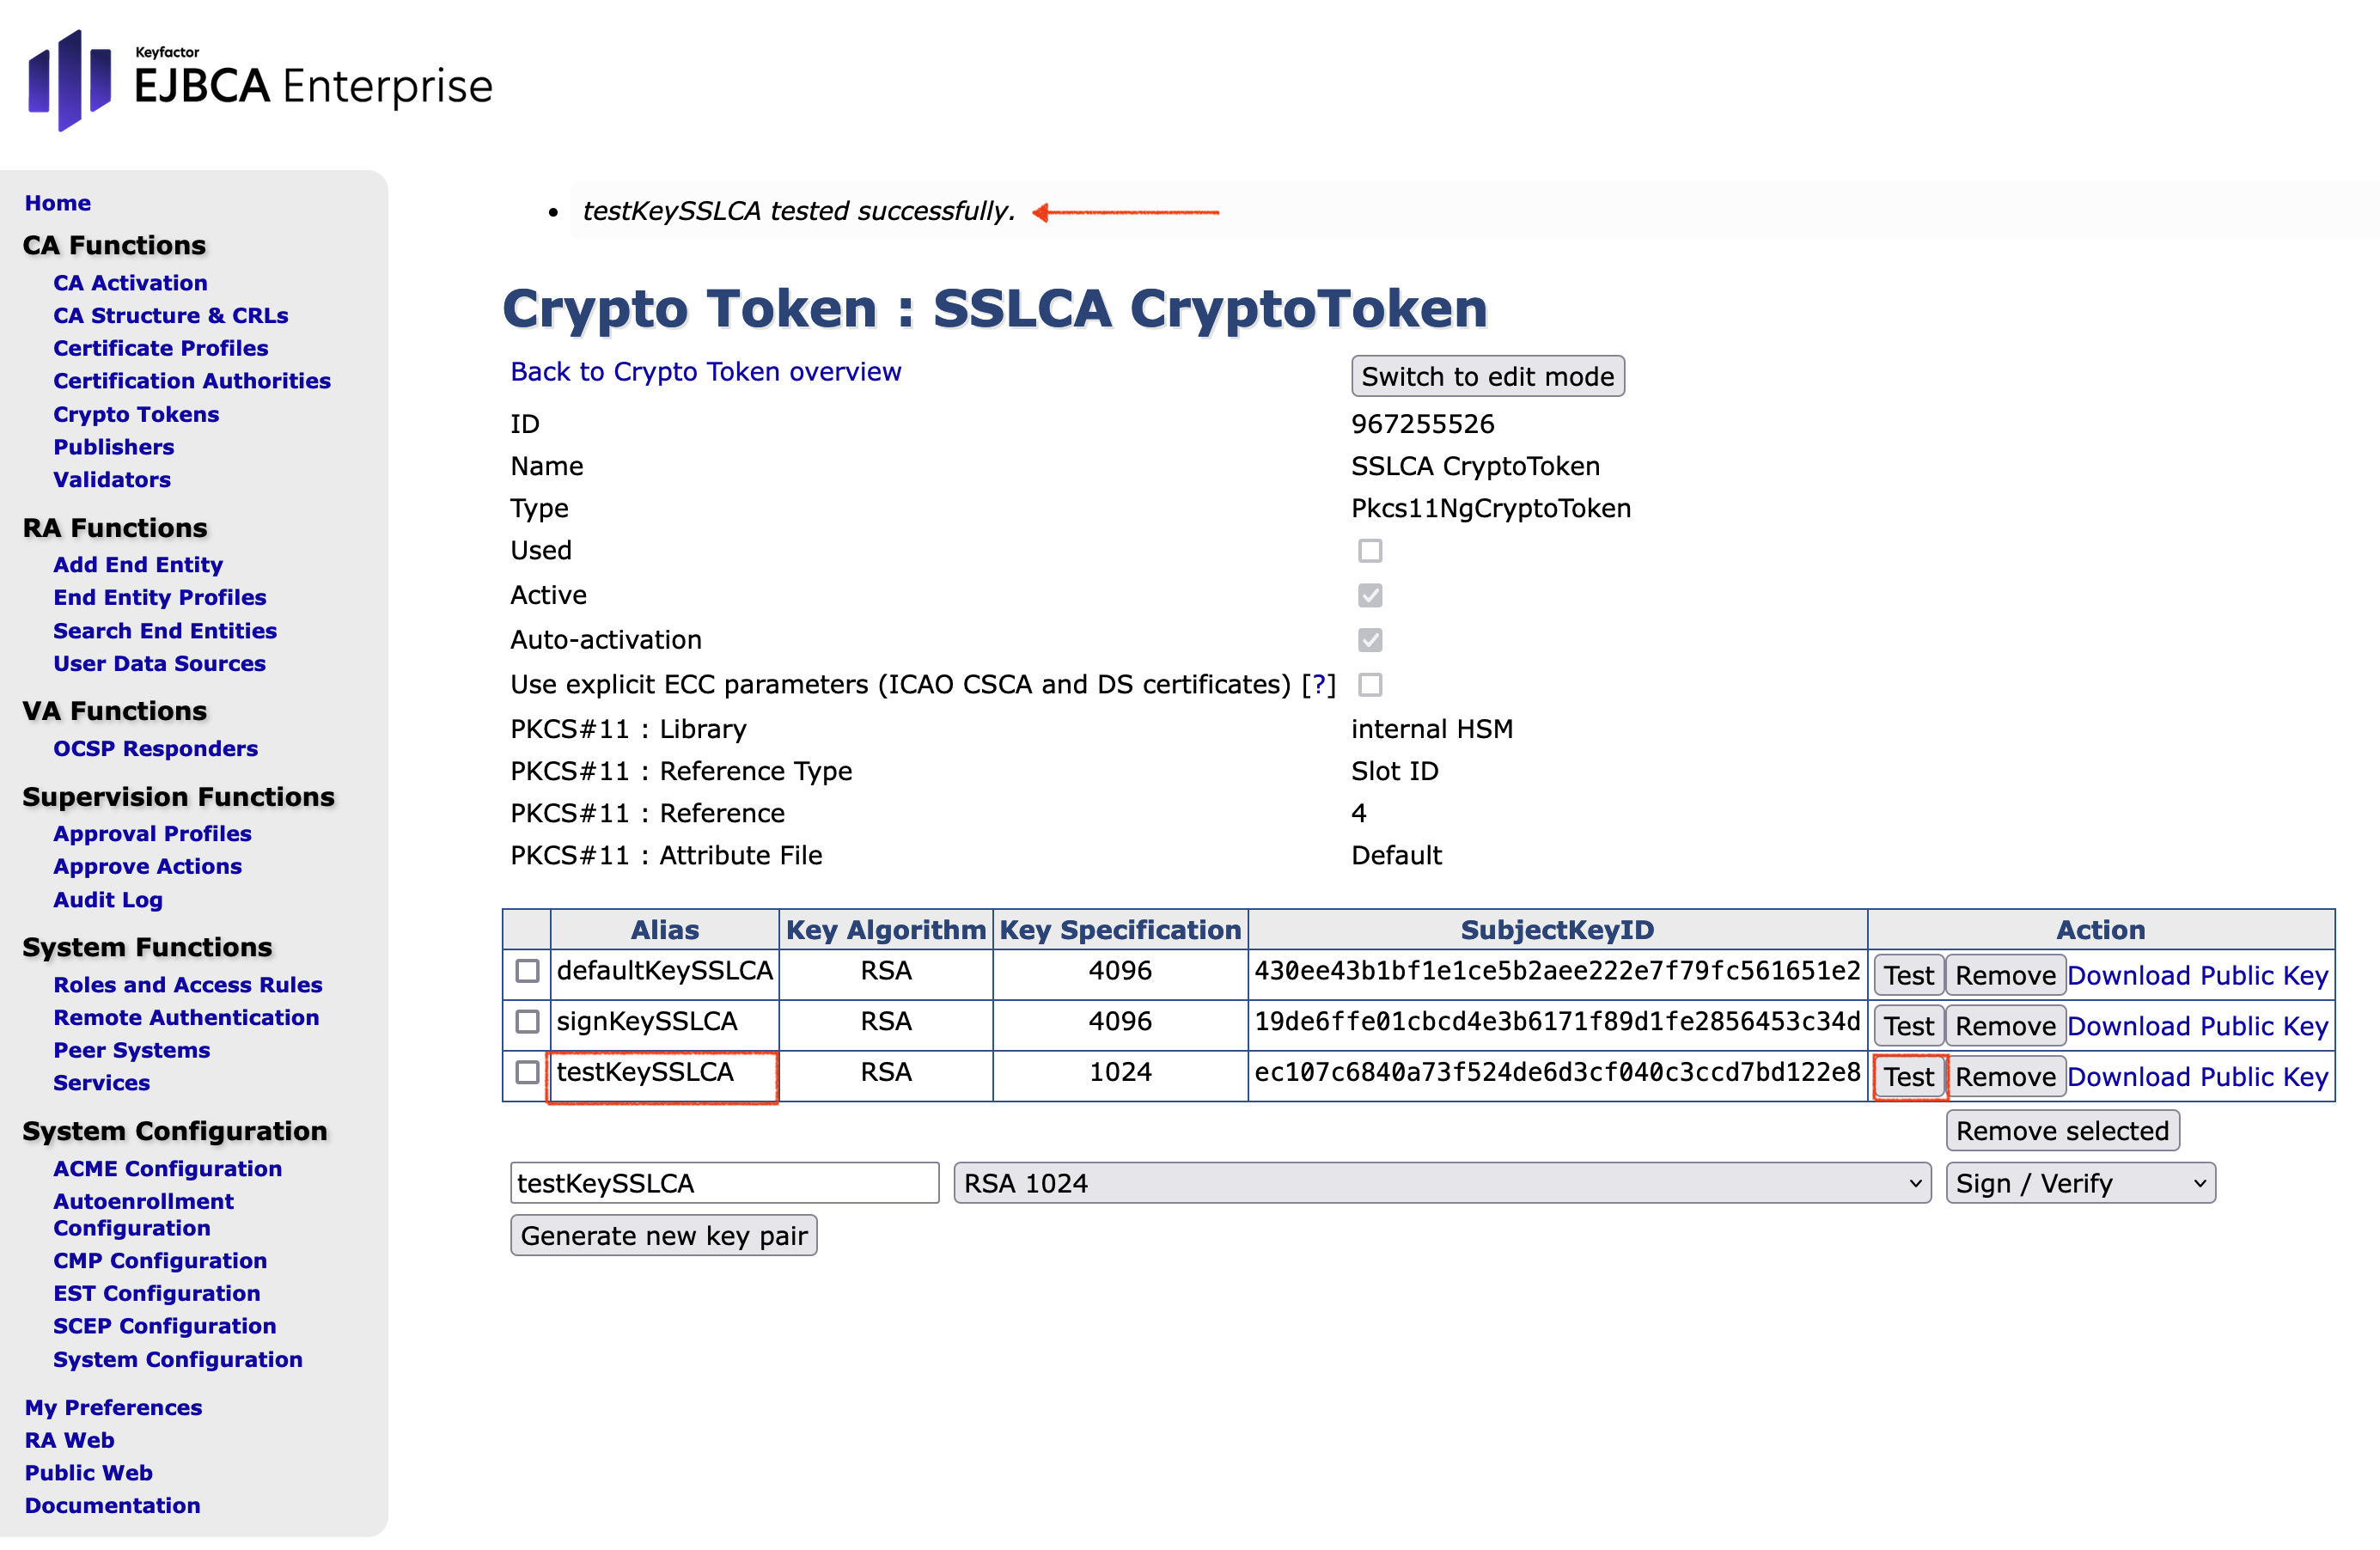
Create SSLCA in Node A
This section describes the actual creation of the SSLCA:
- Open EJBCA Enterprise.
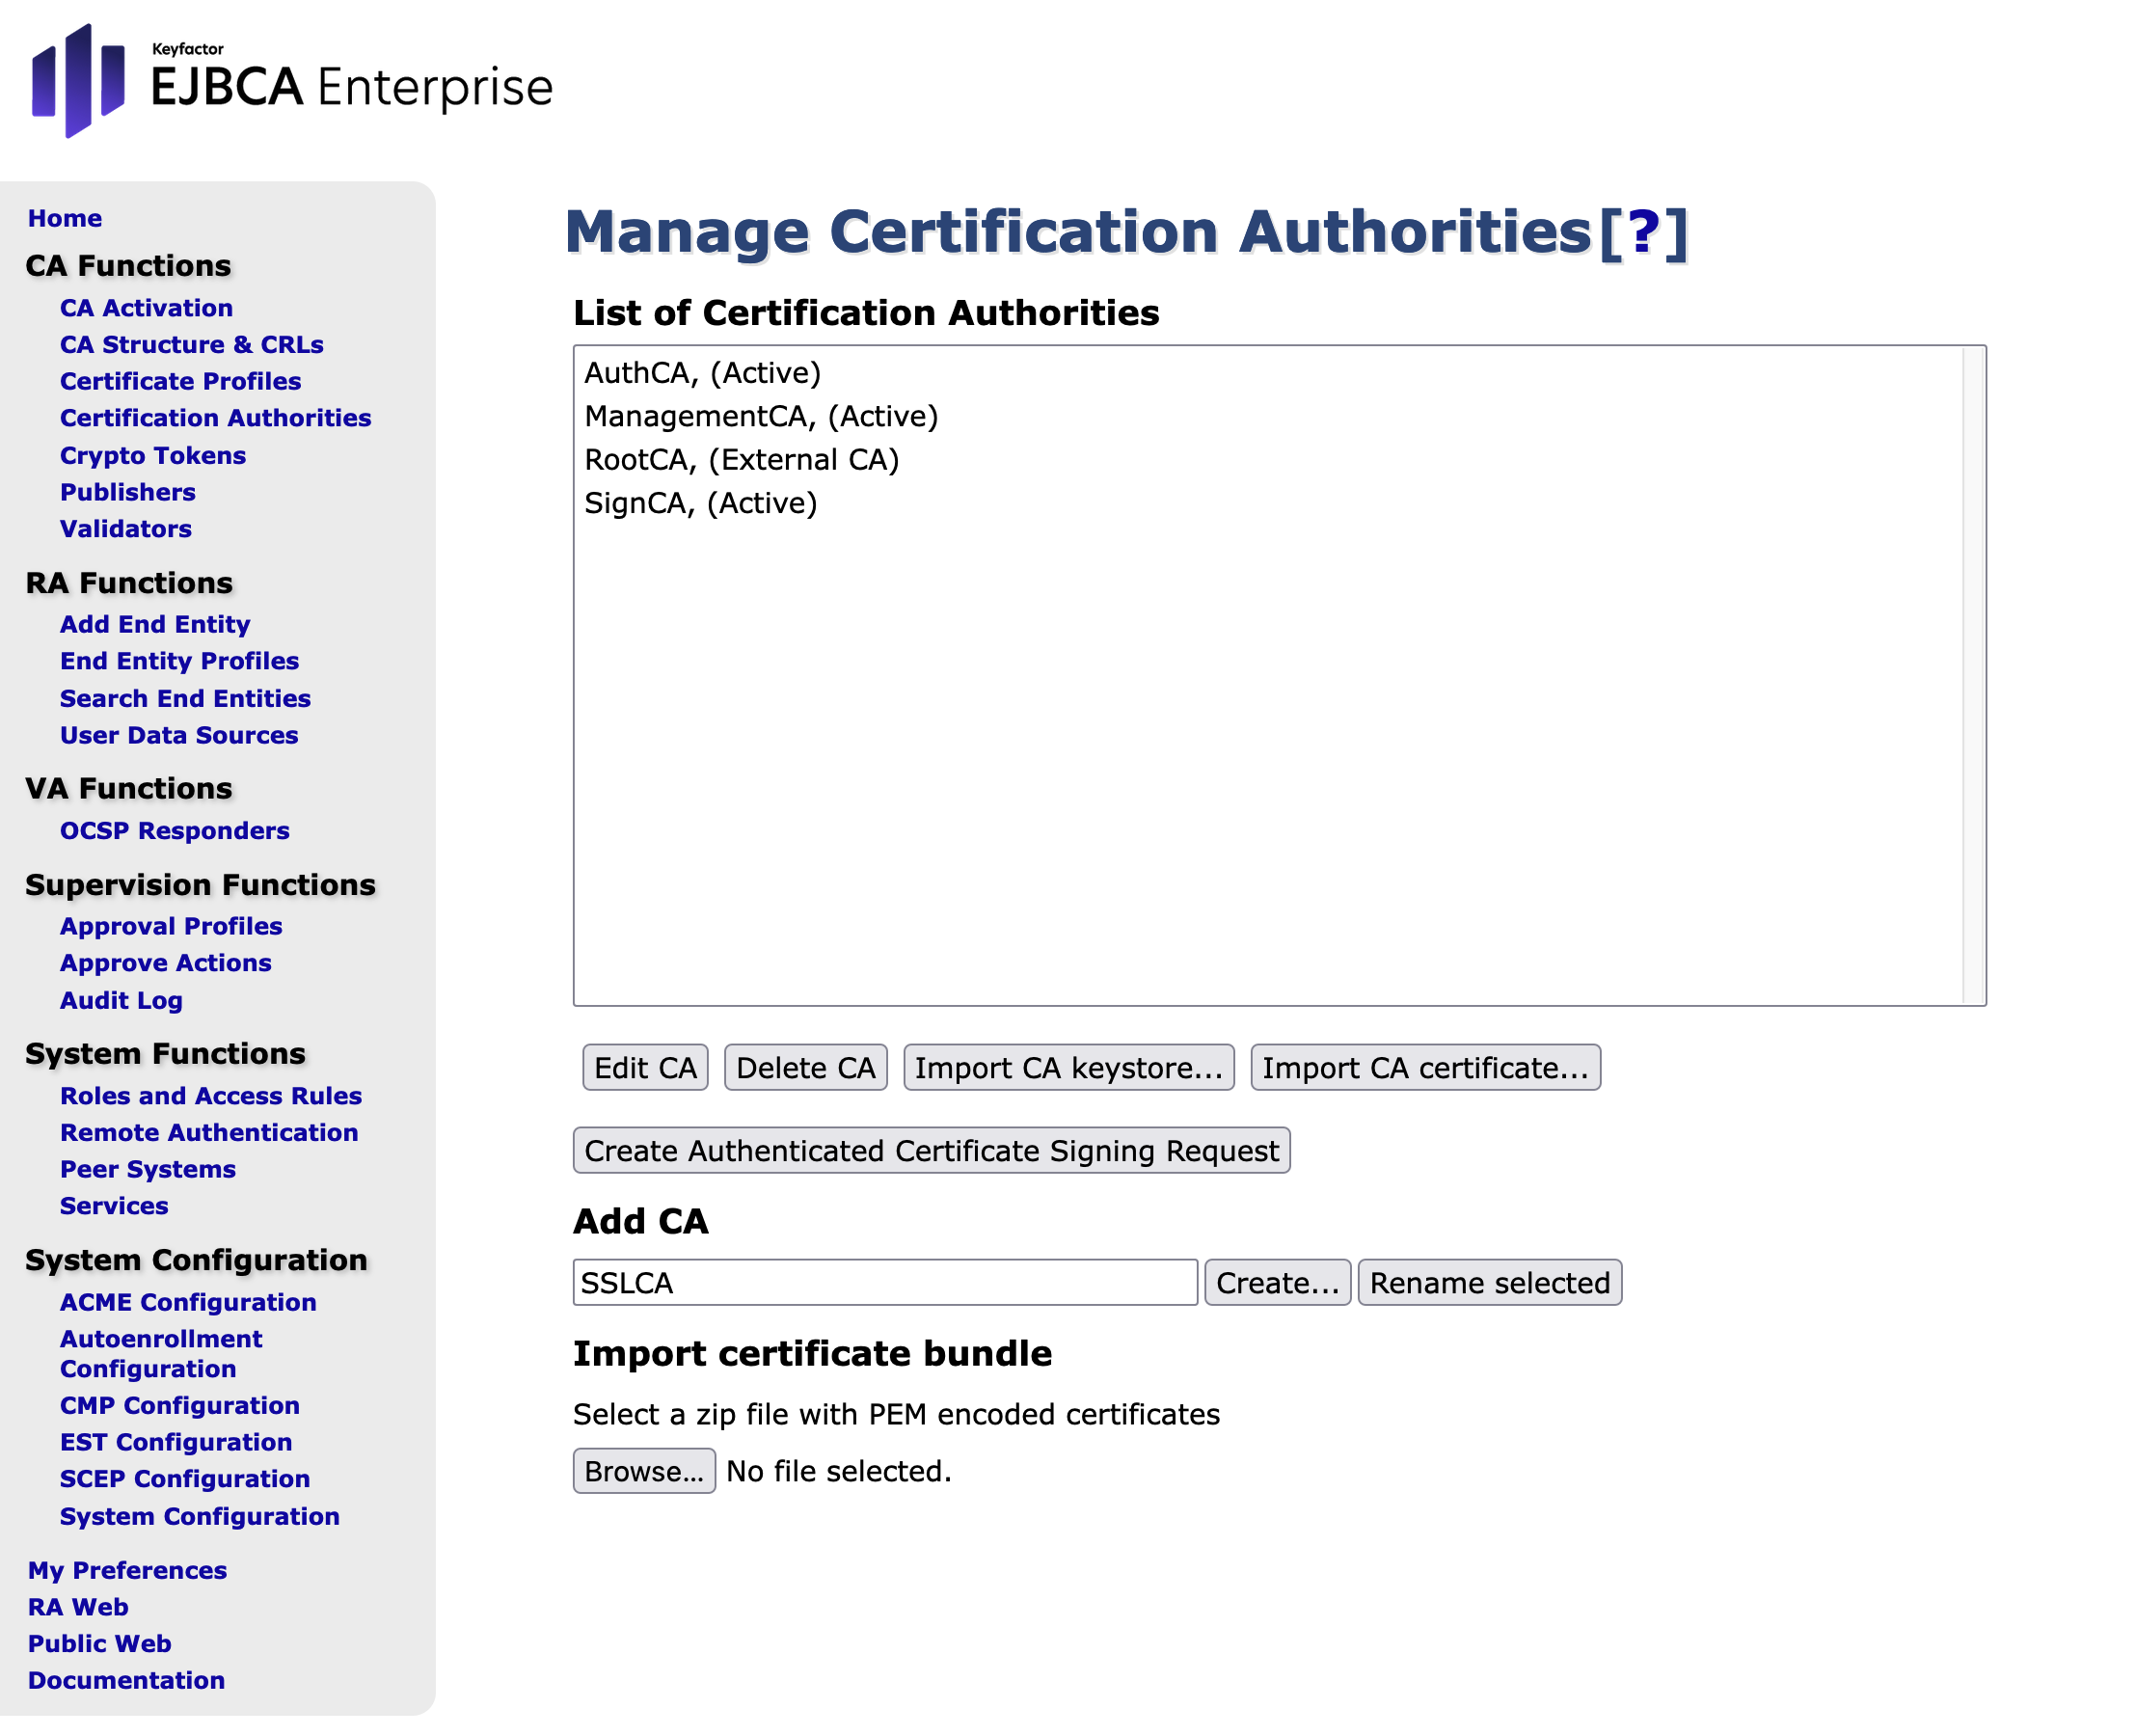
- In the sidebar, in the CA Functions section, select Certification Authorities.
Enter SSLCA in the field Add CA.
Click Create...
In the Create CA (CA Name: SSLCA) form, specify the following:
- CA Type: select X.509 CA
- Crypto Token: select SSLCA CryptoToken
- Signing Algorithm: select SHA256WithRSA
- defaultKey: select defaultKeySSLCA
- certSignKey: select certSignKeySSLCA
- keyEncryptKey: select -Defaut key-
- testKey: select testKeySSLCA
- Extended Service Key Specification: select RSA 2048
- Key sequence format: select numeric [0-9]
- Key sequence: insert 00000
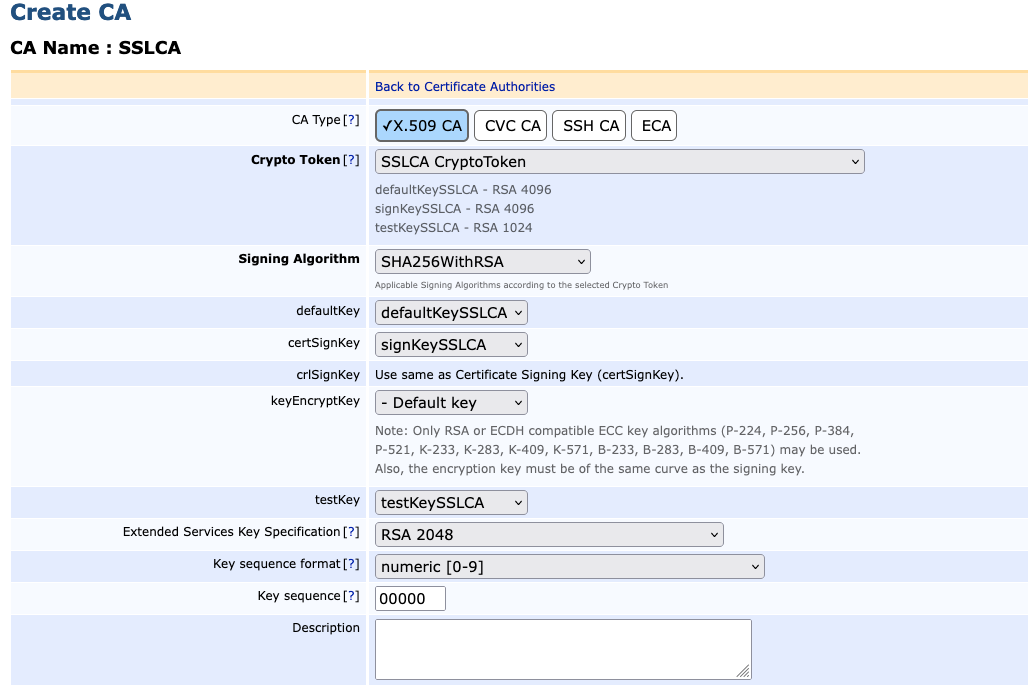
Section 'CA certificate data' - Subject DN: Enter CN=SSLCA,O=EJBCA Course,C=SE
- Signed By: Select External CA
Section 'CRL specific data' - CRL Expire Period (*d *h *m): Enter 12h
This field defines how long a CRL is valid for.The letter “d” after the number specifies days. - CRL Issue Interval (*d *h *m): Enter 0
This defines how often the CRLs are to be issued. In this case the CRLs will be issued once every day but will be valid for two days. CRL Overlap Time (*d *h *m): Enter 2h
This value defines the number of minutes both CRLs are valid for. For example, thirty minutes before the first CRL will expire it will issue a new CRL.
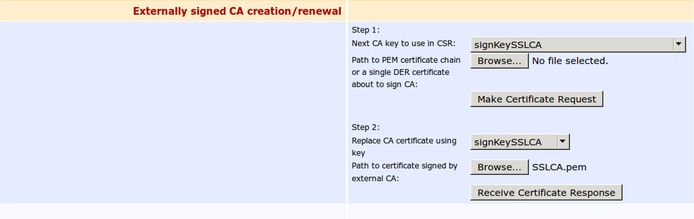
In the section Externally signed CA creation/renewal click Browse... and upload the RootCA.pem file.

This step is NOT needed in case you have imported RootCA as an External CA.
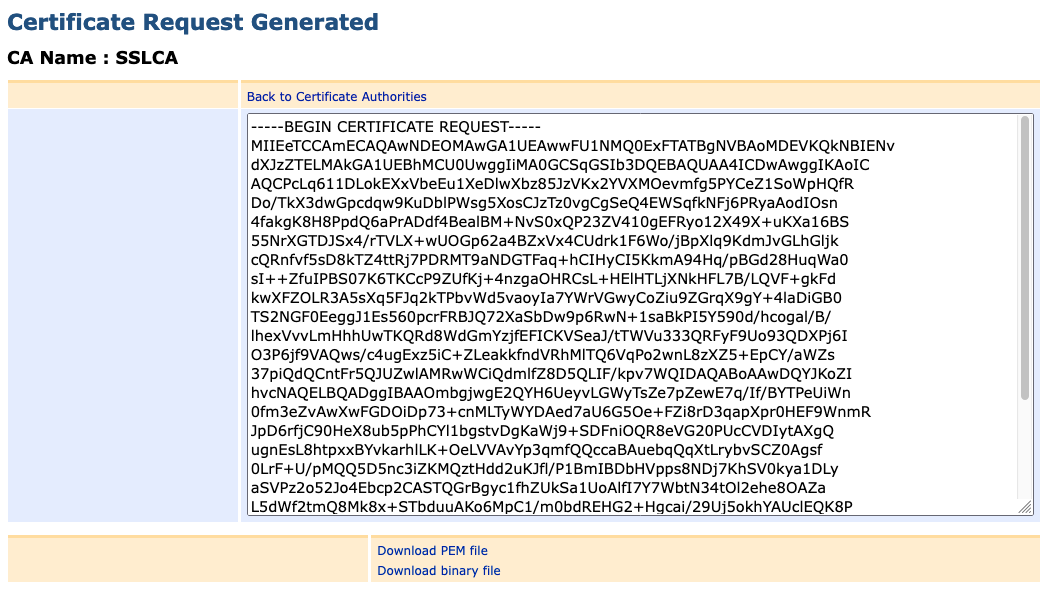
In this case, RootCA.pem can be downloaded from the RA Web of the EJBCA Hardware Appliance on which RootCA is installed (check Use-Case: Import RootCA as External CA in Node A).Click Make Certificate Request.

- You will be asked to download or copy the request. Save the .csr file with Save File:
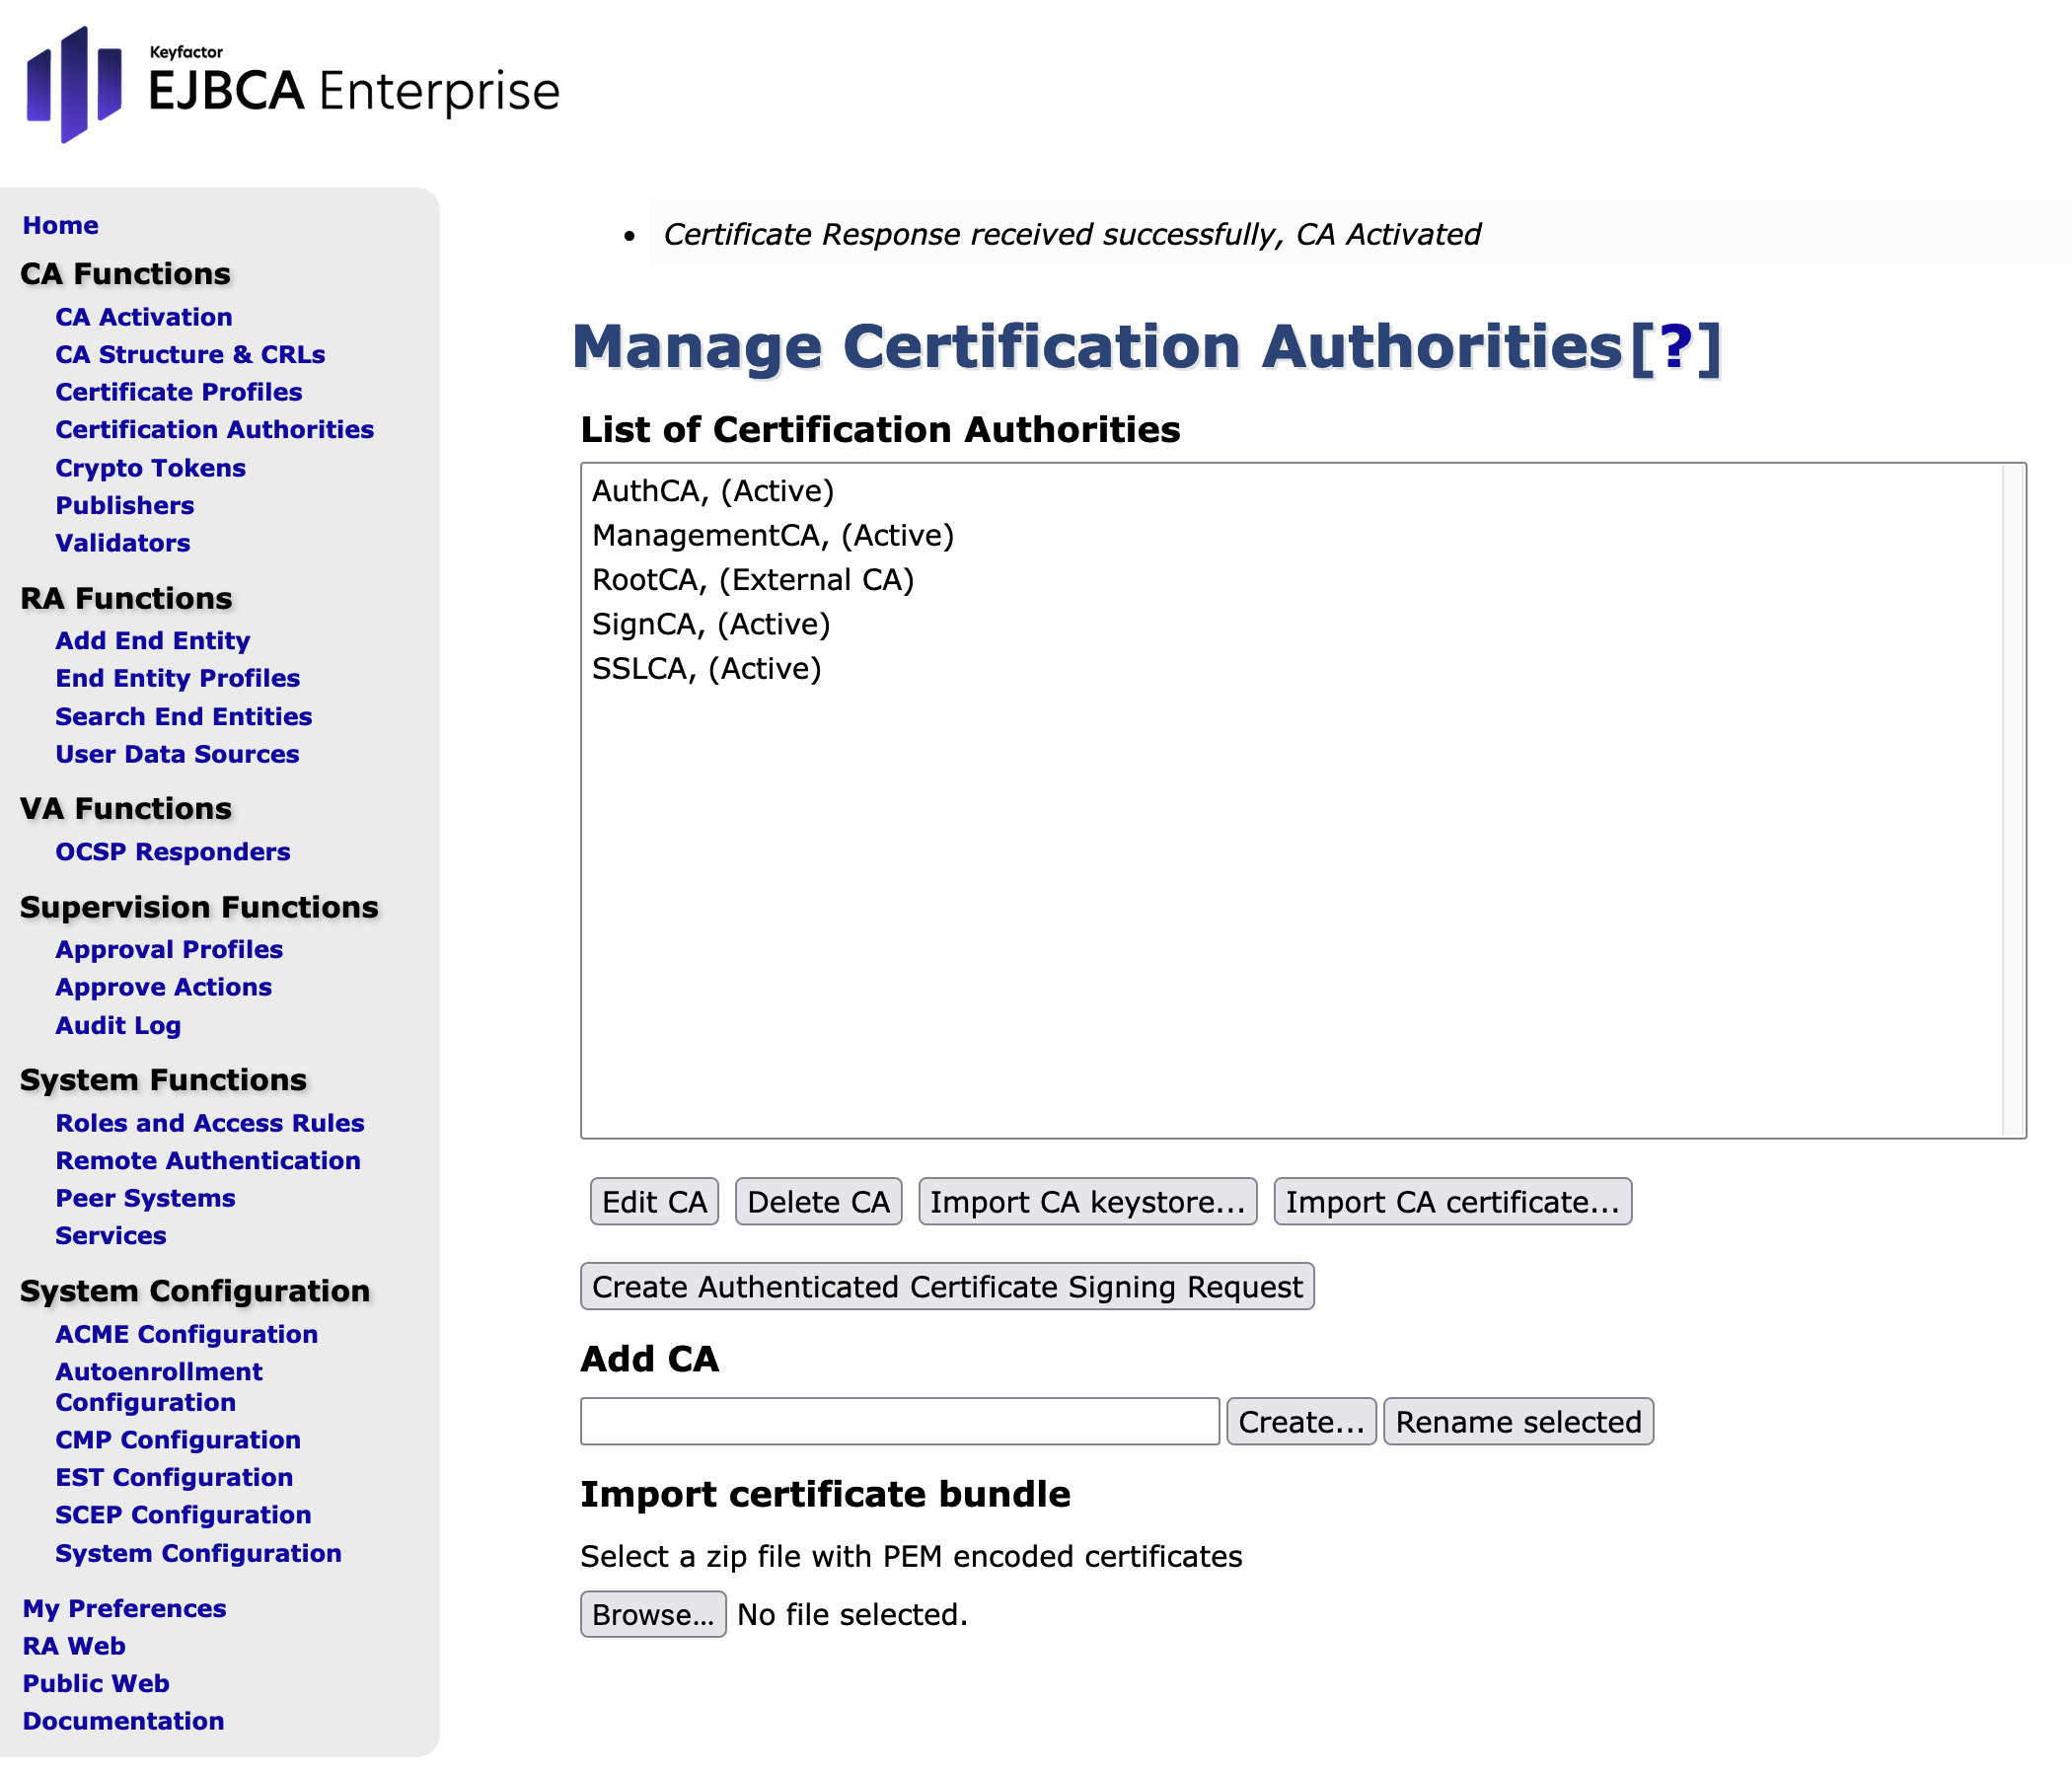
- Check the status of the CAs:
In the sidebar in the CA Functions section, select Certification Authorities.
The status for SSLCA is now Waiting for Certificate Response.
Create an End Entity for the SSLCA with installed RootCA
This describes how create an End Entity that is associated with the SSLCA certificate.
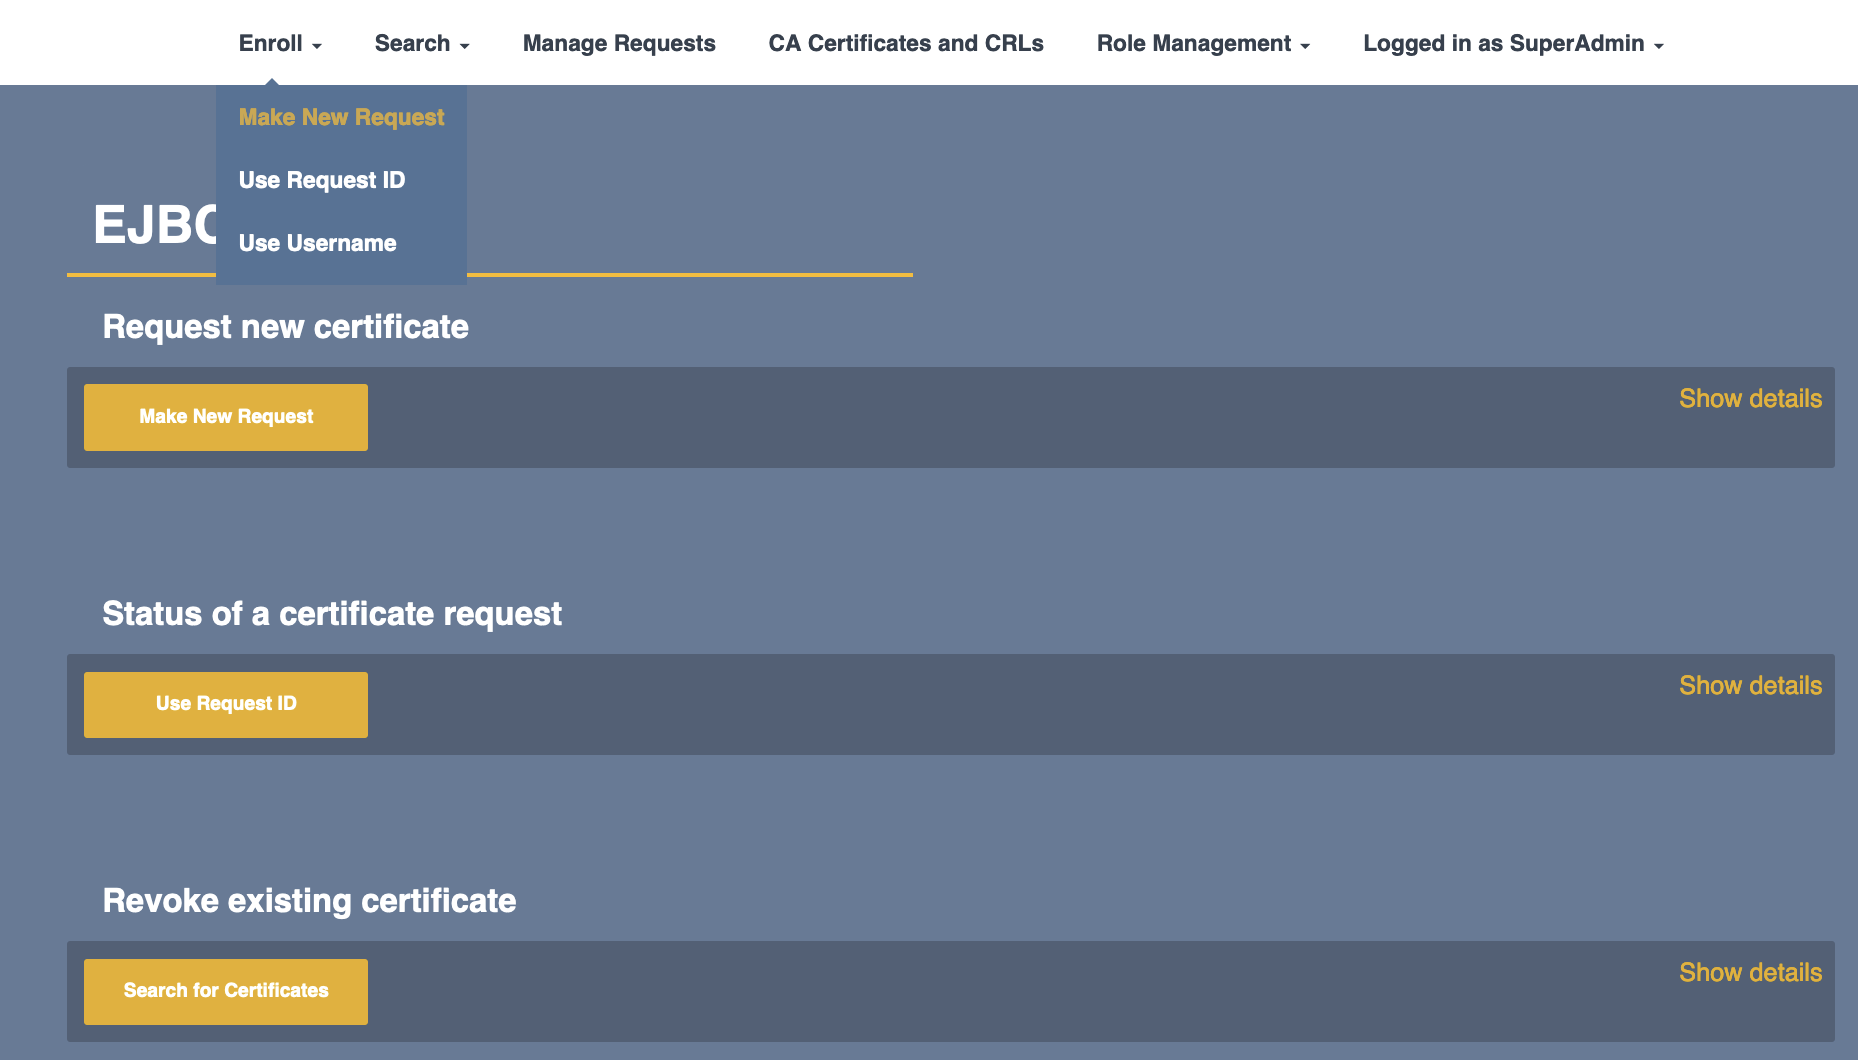
Open EJBCA RA Web.
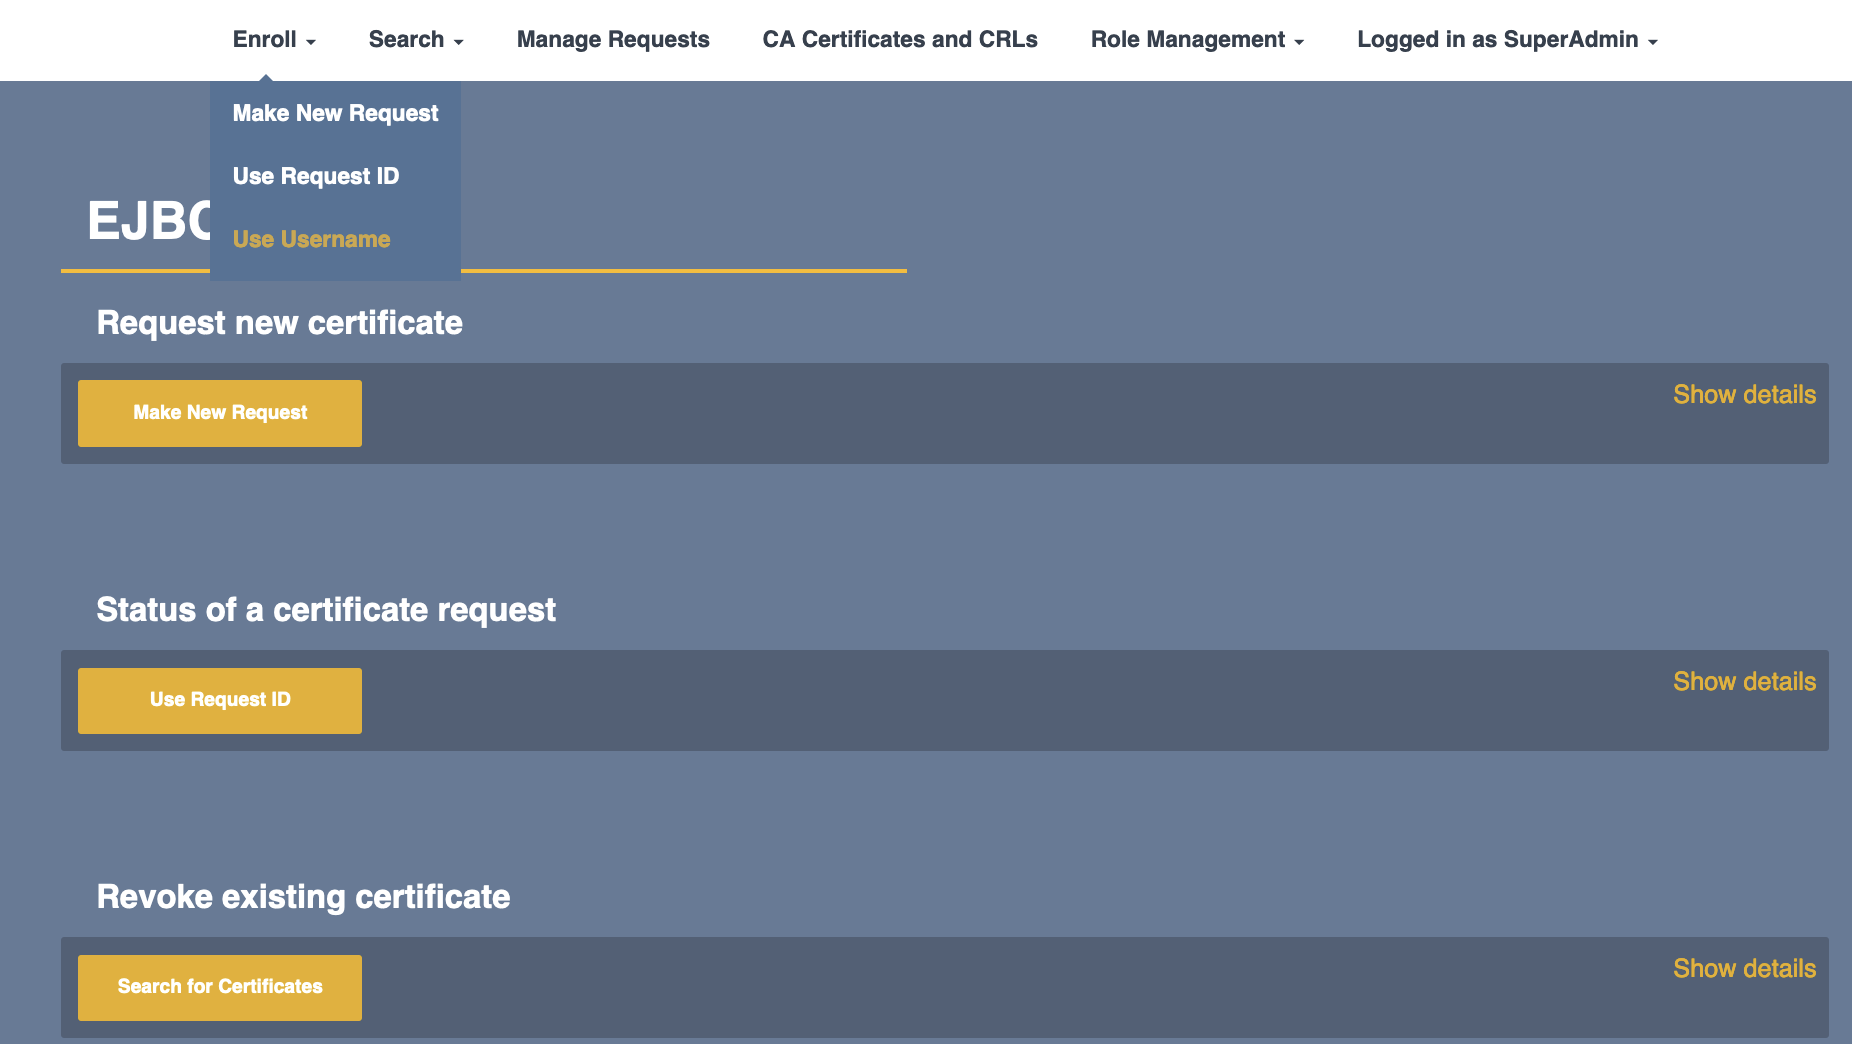
- From the top menu click the drop-down menu for Enroll.
Choose Make New Request from the drop down menu.
- Make the following entries in the Make Request form. The selection and entry fields are automatically expanded.
- Select Request Type
Certificate Type: choose SSLCAEndEntityProfile from the drop-down menu.
Key-pair generation: make sure Postpone is activated. - Select Token Type
Token: select Java Keystore (JKS) Provide Request Info. These are required Subject DN Attributes.
CN, Common Name: enter sslCA
O, Organisation: enter the name of your organization
C, Country: enter your Country code according to ISO 3166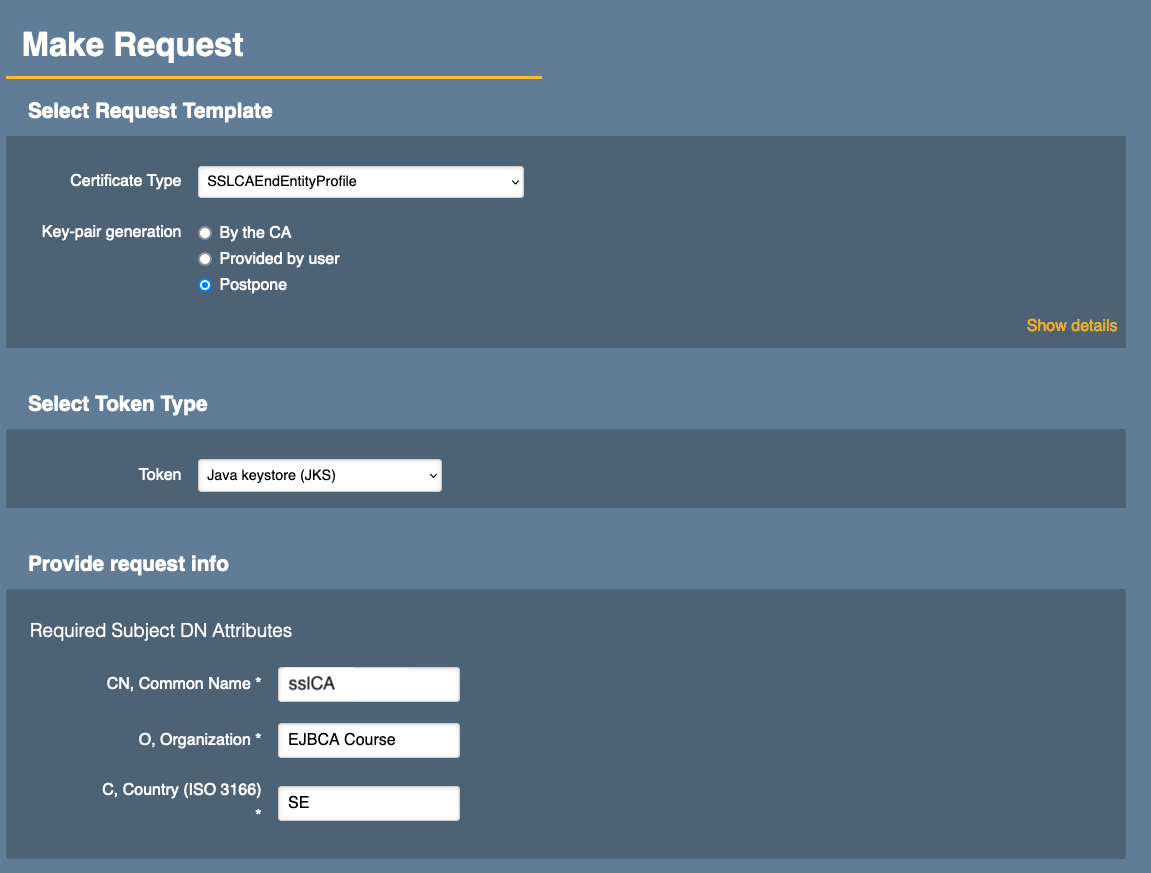
- Provide User Credentials. These are mandatory entries.
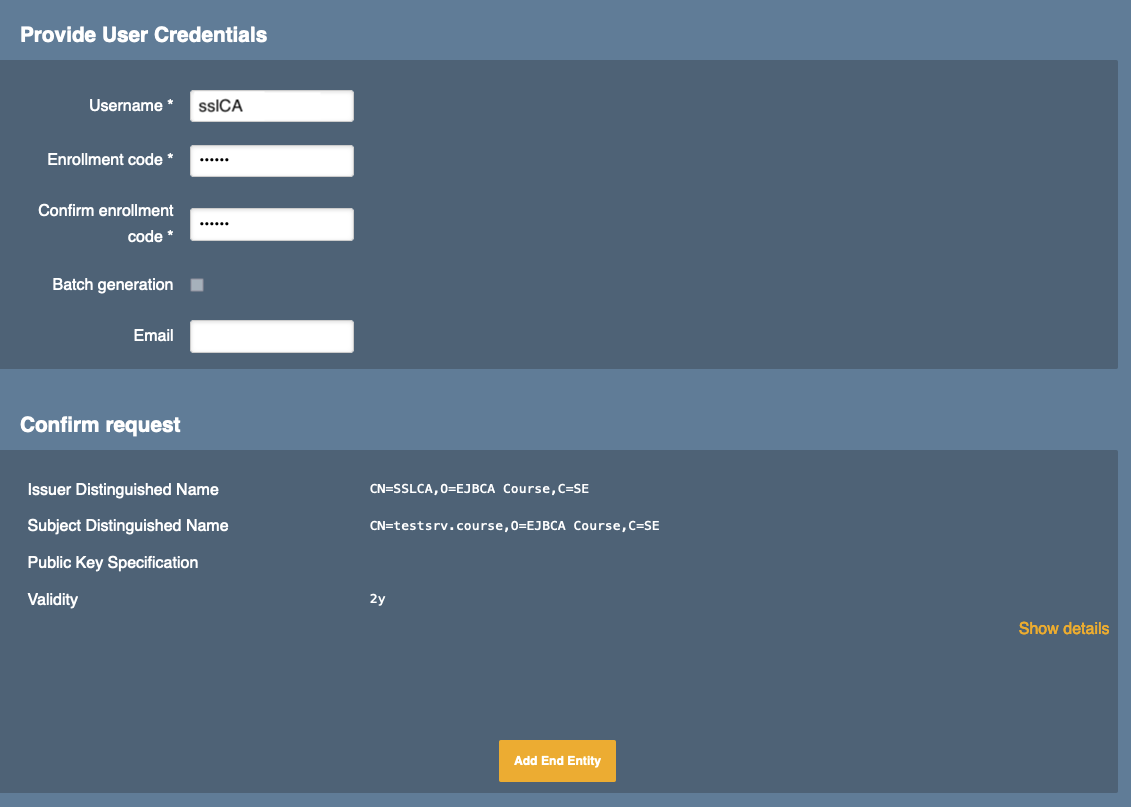
- Click Add End Entity to continue.
- From the top menu click the drop-down menu for Enroll.
Choose Use Username from the drop down menu.
Enter Username and Enrollment code to enroll
Username: enter sslCA
Enrollment code: enter foo123
Click Check to continue.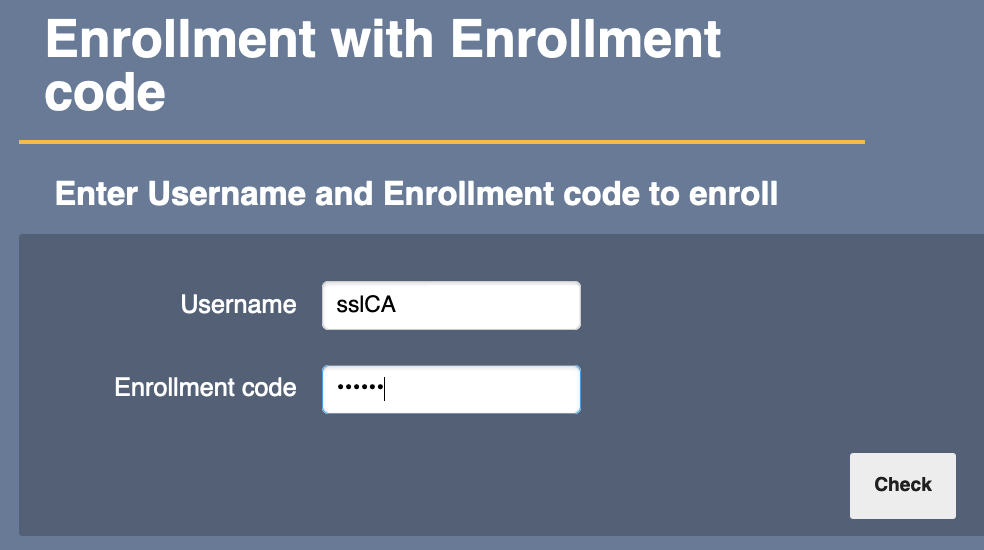
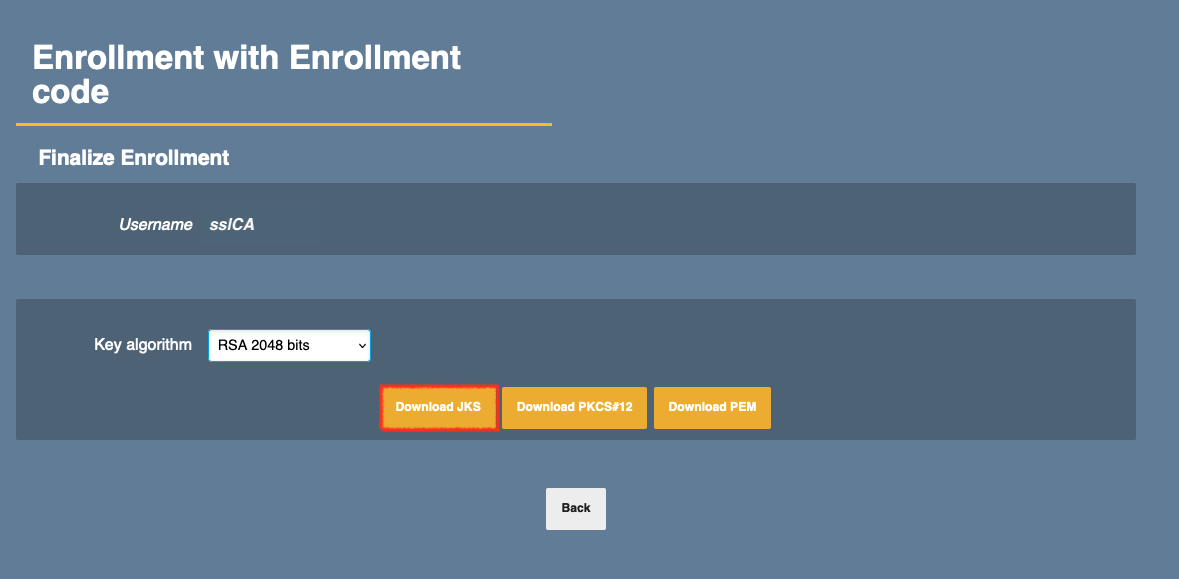
- Finalize the Enrollment
Key algorithm: choose RSA 2048 bits - Click Download JKS to continue.
In the EJBCA Hardware Appliance where SSLCA is installed (Node A), click Certification Authorities , highlight SSLCA, (Waiting for Certificate) and press Edit CA:

In the section Externally signed CA creation/renewal > Step 2, Browse... and select the file SSLCA.pem.
Click Receive Certificate Response.
Navigate to Certification Authorities to see that SSLCA is now active.