In this exercise we will change the client certificate and update the trusted CA for Application Interface using WebConf. First we will configure EJBCA and then WebConf.
The new superuser certificate has to be issued from the same CA (MyTrustedSubCA signed by MyTrustedRootCA) that we will install for TLS authentication. First we have to provide the information about the certificate (MyClientAuthenticationCertificate.pem) that will be used as superuser.
- Open EJBCA Enterprise.
- In the sidebar, in the CA Functions section, select Certification Authorities.
Click Import CA certificate
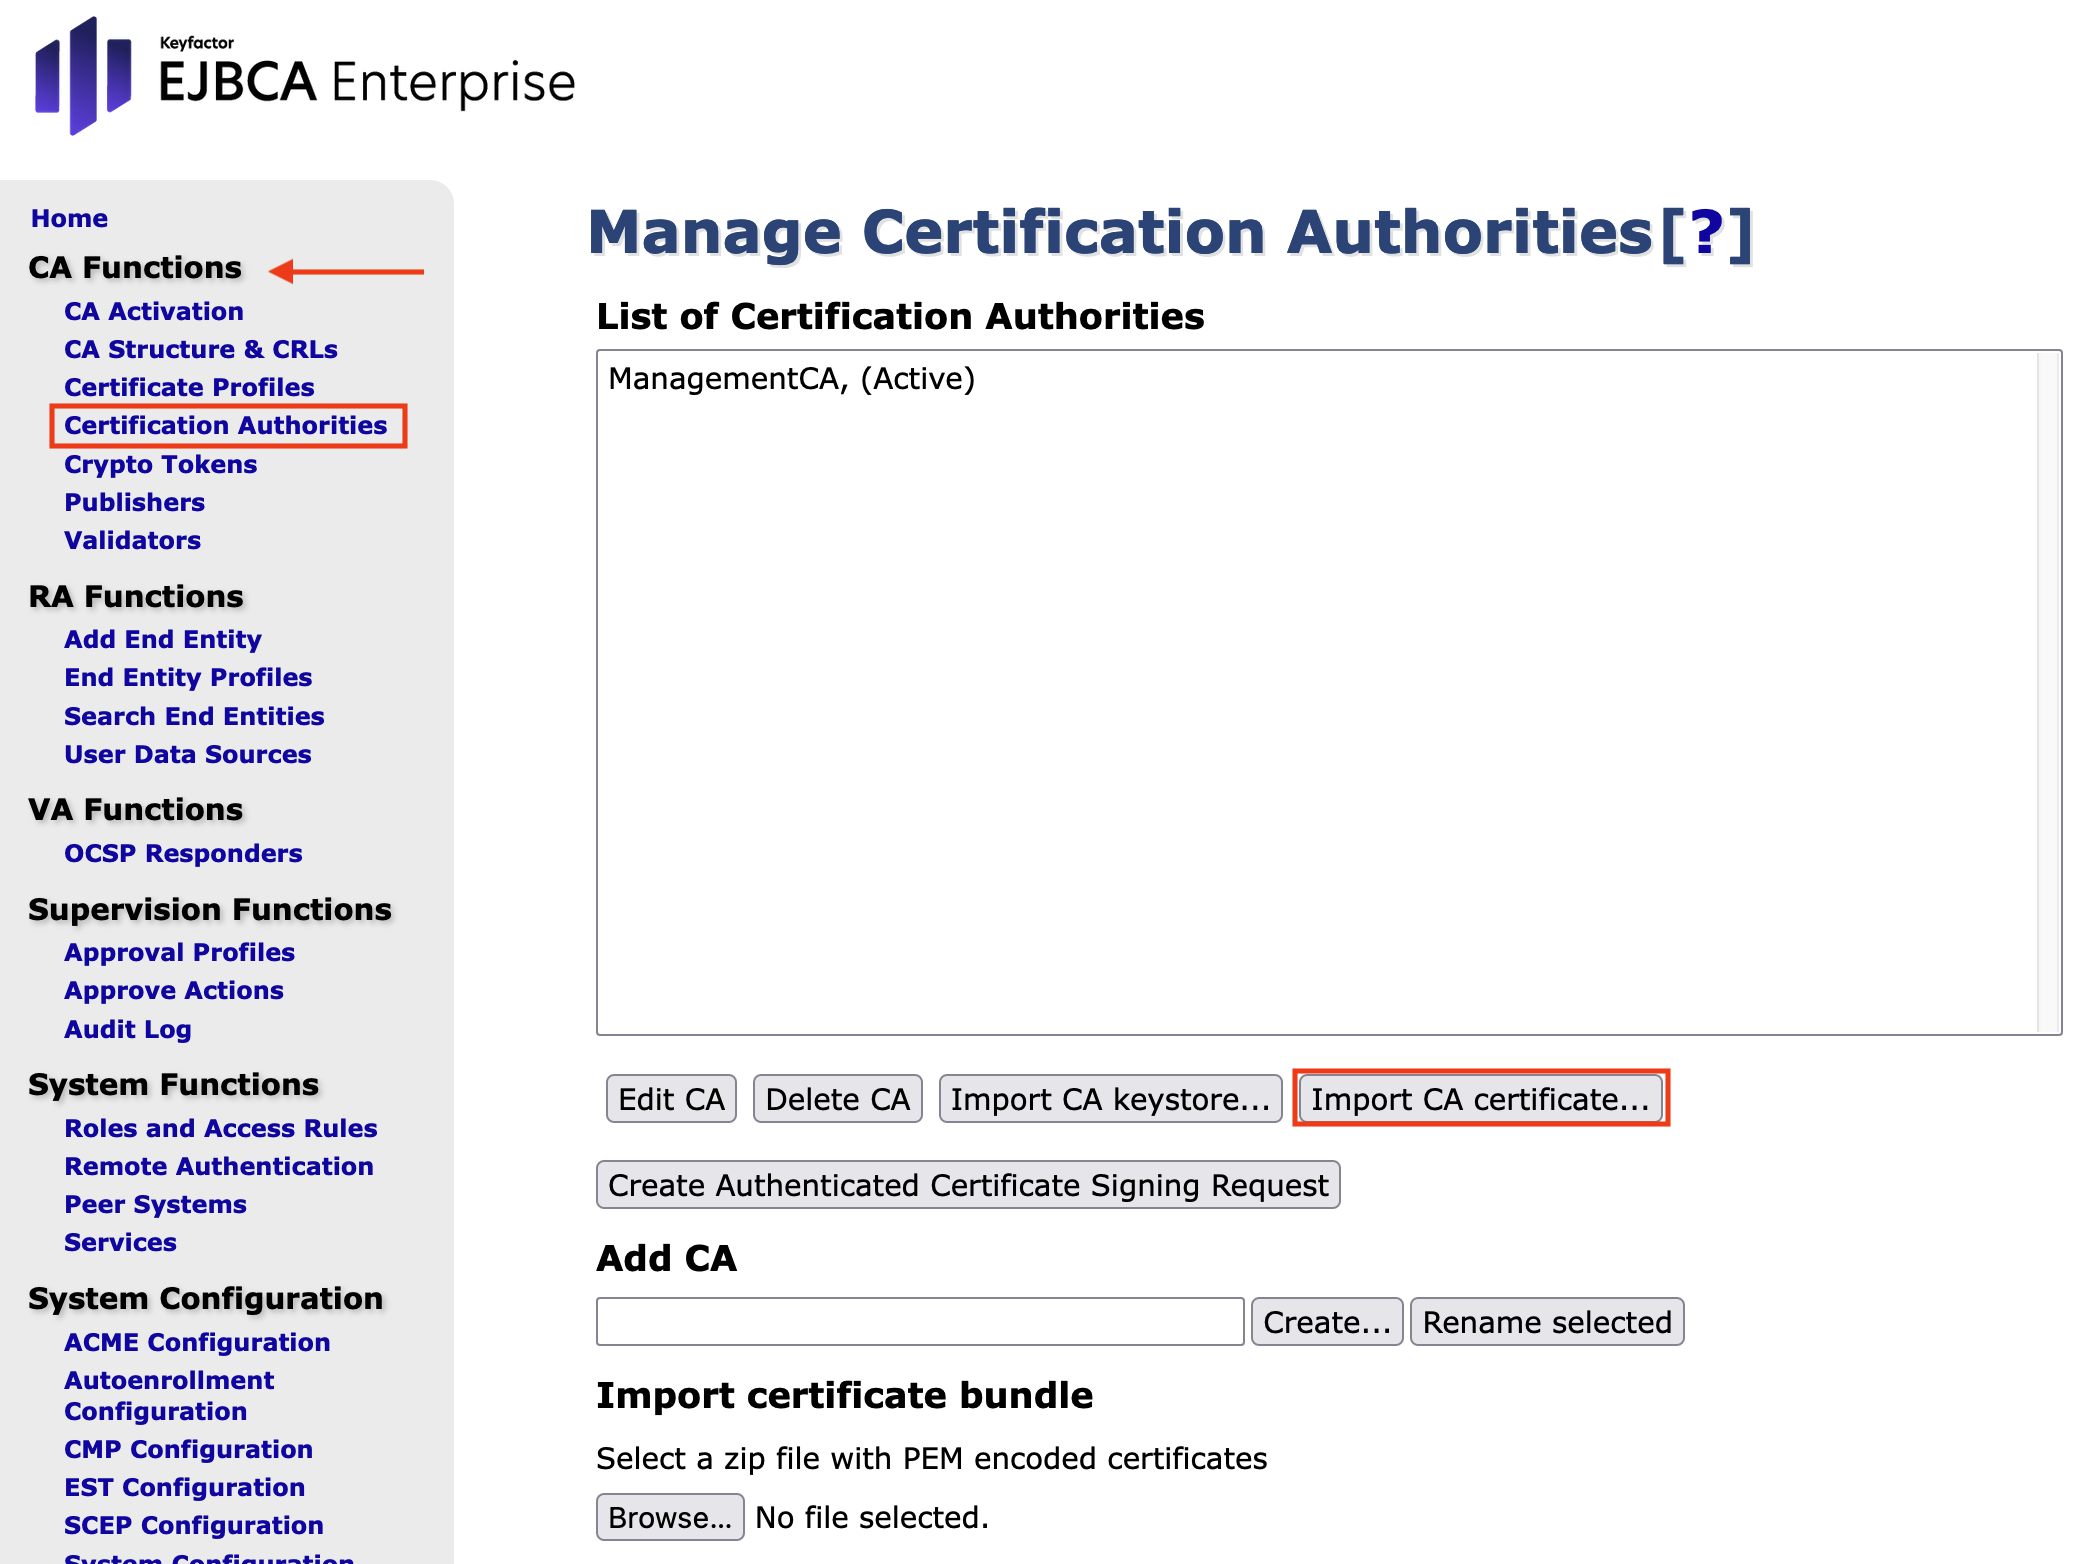
The corresponding form opens.
Enter The name this CA will be given.
Leave the Onboard Keyfactor Enrollment Proxy CA > Disabled.
Browse for the file and upload the full CA certificate chain in PEM format. This is the certificate chain you got from your issuing CA.
Confirm by clicking Import CA certificate.
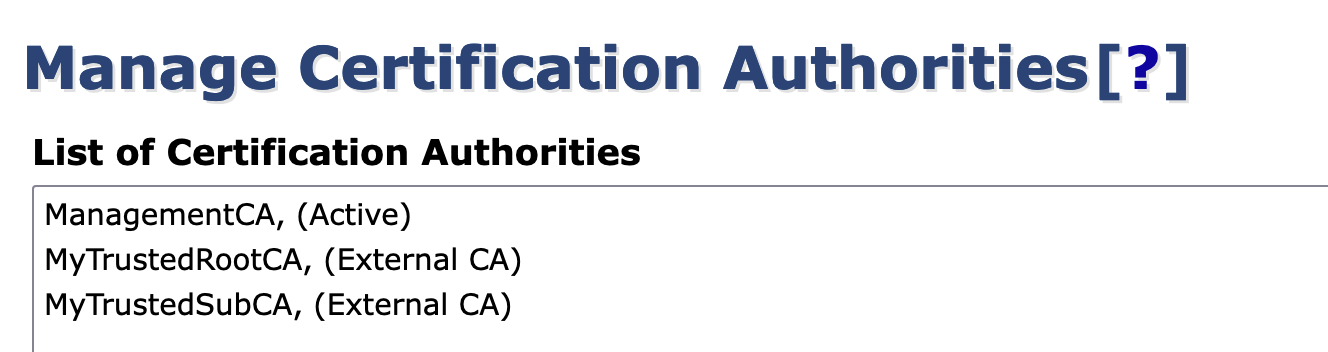
- Repeat the steps above for MyTrustedSubCA.
- The Certification Authorities are listed.
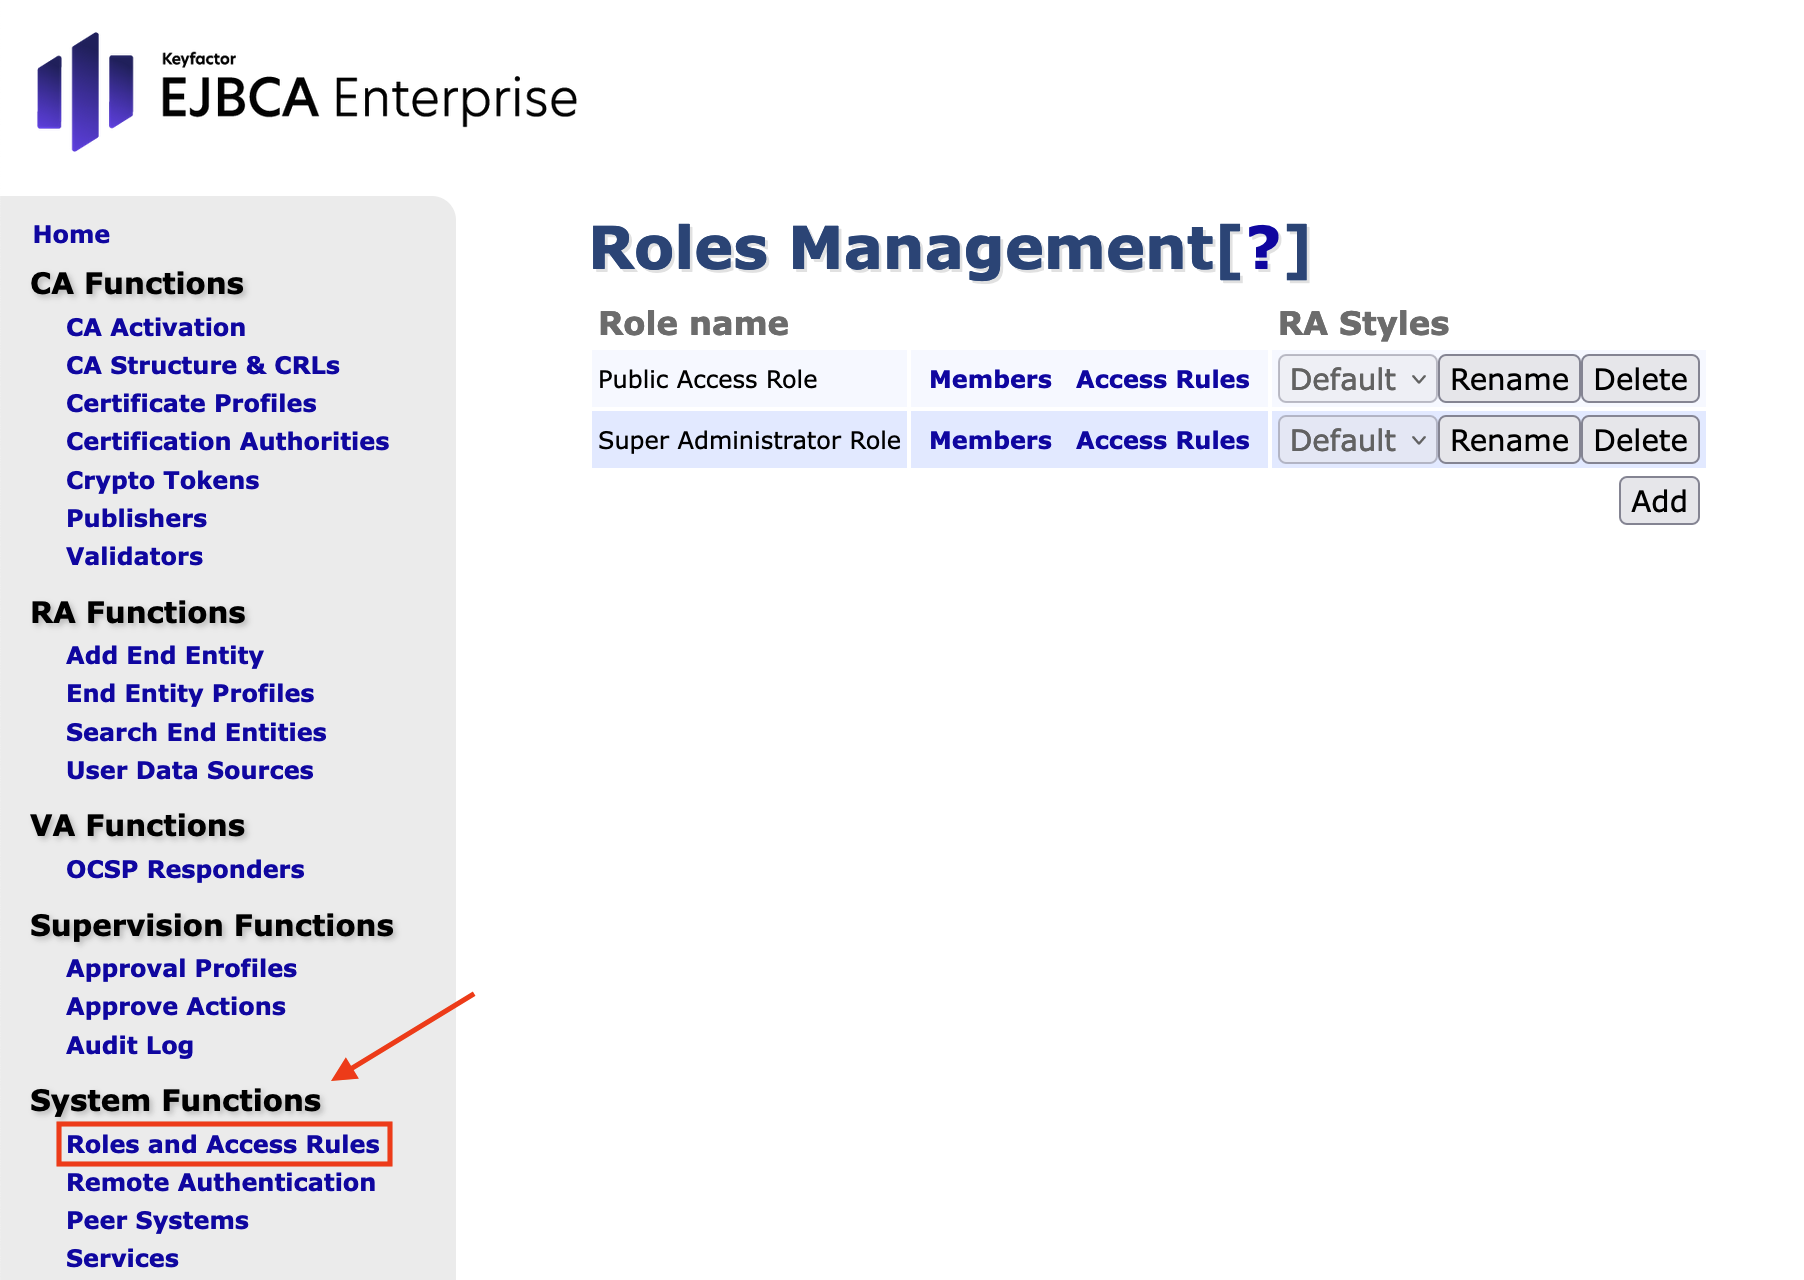
- In the sidebar, in the System Functions section, select Roles and Access Rules.
To proceed, you must verify the serial number of the SubCA that issued the Client Certificate.
Run the following command as 'user':
Now click Members in the row of the Super Administrator Role to open the corresponding form.
Complete the following values.
- Match with: X.509: Certificate serial number (Recommended)
- CA: MyTrustedSubCA
- Match value: 237A0C74AFF3F9CC21AAC854922552BA52B5101D
Confirm with Add.

EJBCA is now configured to use this certificate.
The last step is to configure WebConf to allow the Application Interface to also authenticate MyTrustedSubCA-chain.pem.
Follow the same process but for the Application Interface as described in Changing Client Certificate and Trusted CA for Management Interface.