The Cluster tab and subtabs show an overview of the cluster of the node and allows to configure cluster settings.
For more information on how to extend your system to a cluster with multiple nodes, see Setting Up a Cluster for High Availability.
Operation
Find here status information about the cluster from the perspective of this local node. In complicated networks, the local node has a limited perspective only. In these cases, it is possible that the status information does not reflect the actual status of the cluster.

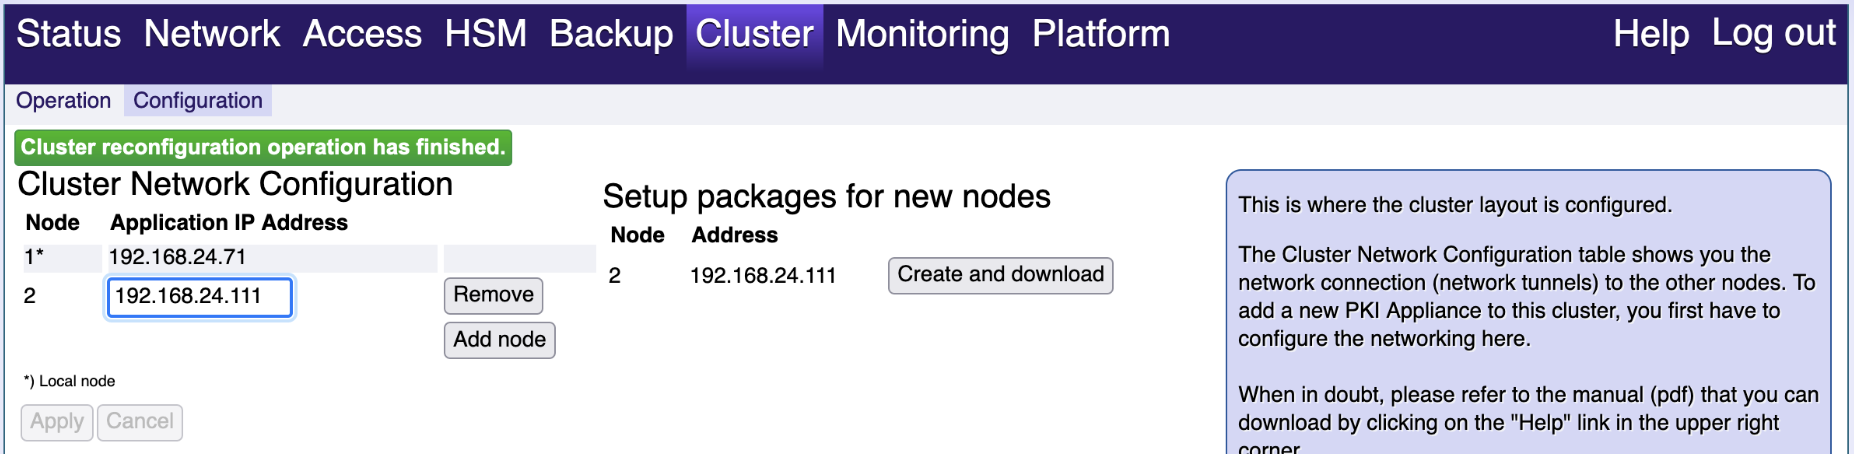
Configuration
Use this tab to configure the cluster layout. You need to add nodes and configure the networking here if you want to add new Hardware Appliances to the cluster.
To access this functionality you need to configure Network Time Protocol (NTP) in the tab Network > Network Time Protocol.
The clocks of all Hardware Appliance nodes in the cluster must be synchronized, even if the cluster is only used for demo or testing purposes. We therefore recommend using quality NTP sources that agree on the current time.
You have the following options:
Cluster Network Configuration:
Table with nodes:
Find here information on the current network connection - network tunnels - to the other nodes in the cluster.
Application IP Address:
Use this field to enter the IP address of the node you want to add.
Add node:
Select Add node to add the node with the specified Application IP Address.
Remove:
Select Remove to remove the node in this line.
Apply:
Select Apply to confirm your changes to the nodes' table. For newly added nodes, the setup packages will then be prepared.
Cancel:
Select Cancel to undo your changes. This option is no longer available after you clicked Apply.
Setup packages for new nodes:
This section is only visible after you added new nodes and clicked Apply.
Create and download:
Select Create and download to create and download bundles for that node. When you start the Connect to cluster process for the new node the wizard will prompt you to upload this bundle.