Launch EJBCA Enterprise Cloud on Azure
The following describes how to launch EJBCA Enterprise Cloud from Azure Marketplace.
The Azure Portal is a web interface that allows you to configure the EJBCA Enterprise Cloud instance details from a web browser before you launch it. Follow the instructions below to launch an EJBCA Cloud Azure instance.
Locate EJBCA Cloud in the Azure Marketplace
The following describes how to locate the EJBCA Cloud instance and create the app in Azure.
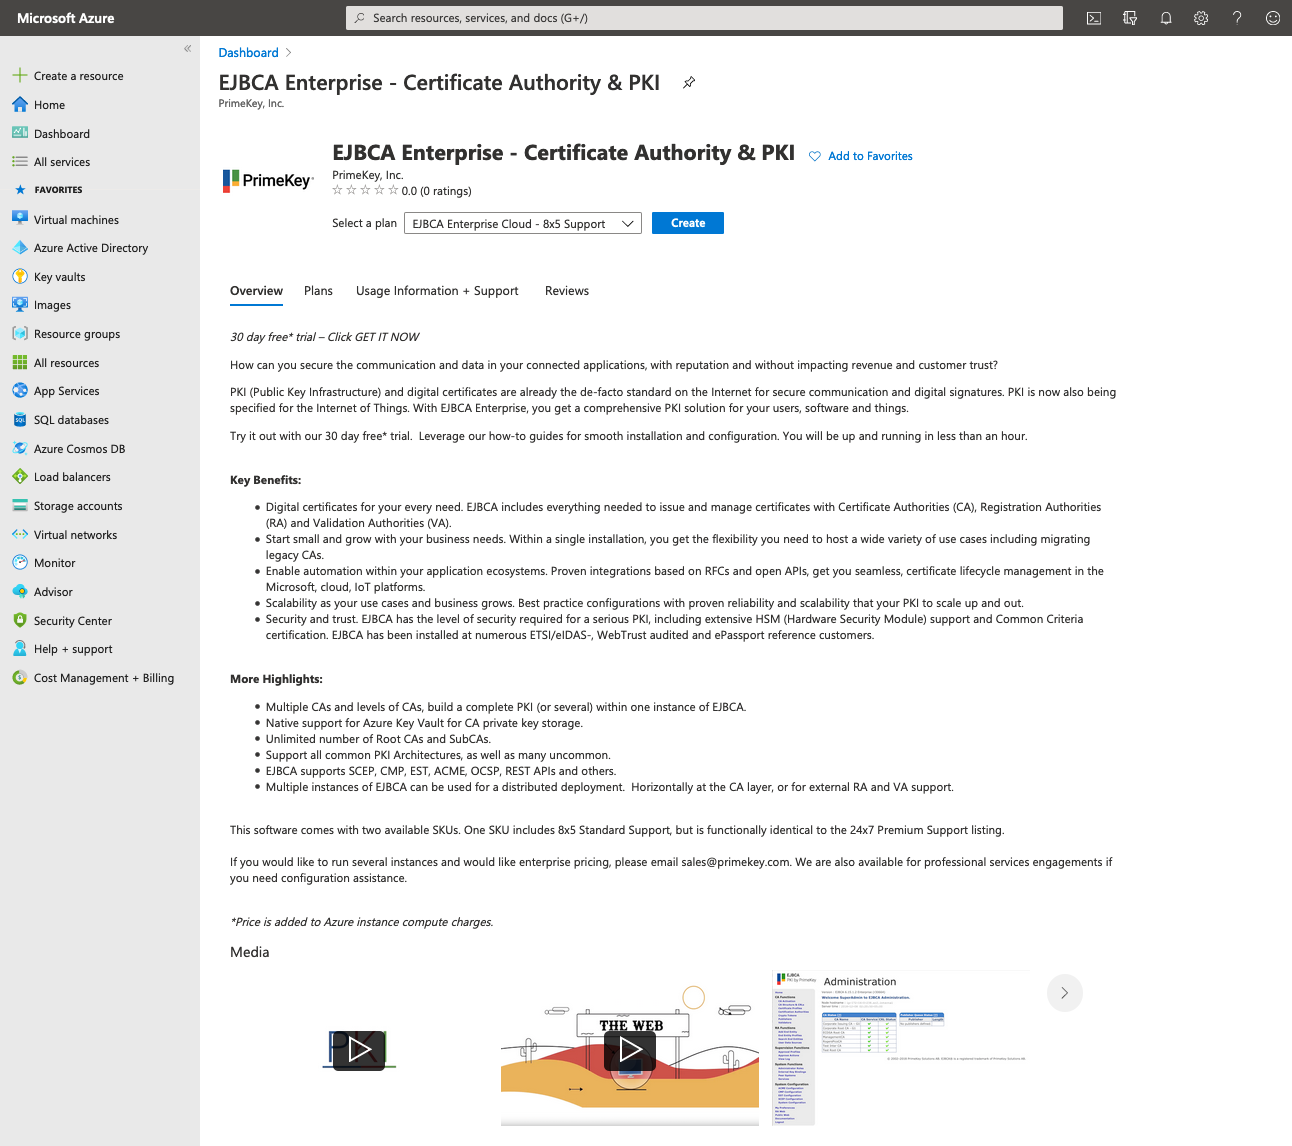
- Browse to the Azure Marketplace and search for "primekey" to display the EJBCA Cloud.

- Review the plans as desired under the Plans tab to see the different pricing options.
- Select the instance type to use and click GET IT NOW in the sidebar.
- Select the desired support level, 8x5 or 24x7, and specify the contact information as required by Microsoft.

Launch the Instance
The following describes the steps to launch the instance in Azure using the Launch Wizard.
Step 1 - Log In and Create
This action will redirect you to the Azure portal.
- Log in to the Azure portal if not already done, confirm that the proper support plan is selected, and then click Create.

Step 2 - Basics
This brings you to the EJBCA Cloud Launch Wizard for Azure.
Details
- Select the desired subscription
- For Resource Group, click Create new or select an empty resource group in the list. If creating a new one, enter the name of a Resource Group that will hold all of the EJBCA Cloud resources, and then click OK.

Instance Details
- Enter the region desired to deploy the EJBCA Cloud host to.
- Enter a Virtual Machine name. This will be the hostname for the VM as well as the default value for the DNS name unless changed later.
- Choose a username for the virtual machine.
- Enter the Admin Username that will be allowed to SSH into the EJBCA Cloud Instance.
- Select the Authentication Type, either Password or SSH public key.
- If using password, enter it twice. Password must be at least 12 characters long and have 3 out of the following: one number, one lower case, one upper case, or one special character.
- If entering an SSH key, copy and paste an RSA public key in the single-line format (starting with "ssh-rsa") or the multi-line PEM format. You can generate SSH keys using ssh-keygen on Linux and OS X, or PuTTYGen on Windows.
- Select the IP Range that will be allowed to connect to this instance. For a single IP use a /32, for example, 1.2.3.4/32.
- Click Next: Virtual Machine Settings.

Step 3 - Virtual Machine Settings
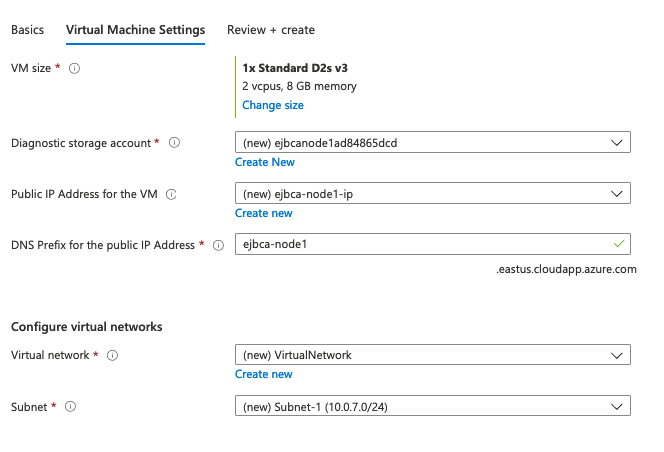
- The default VM size is a 2 Core 8GB RAM virtual machine. To change the size, click Change size.
- Some default recommended sizes are shown. To see more options, click Clear all filters. The prices Azure charges will be shown as well as the resources available for those virtual machines. These charges are separate from the PrimeKey licensing charges associated with the marketplace. Once the desired virtual machine is chosen, click Select, and then click OK.
- Select the Storage Account to be created for this deployment. This can generally be left to default.
- Select if a Public IP is desired to be added to this deployment. If no Public IP is chosen (None), you must have direct access to the subnet chosen for deployment so the web interface of EJBCA can be accessed after deployment.

If changes to the Public IP address are required, click Create new. This will allow for changes to be made to the type of IP including the Basic or Standard SKU as well as a Dynamic or Static IP assignment. For more information on Azure Public IP address types and options, refer to the Azure Public IP documentation on Public IP addresses. Once completed click OK.
- Select the DNS Prefix to be used in DNS. This will be populated with the value used in the Virtual Machine Name field in the previous section. This value can be changed to something unique within the Azure ecosystem since this value is in public DNS. The deployment template will check for its uniqueness and give an error if the entry is already used.

Configure Virtual Networks
The following describes specifying Virtual Network Settings.
- The deployment template will create a new virtual network by default. If desired, select an existing virtual network from the list.
- Select Subnets and optionally change the subnet to use for deployment. The subnet list will show the subnets in the virtual network chosen if an existing one is used.

- Once done, Click Next: Summary
Step 4 - Summary
The system now runs a final validation to verify your settings as well as the resource allocations you selected.

Once the Validation passes, click OK.
Step 5 - Terms of Use
Accept the terms of use to proceed and click Create.

Step 6 - Deployment
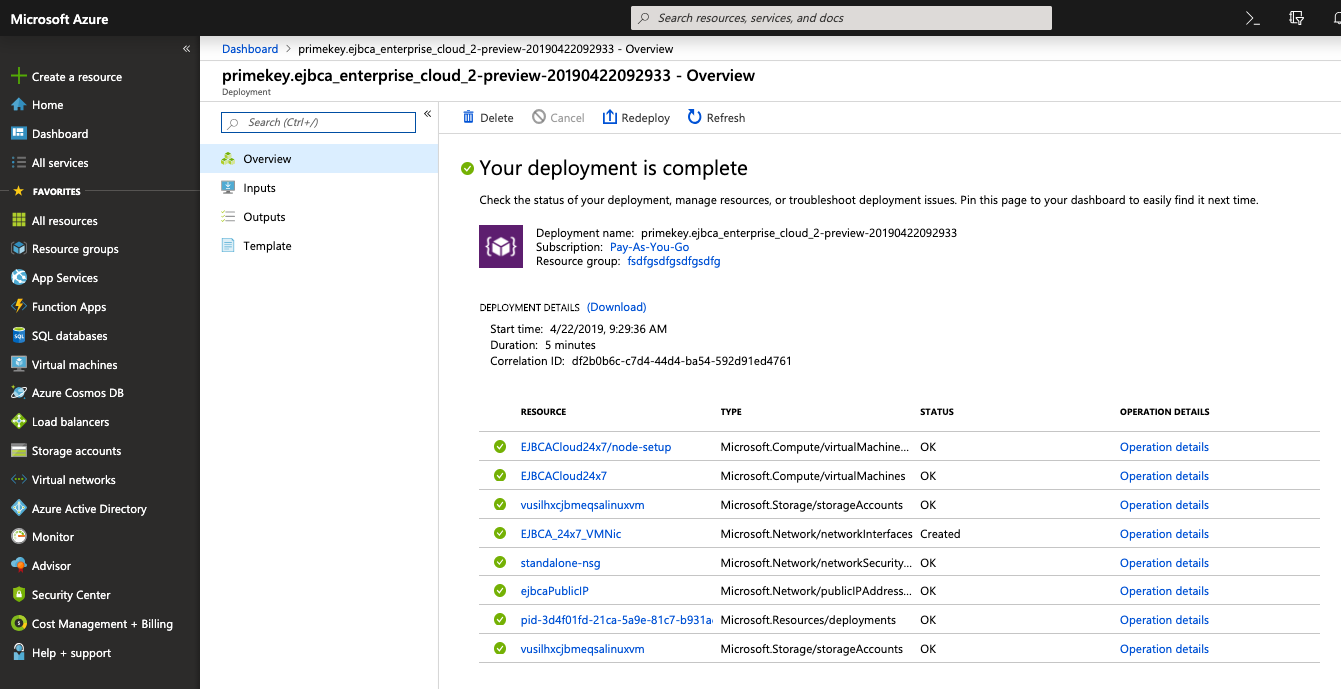
The deployment begins. Once you see Deployment in progress, select the link to view the details of the deployment.

Wait for the details of the deployment to appear. The typical deployment takes about 7-8 minutes in the Microsoft Azure environment.

Wait until all of the deployed resources are green. Within a few minutes after this, the instance should be available on the public IP deployed to the host.

Wait for the instance to boot within Azure. Once booted, the Configuration Wizard can be started, see Configure via EJBCA Cloud Configuration Wizard in Azure.