The following describes the required steps to update to the latest version of the Software Appliance.

Prepare Update

If the Software Appliance runs in a cluster, you must ensure that the individual nodes are updated in the correct order. For more information see: Cluster Update.


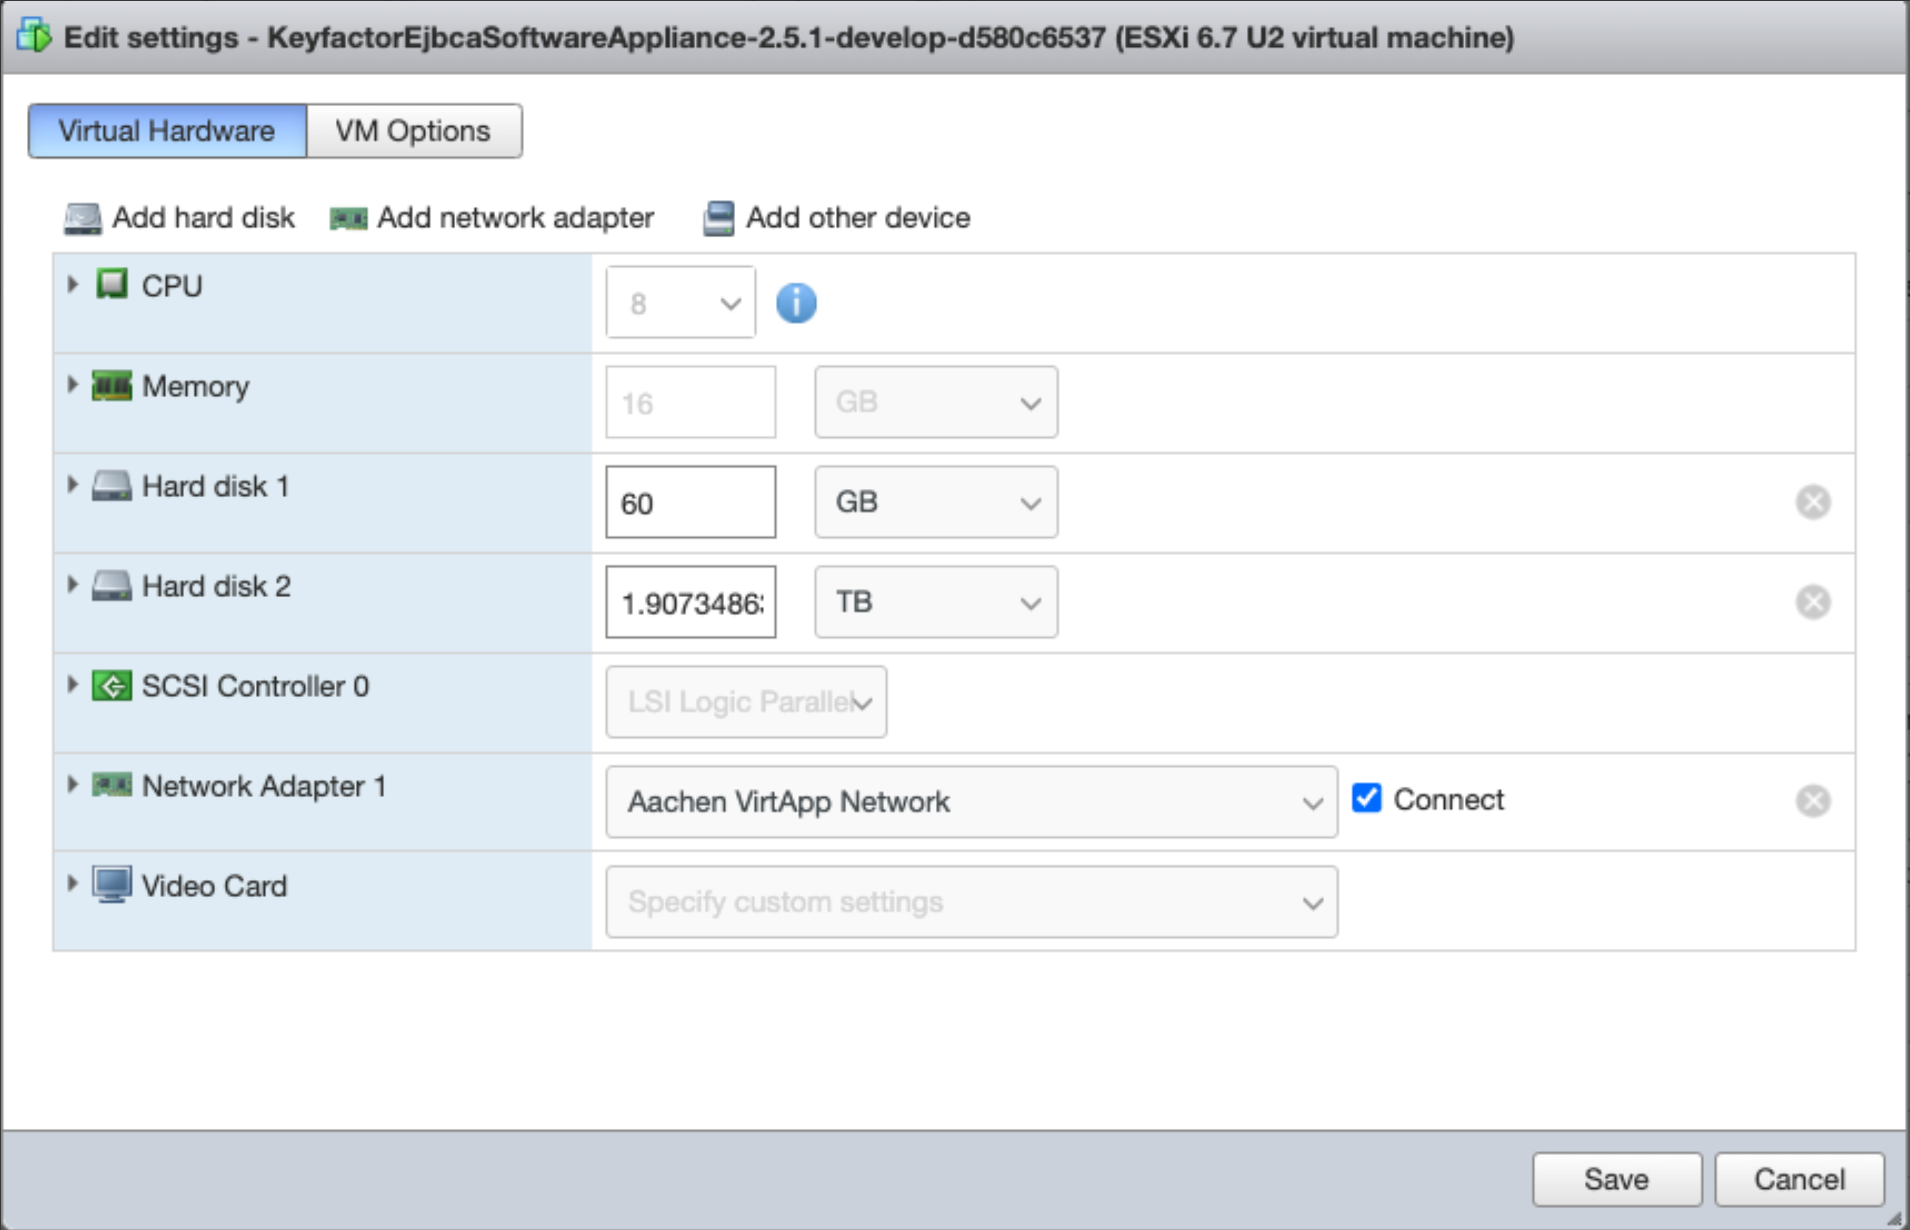
In the Hardware Configuration overview of the ESXi the Hard disk 1 and Hard disk 2 are listed. During the update processes, it is possible that the given names may change. For orientation, it is helpful to know that the firmware disk is always the disk with the smaller disk volume. Usually about 60 GB.


To prepare the update with a new VM and the new Version of the Software Appliance:

  1. Log in to vmware ESXi.
  2. Install/Import the new version of the Software Appliance, e.g. 2.5.1 on the newly created VM. Detailed instructions can be found at Installation Instructions for new VM on ESXi.
  3. Make sure that the new VM is turned Off.
  4. Click Edit.
  5. Write down or copy the firmware disk to a new location (we will use this firmware later).

To remove the old firmware from the current VM that is to be updated:

  1. Power Off the VM.
  2. Click Edit.
  3. In the overview of the Virtual Hardware click on Hard disk 1.


    Since we want to update the firmware, we have to search for the disk.vmdk. In our example, the firmware disk (disk.vmdk) is located on Hard disk 1.
    Disk File: disk.vmdk is the firmware disk.
    Disk File: disk-1.vmdk is the data disk.


  4. To remove the old firmware disk, click the cross sign (X) on the right side of the line Hard disk 1.

Connect the new firmware with your current VM that is to be updated:

  1. Click on Add hard disk at the top left and select Existing hard disk.


  2. A window then opens. Search for the newly created VM with the latest Software Appliance version.
  3. Select disk.vmdk, the firmware disk (i.e. take the new firmware copied earlier).
  4. Save the configuration and wait a few minutes until the VM is completely reconfigured.

Finalize the Update

To complete the update:

  1. Log in to ESXi.
  2. Click Virtual Machines and select VM with the freshly updated Software Appliance.
  3. Click Power on.

Update from Version 2.0.0:

A new IP address will be assigned to your Software Appliance on the first startup. You can change the IP address in the Network Configuration.