Enrolling Chrome OS Devices against EJBCA
The following sections describe how to install and configure the Google Cloud Certificate Connector to set up Chrome OS devices to automatically enroll for certificates from EJBCA.
Introduction
Chrome OS is an operating system based on Chromium (with Google Chrome as its primary UI) which is the default operating system on devices such as Chromebooks, Chromeboxes, Chromebases, and similar devices. To allow these devices to access the network, ensure internal network security and other PKI use cases, Chrome OS can be easily set up to automatically enroll for certificates from EJBCA over the SCEP protocol.
This scenario requires three parties:
Google Cloud Certificate Connector is a service installed on a third device that acts as an enrollment and administration portal for the enrolling Chrome OS devices.
EJBCA Configuration
Before you install and configure the Google Cloud Certificate Connector, you should have installed EJBCA and configured a CA that you would like to enroll against. The following sections outline the relevant settings of the Certificate Profile, End Entity Profile, and SCEP Alias.
Certificate Profile
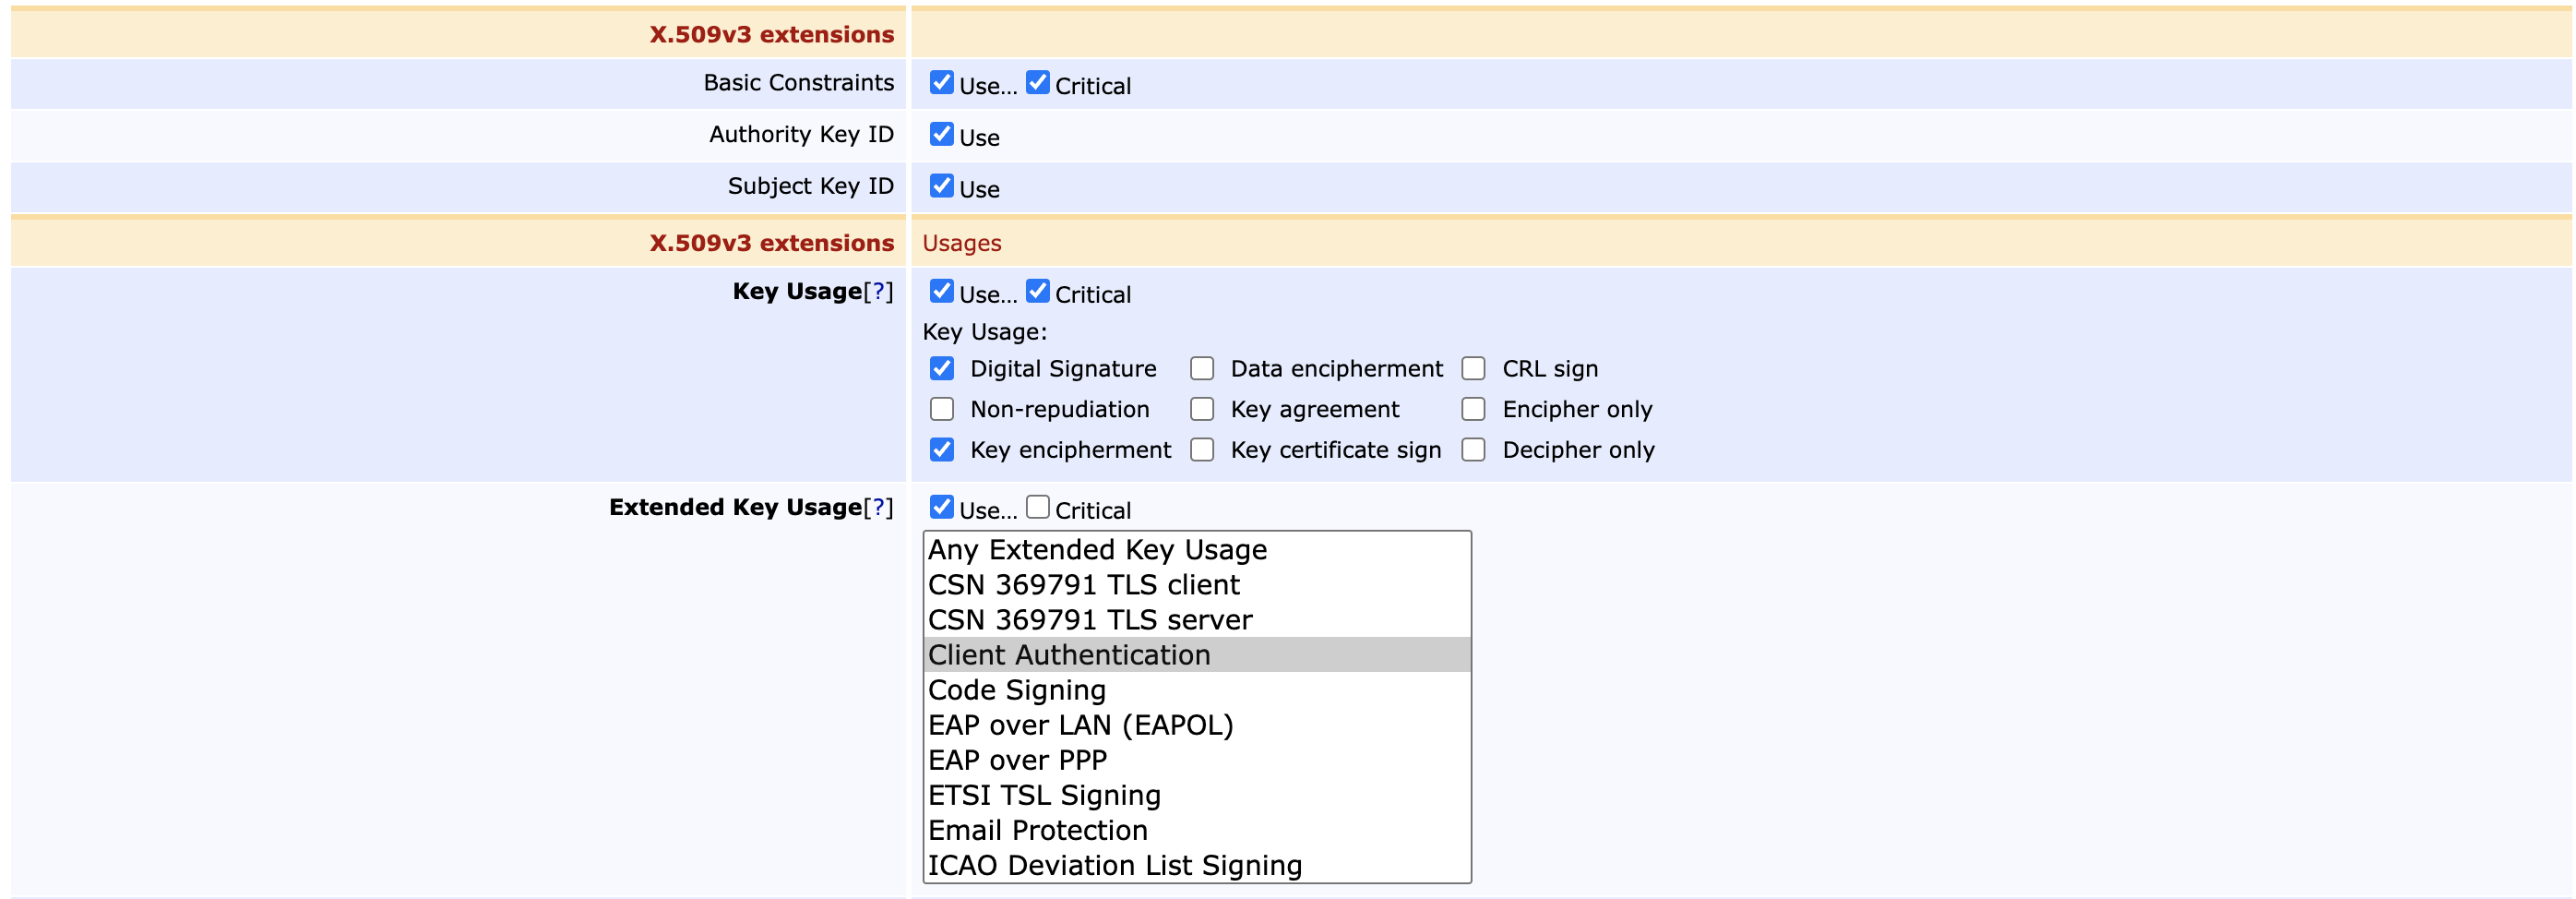
Ensure that the following relevant fields are set in the Certificate Profile (EJBCA CA Functions > Certificate Profiles):
- Authority Key ID: Use
- Subject Key ID: Use
- Key Usage: Digital Signature.
- Extended Key Usage: Client Authentication.
For more information on Certificate Profiles, see Managing Certificate Profiles.
End Entity Profile
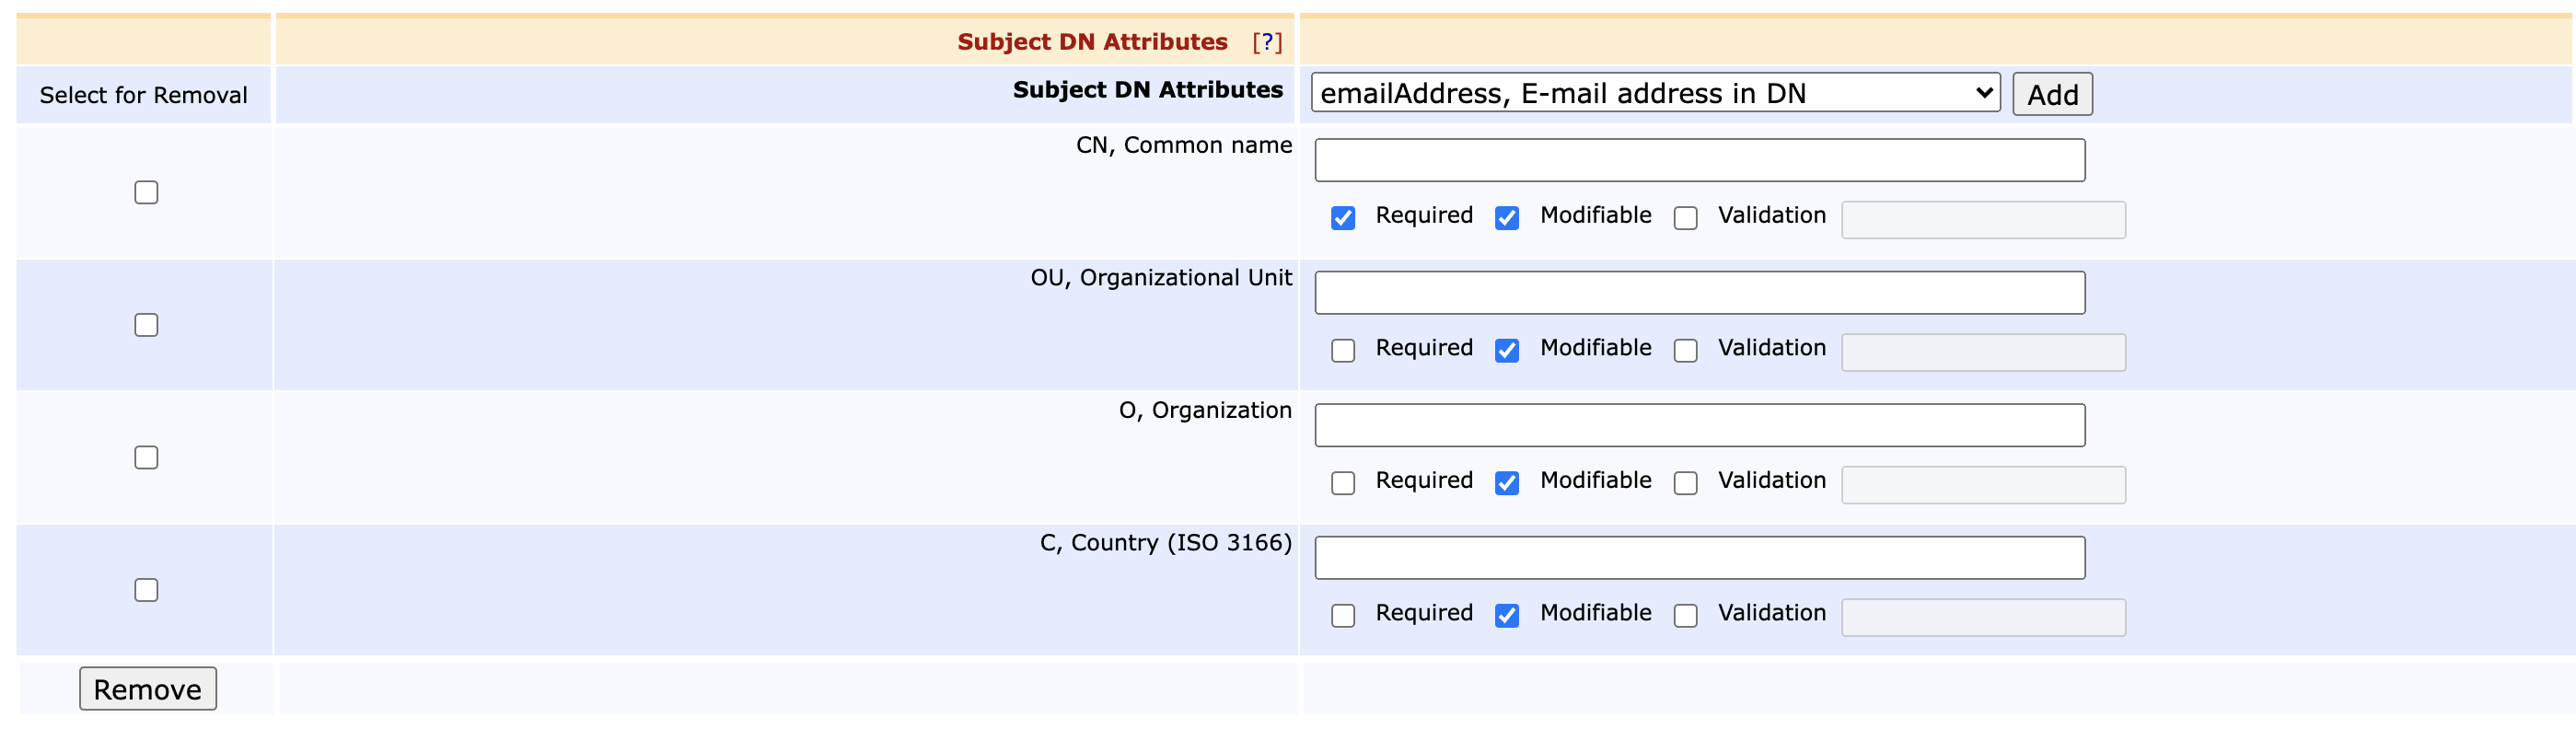
Ensure that the following Subject DN Attributes and Subject Alternative Names values are available in the End Entity profile (EJBCA RA Functions > End Entity Profiles):
Subject DN Attributes
- Common Name (CN)
- Organizational Unit (OU)
- Organization (O)
- Country (C)
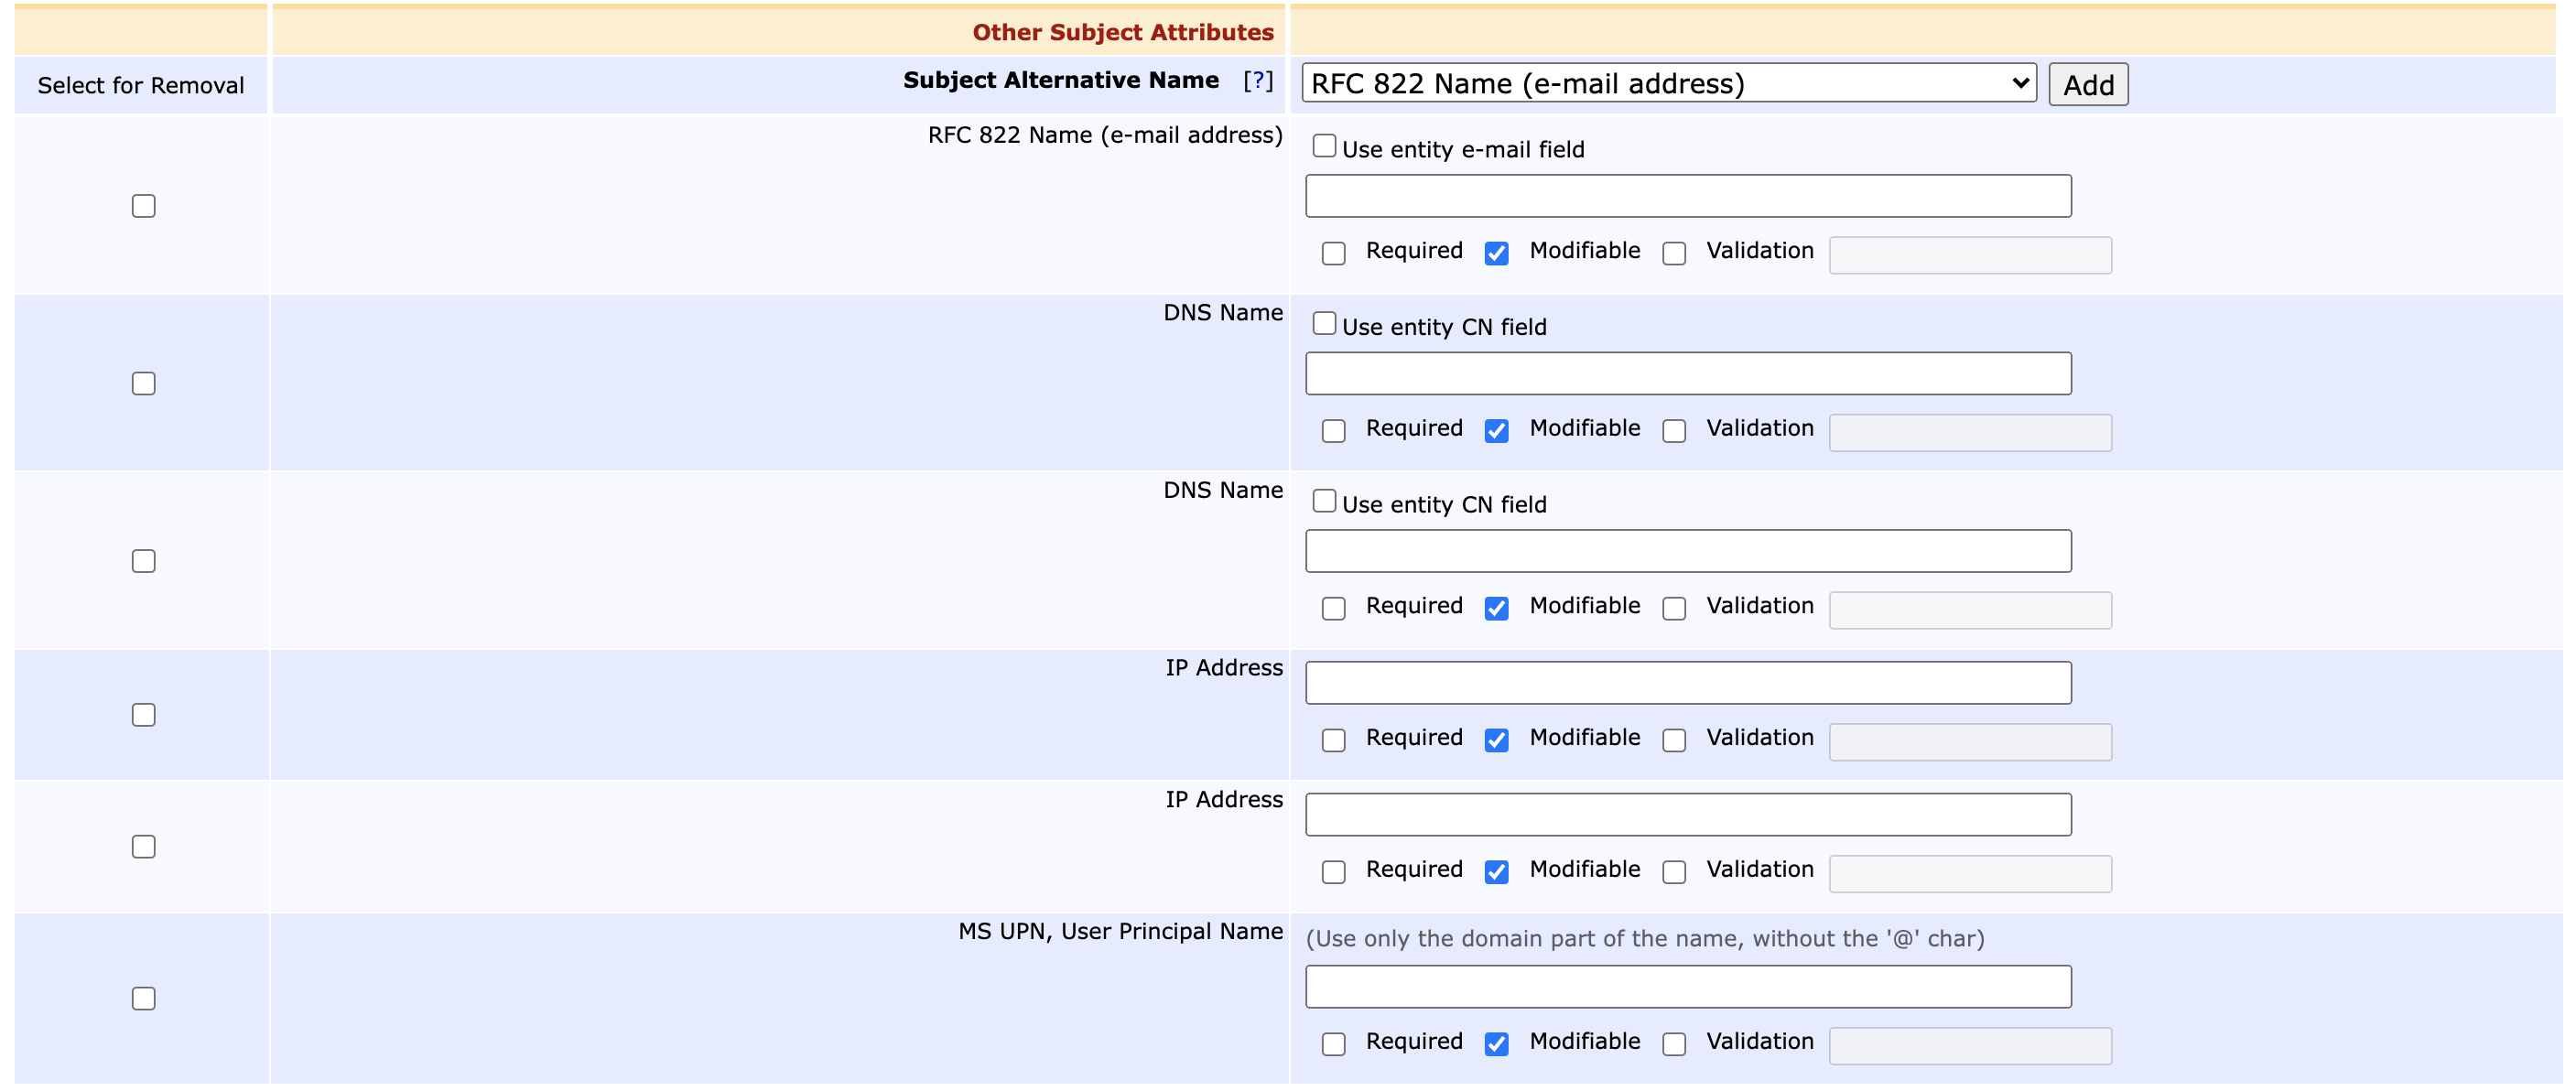
Subject Alternative Name (SAN)
- RFC 822 Name (e-mail address)
- DNS Name
- IP Adress
- MS User Principal Name (UPN)
For more information on End Entity Profile settings, see End Entity Profile Operations.
SCEP Alias
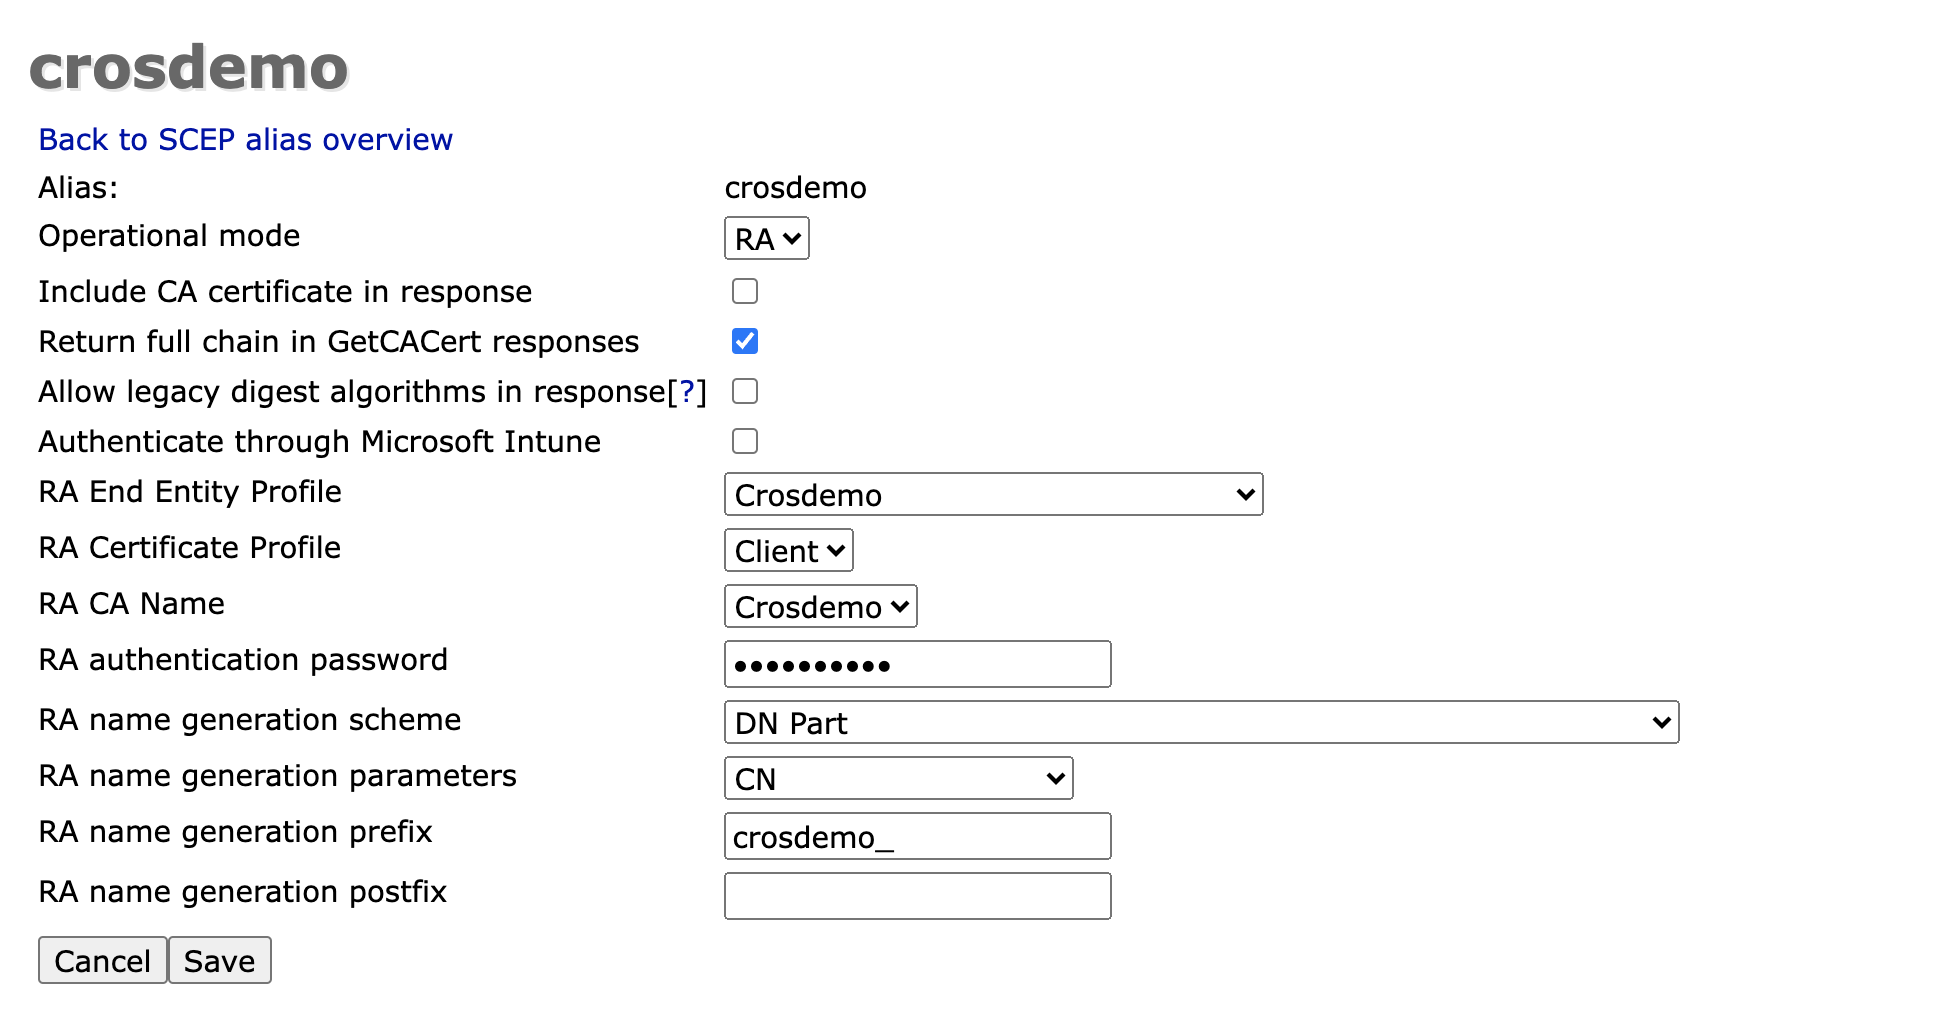
Lastly, ensure that the SCEP alias is set up as follows (EJBCA System Configuration > SCEP Configuration):
For more information on Configuring SCEP, see SCEP Operations Guide.
Google Cloud Certificate Connector
The following describes how to install and configure the Google Cloud Certificate Connector.
Step 1 - Install the Google Cloud Certificate Connector
The Google Cloud Certificate Connector is downloaded when first setting up your Google Cloud account, as documented in the Google Help page Set up certificates for managed mobile devices. The Connector needs to be installed on a Microsoft Windows Server.
To install the Google Cloud Certificate Connector, perform the following steps:
- Create an Active Directory service account user which will run the Google Cloud Certificate Connector. This account must have a static password.
- Connect to the Google Admin console with an administrator account
- Under Devices > Networks, click Secure SCEP connector.
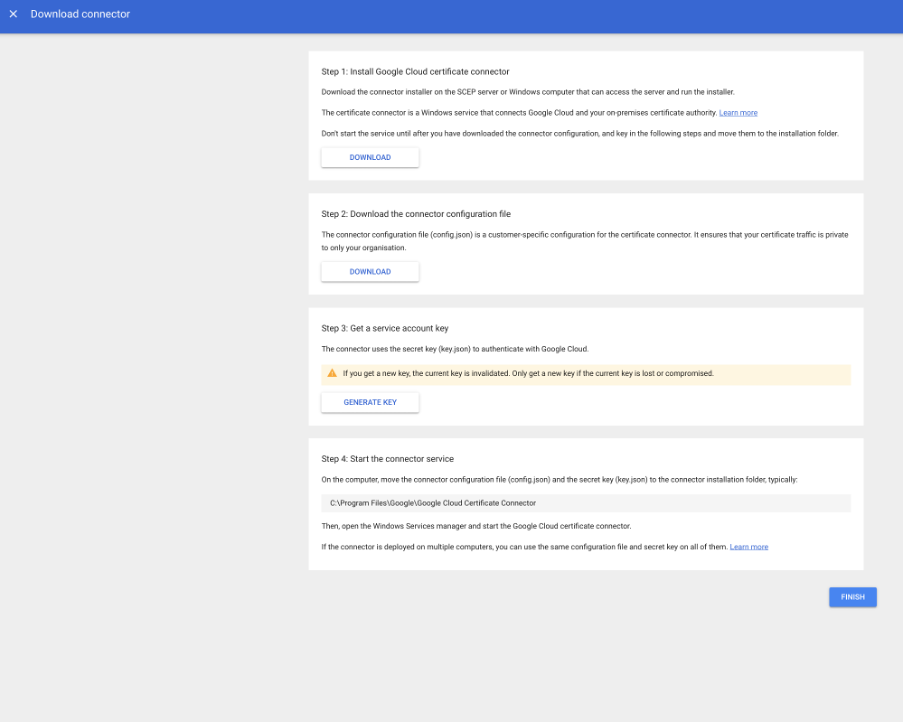
- The download connector page gives you access to:
- The Connector Executable.
- The connector configuration JSON file (config.json).
- The service account credentials JSON file (key.json).
- Copy all the files downloaded to the server hosting the Google Cloud Certificate Connector.
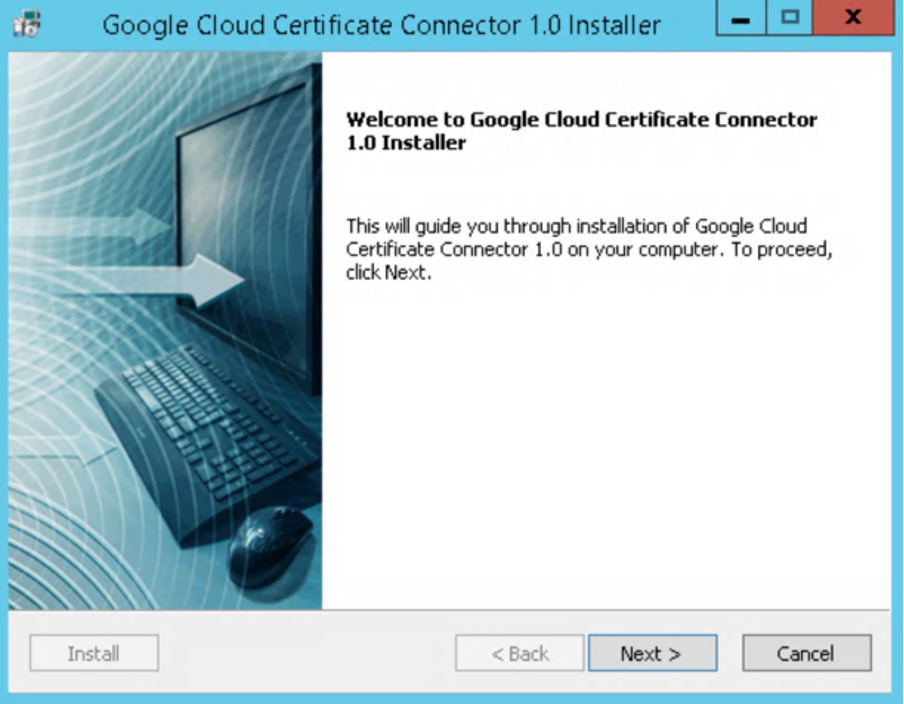
- Run the Google Cloud Certificate Connector installer as an Administrator.
- In the Google Cloud Certificate Connector Installer wizard, click Next.
- Accept the terms of the license agreement and click Next.
- Choose to install the service for Anyone who uses this computer and click Next.
- Select the installation location. Google recommends using the default. Click Next.
- Select a program folder, in this example Google Cloud Certificate Connector, and click Next.
- Enter your AD service account credentials and click Next.
 The connector cannot be installed with a non-domain account.
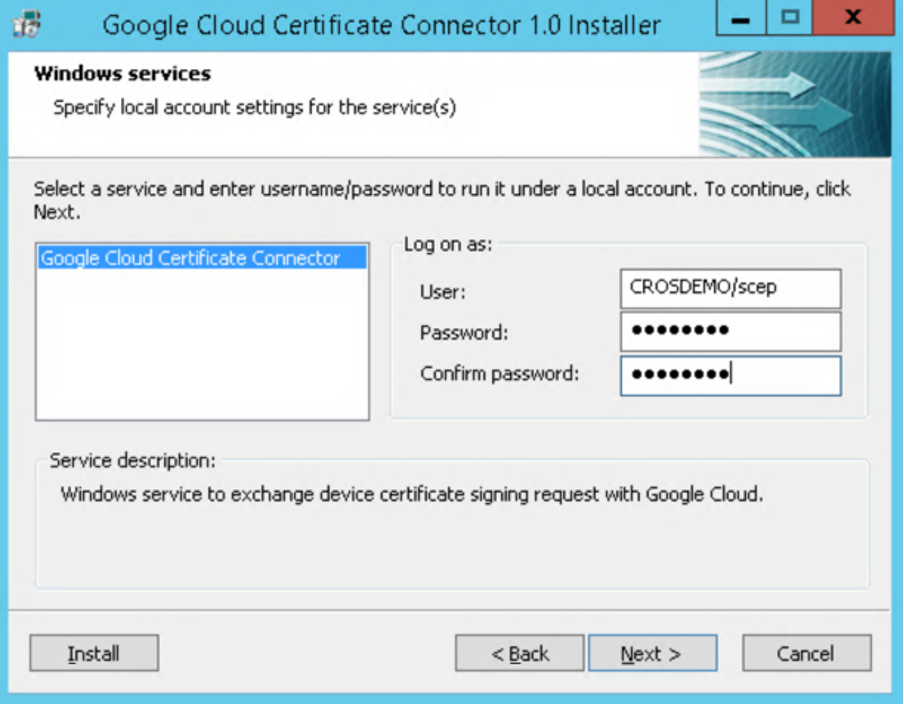
- View the settings and click Next to begin the installation.
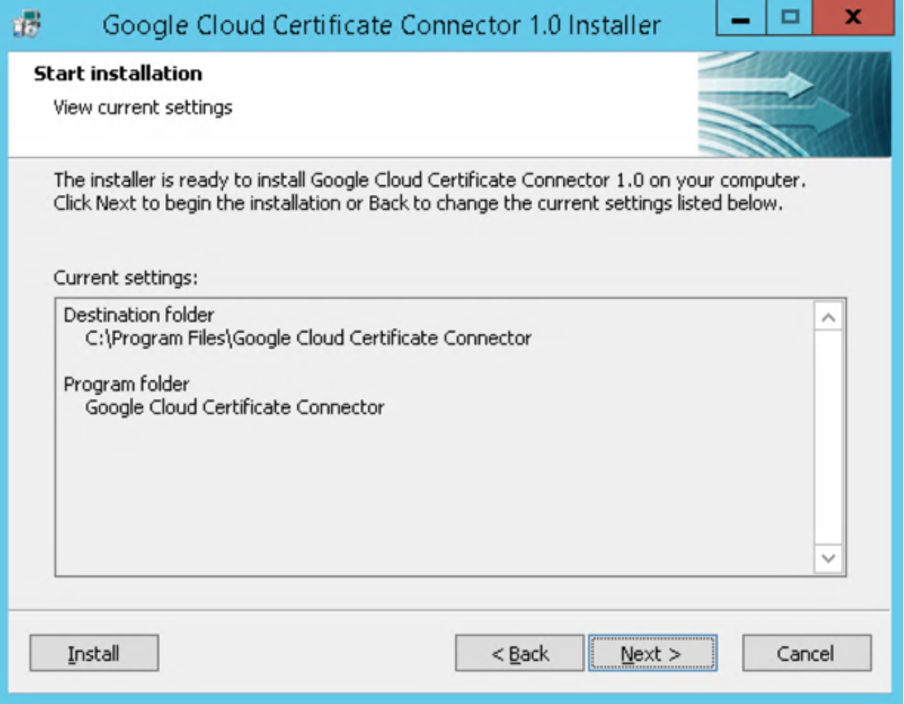
- The Connector installs.
Step 2 - Configure the Google Cloud Certificate Connector
To configure the Google Cloud Certificate Connector, perform the following steps:
Put the connector configuration JSON file (config.json) and the service account credentials JSON file (key.json) in the Google Cloud Certificate Connector folder created during installation, typically:
C:\Program Files\Google Cloud Certificate Connector.- For the SSL handshake between the Google Cloud Certificate Connector and EJBCA to work, EJBCA's Management CA certificate needs to be added to the CA store of the Google Cloud Certificate Connector:
- Locate the CA store of the Google Cloud Certificate Connector. The default location is:
C:\Program Files\Google Cloud Certificate Connector\rt\lib\security\cacerts. - Next, either install a Java SDK on the Google Cloud Certificate Connector server or copy the
cacertsfile to a computer where a Java SDK is installed. Add the Management CA certificate using the keytool utility:
keytool.exe -import -keystore ./cacerts -trustcacerts -file <ManagementCA.pem> -storepass changeitPOWERSHELL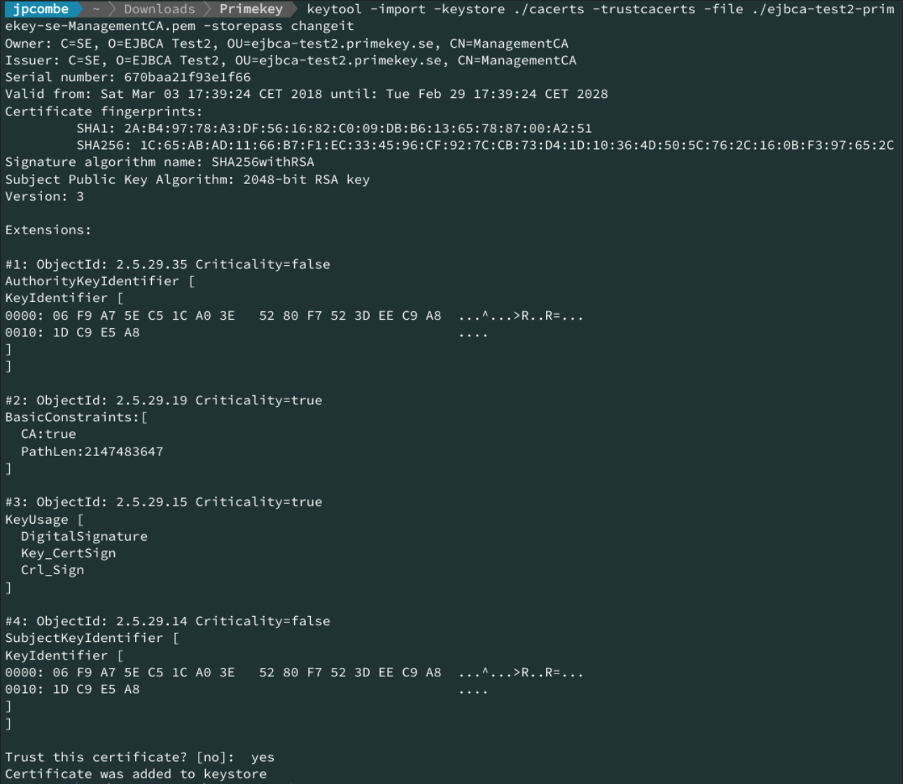
- If keytool was not run on the server itself, copy the
cacertsfile back to the Google Cloud Certificate Connector server. Default location:C:\Program Files\Google Cloud Certificate Connector\rt\lib\security.
- Locate the CA store of the Google Cloud Certificate Connector. The default location is:
- Start the Google Cloud Certificate Connector service.
- Ensure that everything is properly started in the event viewer according to the following:
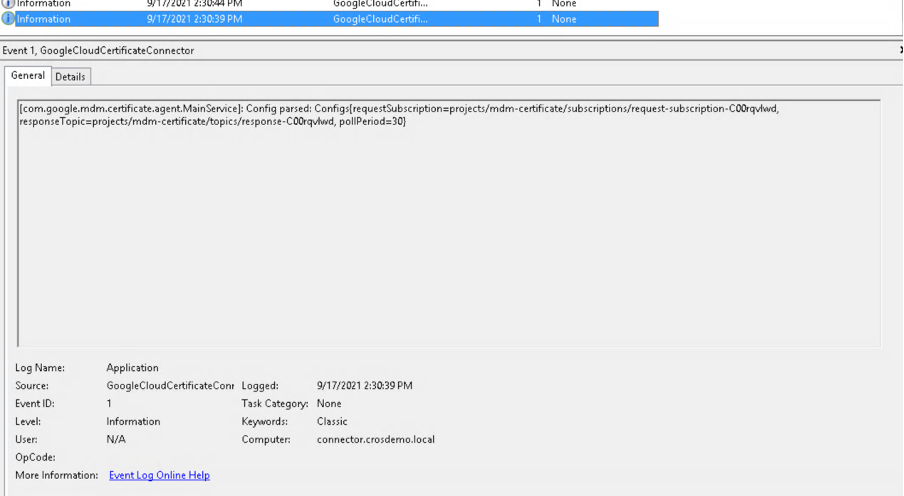
- The Google Cloud Certificate Connector is able to parse its configuration:
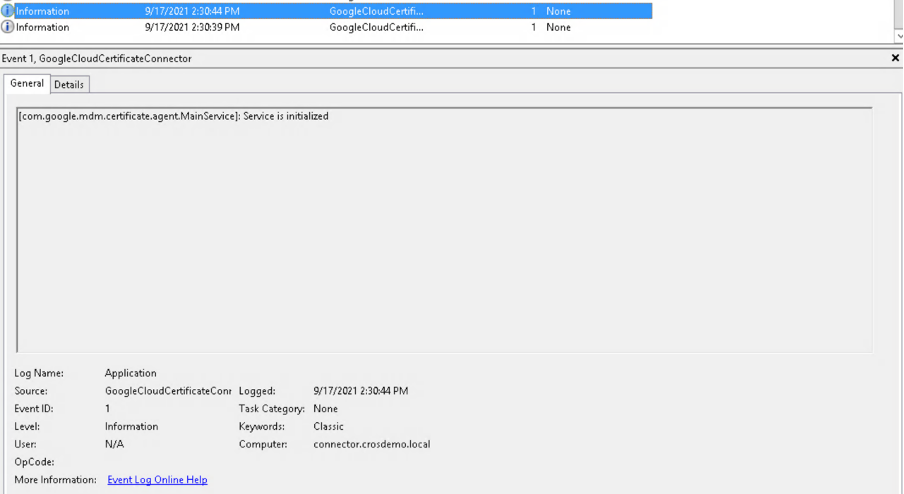
- Initialize the service.
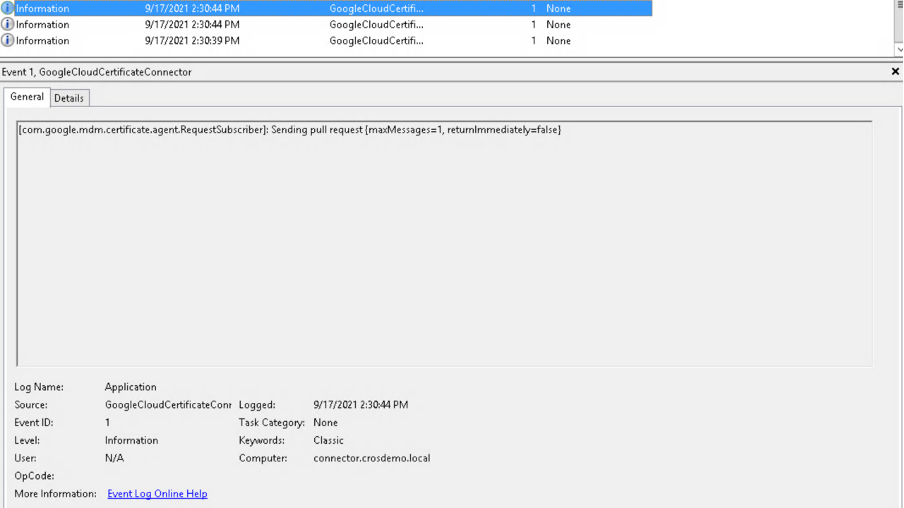
- Every 30 seconds the service will check against the Google backend if there are any requests to process.
- The Google Cloud Certificate Connector is able to parse its configuration:
Step 3 - Add your CA to Google Cloud
To add your own CA certificate to Google Cloud, do the following:
- Connect to the Google Admin console with an administrator account.
- Under Devices > Networks > Certificates, click Add certificate. This should be done at the root of the Google domain or for Chromebooks root OU
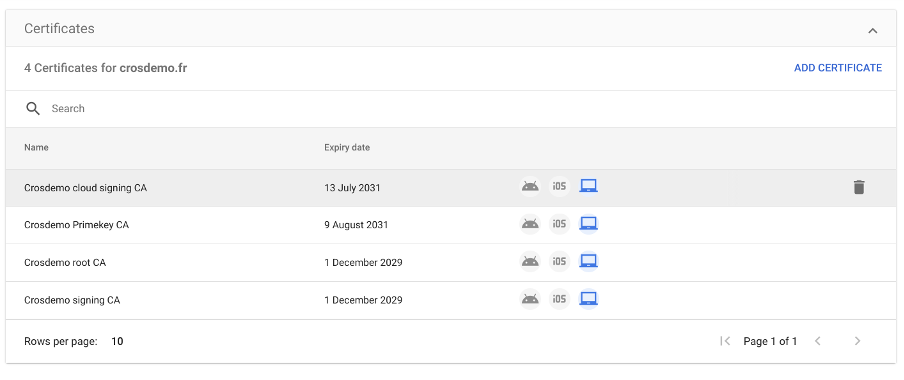
- Provide a name for the CA, or otherwise, the common name of the issuer will be used). Then upload the CA certificate in PEM format and choose to deploy on Chromebooks.
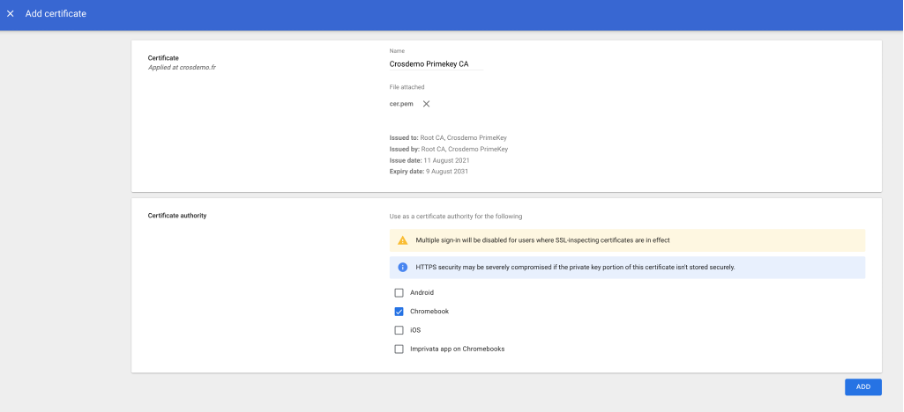
- Click Add to add the CA certificate.
Step 4 - Configure the SCEP Profile
To add and configure a secure SCEP profile in the Google Admin console, do the following_
- Connect to the Google Admin console with an administrator account.
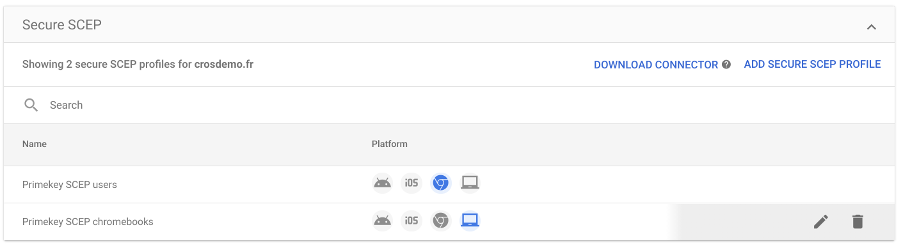
- Under Devices > Networks > Secure SCEP connector, select Add Secure SCEP Profile. This can be done at the root domain level, at Chromebooks root OU in case of device certificates, or Users root OU in case of user certificates.
- Specify a SCEP profile name, Subject name format, and Key size.
 The following example is focused on issuing device certificates, but can easily be adapted for user certificates:
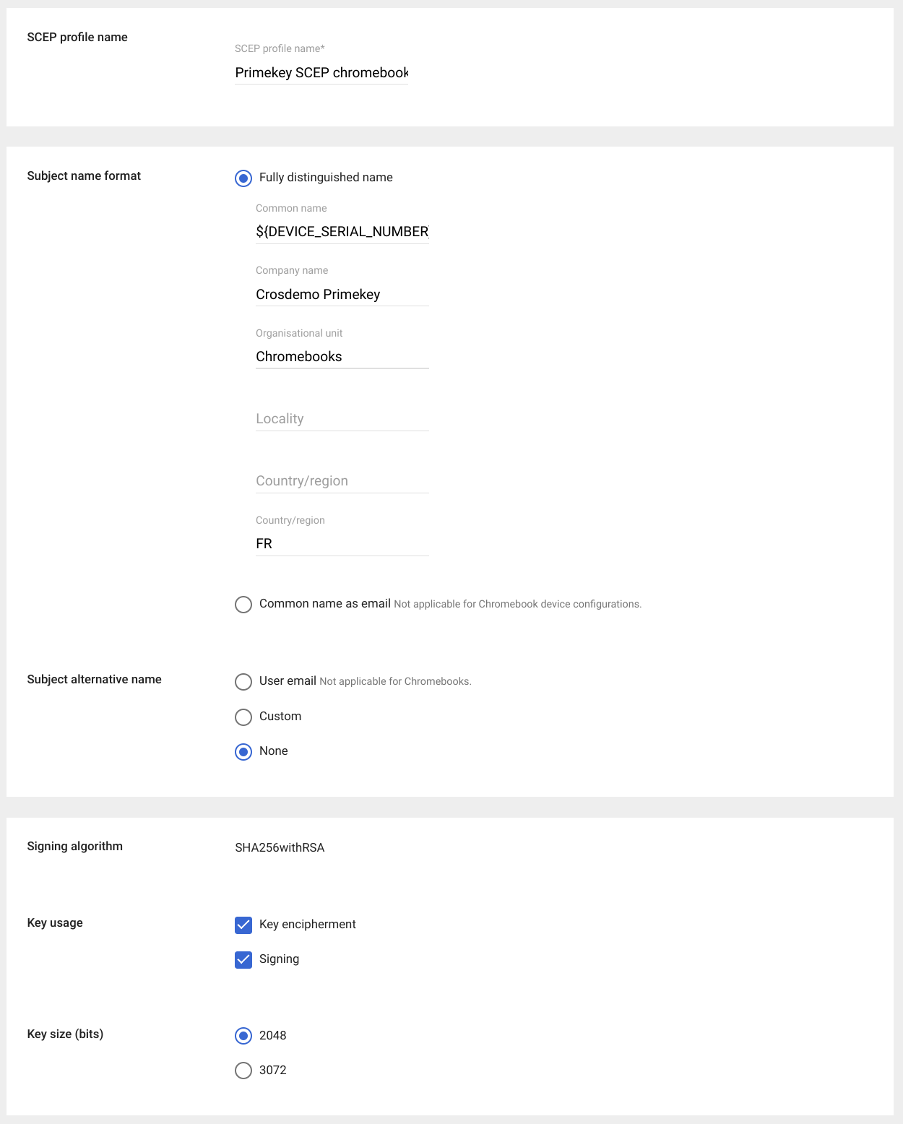 ¨
¨
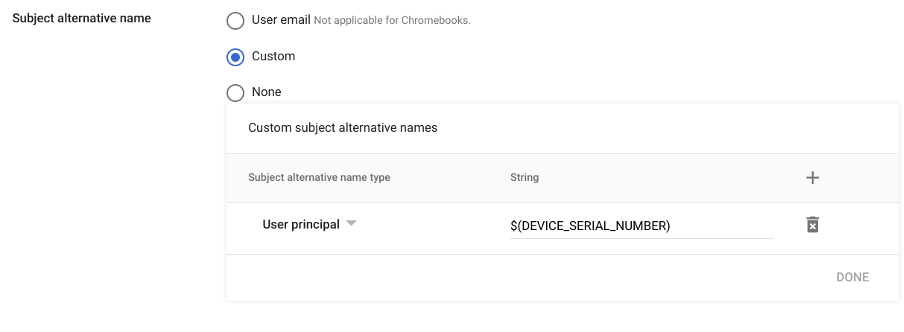
CSR subject fields are defined in the SCEP profile. Placeholder variables can be used in order to customize the CSR to the need. For available placeholder variables, refer to the Google Help article Set up digital certificate provisioning. - If needed, Subject alternative names (SANs) can also be added:
- Configure the following:
- SCEP server URL: The URL of the SCEP server should look something like:
https://<hostname>:<port>/ejbca/publicweb/apply/scep/<alias>/pkiclient.exe. - Certificate characteristics.
- Challenge type: The static challenge (pass-phrase) used to authenticate the request coming from the Google Cloud Certificate Connector on the SCEP server and the corresponding certificate authority.
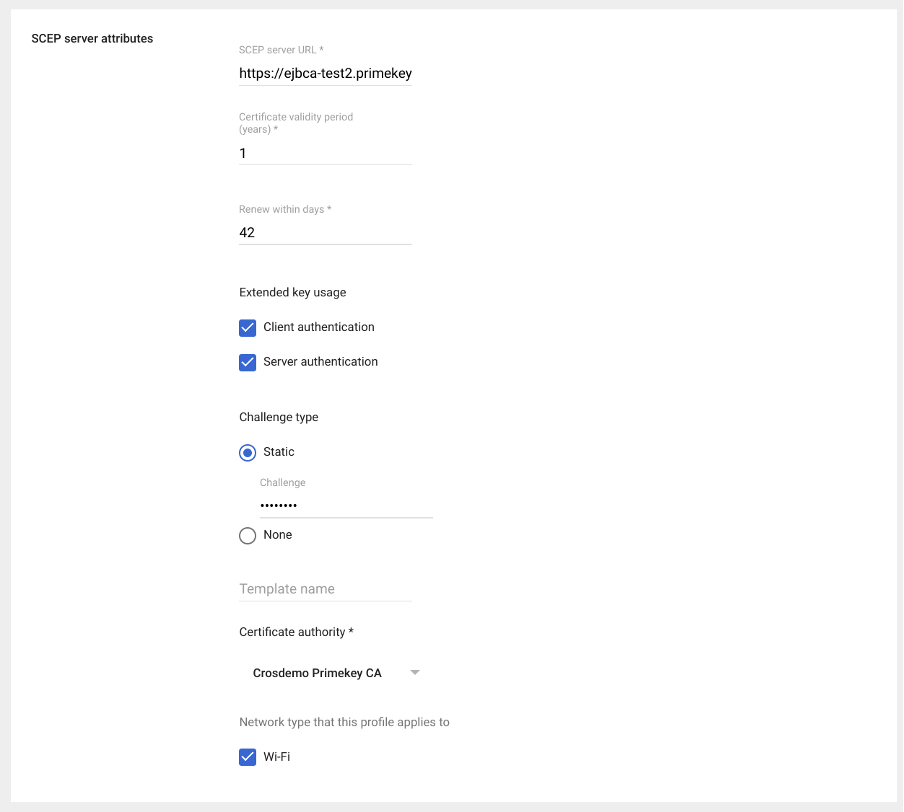
- SCEP server URL: The URL of the SCEP server should look something like:
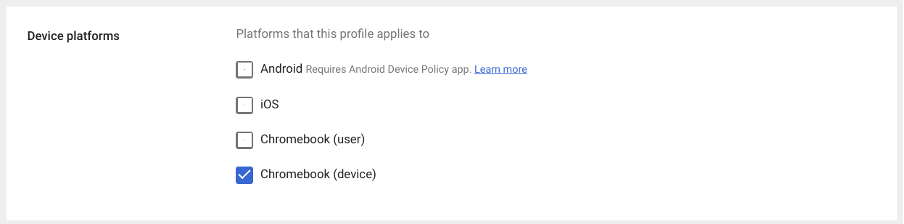
- Configure how this template should be applied on Chromebooks, per user or per device:
Click Save to add the profile.
The added SCEP profile is listed with its name and the platforms it is enabled on. In the Platform column, the profile is enabled for platforms with blue icons and disabled for platforms with grey icons.
You have now completed the steps for configuring the Google Cloud Certificate Connector and can continue to test the setup in the next section.
Test Enrolling a Chrome OS Device
Do the following to follow the certificate creation process and verify that the certificate is properly added to a Chromebook:
- Connect to a user session on a Chromebook.
- Ensure that the device/user gets the policies to create the certificate request in chrome://policy (RequiredClientCertificateForDevice for a device certificate and RequiredClientCertificateForUser for a user certificate).
- Under
chrome://certificate-manager, follow the certificate creation process. - On the Google Cloud Certificate Connector event viewer, look for the following events:
- Processed Requests:
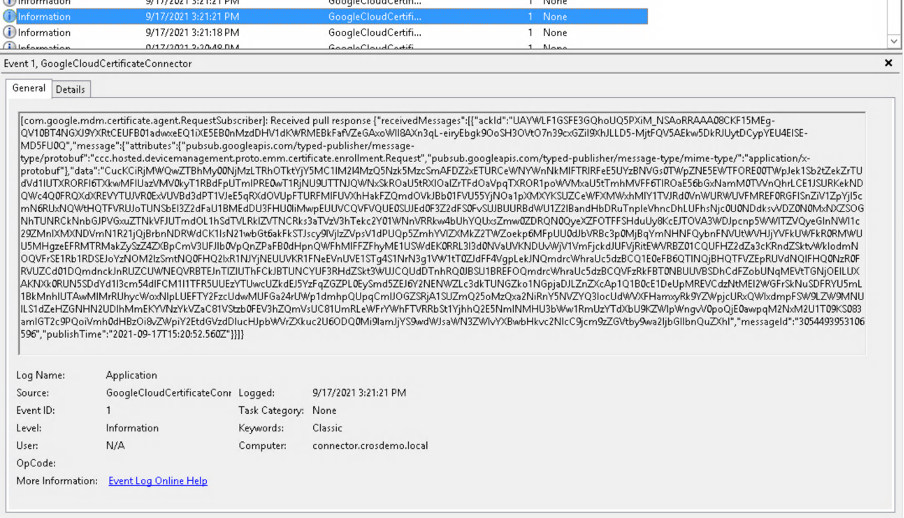
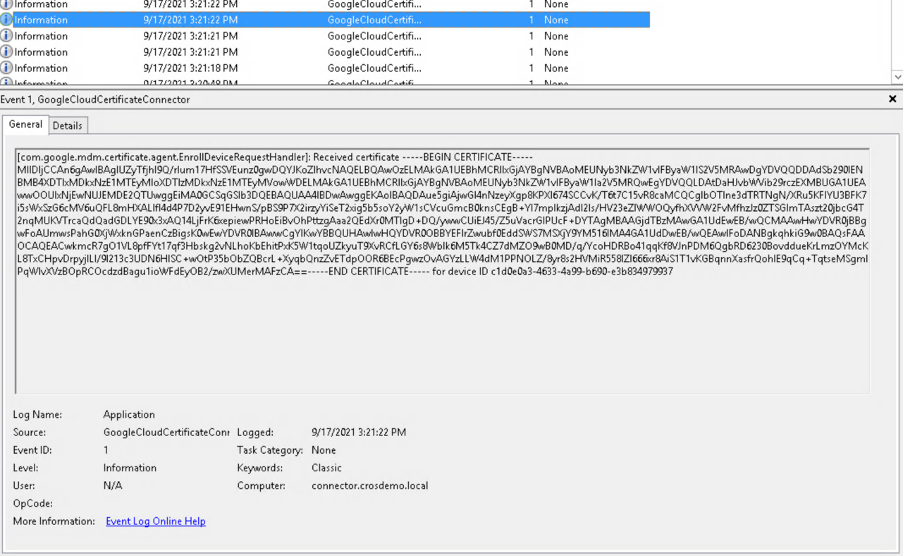
- Google Cloud Certificate Connector submitting the SCEP request to EJBCA and receiving a certificate:
- Acknowledgment (ACK) message between the Connector and the Google backend, pushing certificate to the Chromebook:

- Processed Requests:
- Check that the certificate has been properly added to the Chromebook under
chrome://certificate-manager. - In the case of a device certificate, this process is also triggered just after a device enrollment.