Creating an Issuing CA Signed by an External Root
This page describes a basic workflow for creating an X509 Issuing CA, signed by a Root CA on a different machine.
For more general information on managing CAs, see Managing CAs and for conceptional information, see Certificate Authority Overview.
Create Issuing CA
To create the CA in the EJBCA CA UI, do the following:
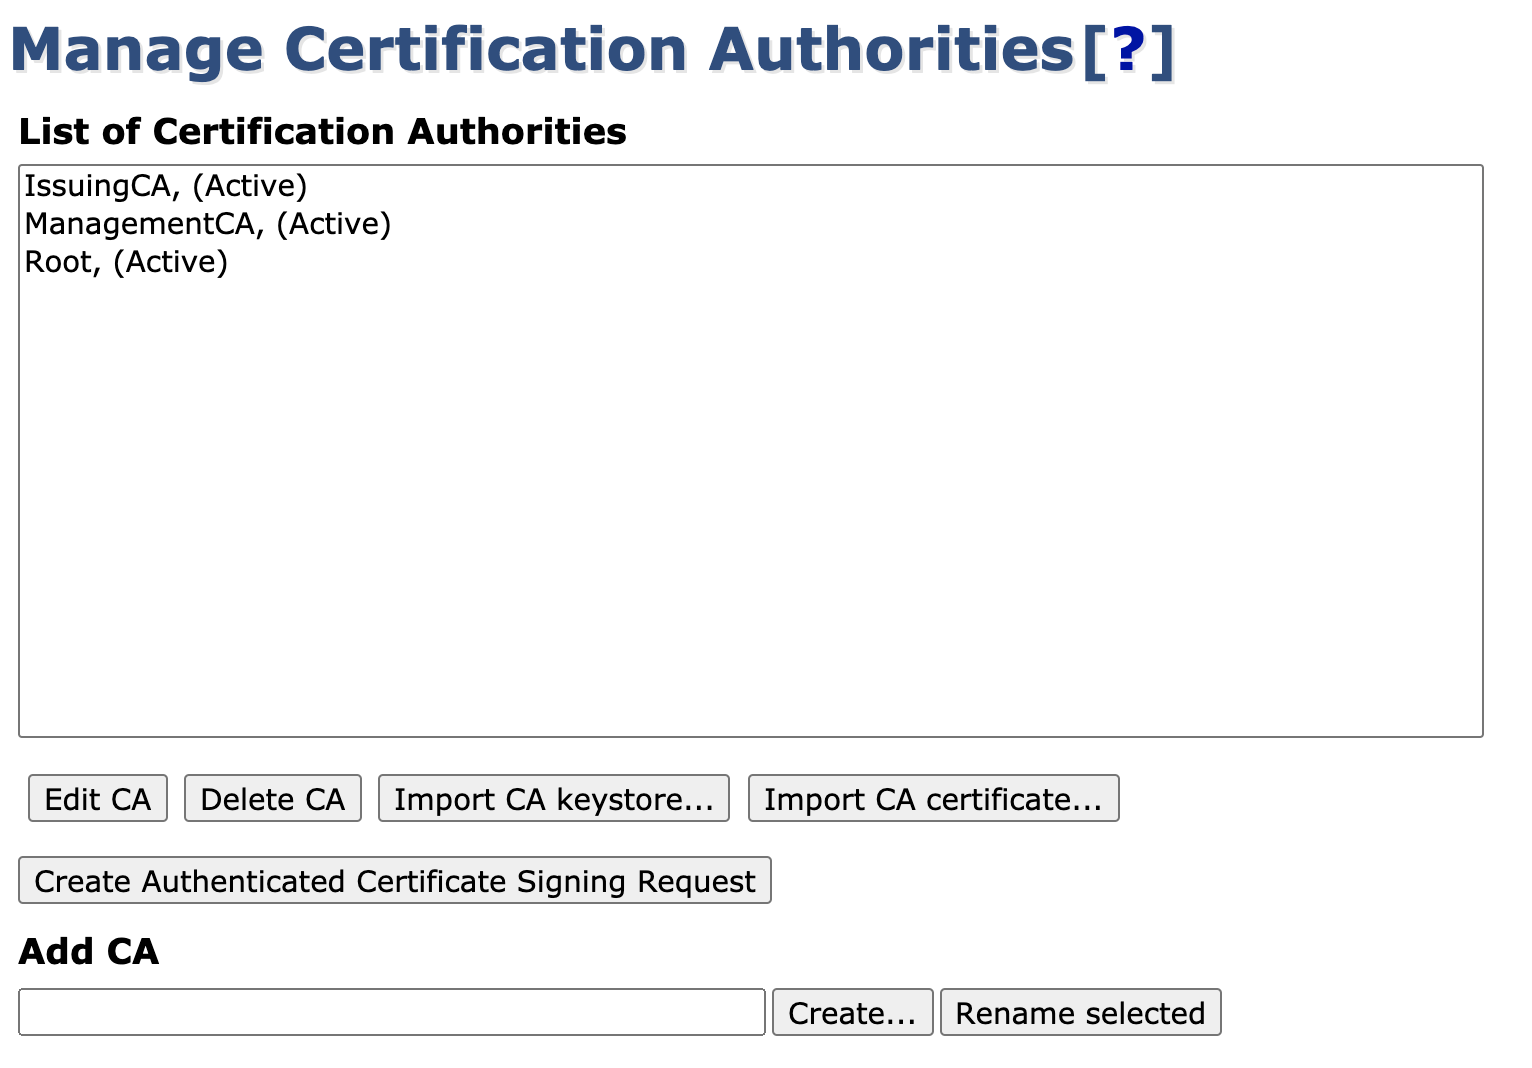
- Click Certification Authorities under CA Functions to open the Manage Certificate Authorities page.
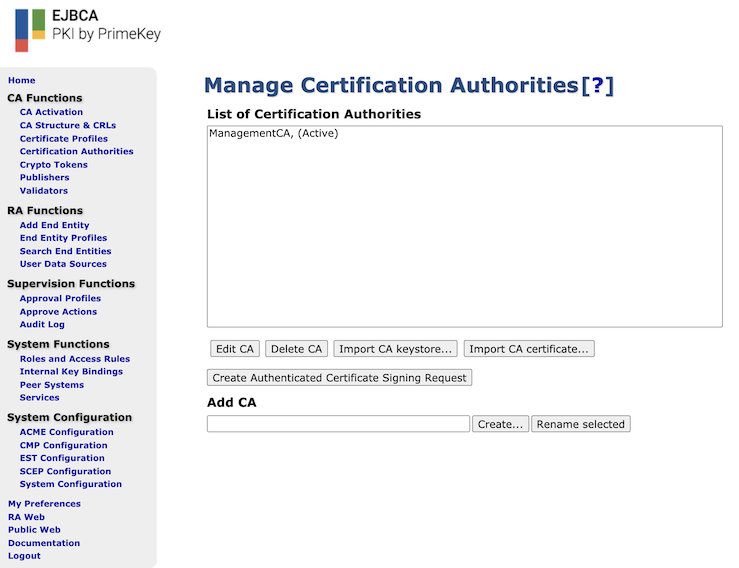
- In the Add CA field, specify a name for the CA and click Create.

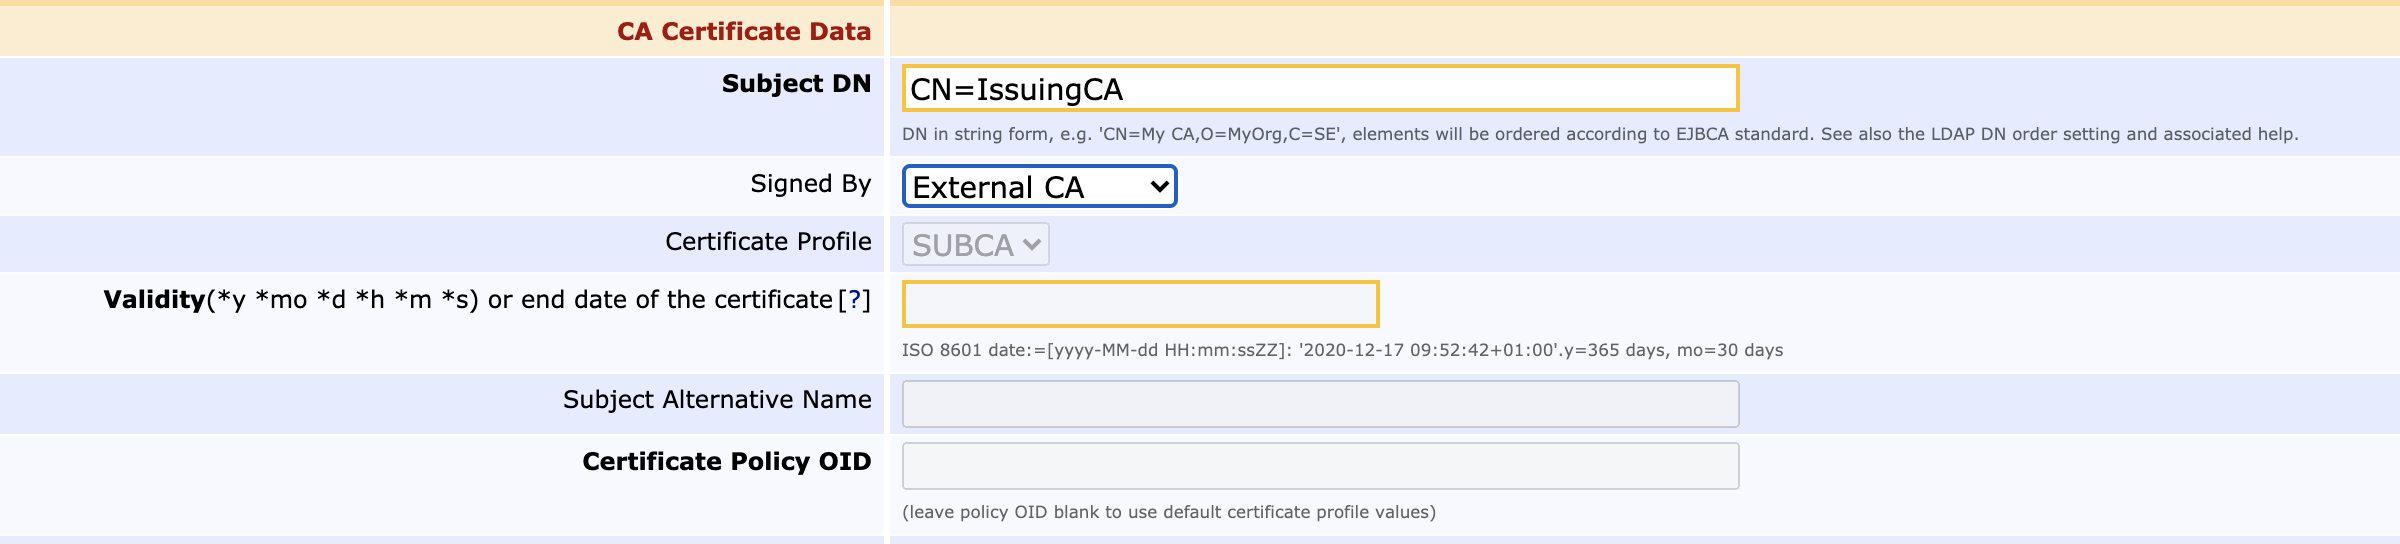
- Next, on the Create CA page, set Subject DN and Issuer:
- Subject DN: Specify the subject DN for the CA.
- Signed by: Select External CA as the signer. Note that the fields for Certificate Profile, Validity, SAN, and Certificate Policy OID are disabled since these values are set by the issuer.
- Optionally configure Approvals/Dual Access Control.
If you want to have several trusted administrators sign off on the issuance of a new CA certificate, configure Approval Profiles in the Approval Settings section.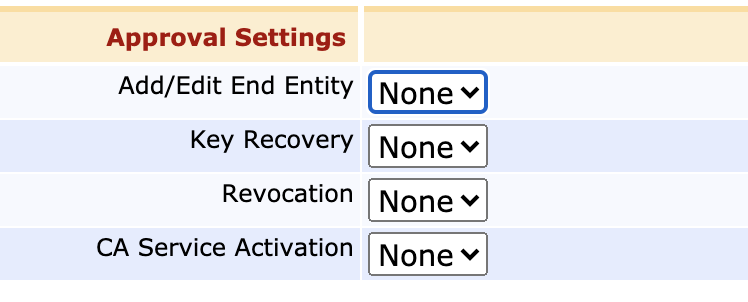
- Next, create a Certificate Signing Request.
As the final step on the Sub CA instance for now, create a Certificate Signing Request (CSR) to the Root CA to get this CA's certificate signed.
If you haven't already added the Root as an external CA, you here have the option to upload the Root's certificate as well. If there is a deeper hierarchy between this CA and the Root, you need to upload the whole chain.
Click Make Certificate Request to generate the CSR, which will allow you to copy it at text, download it in BASE64 format (PEM) or as a binary file (DER).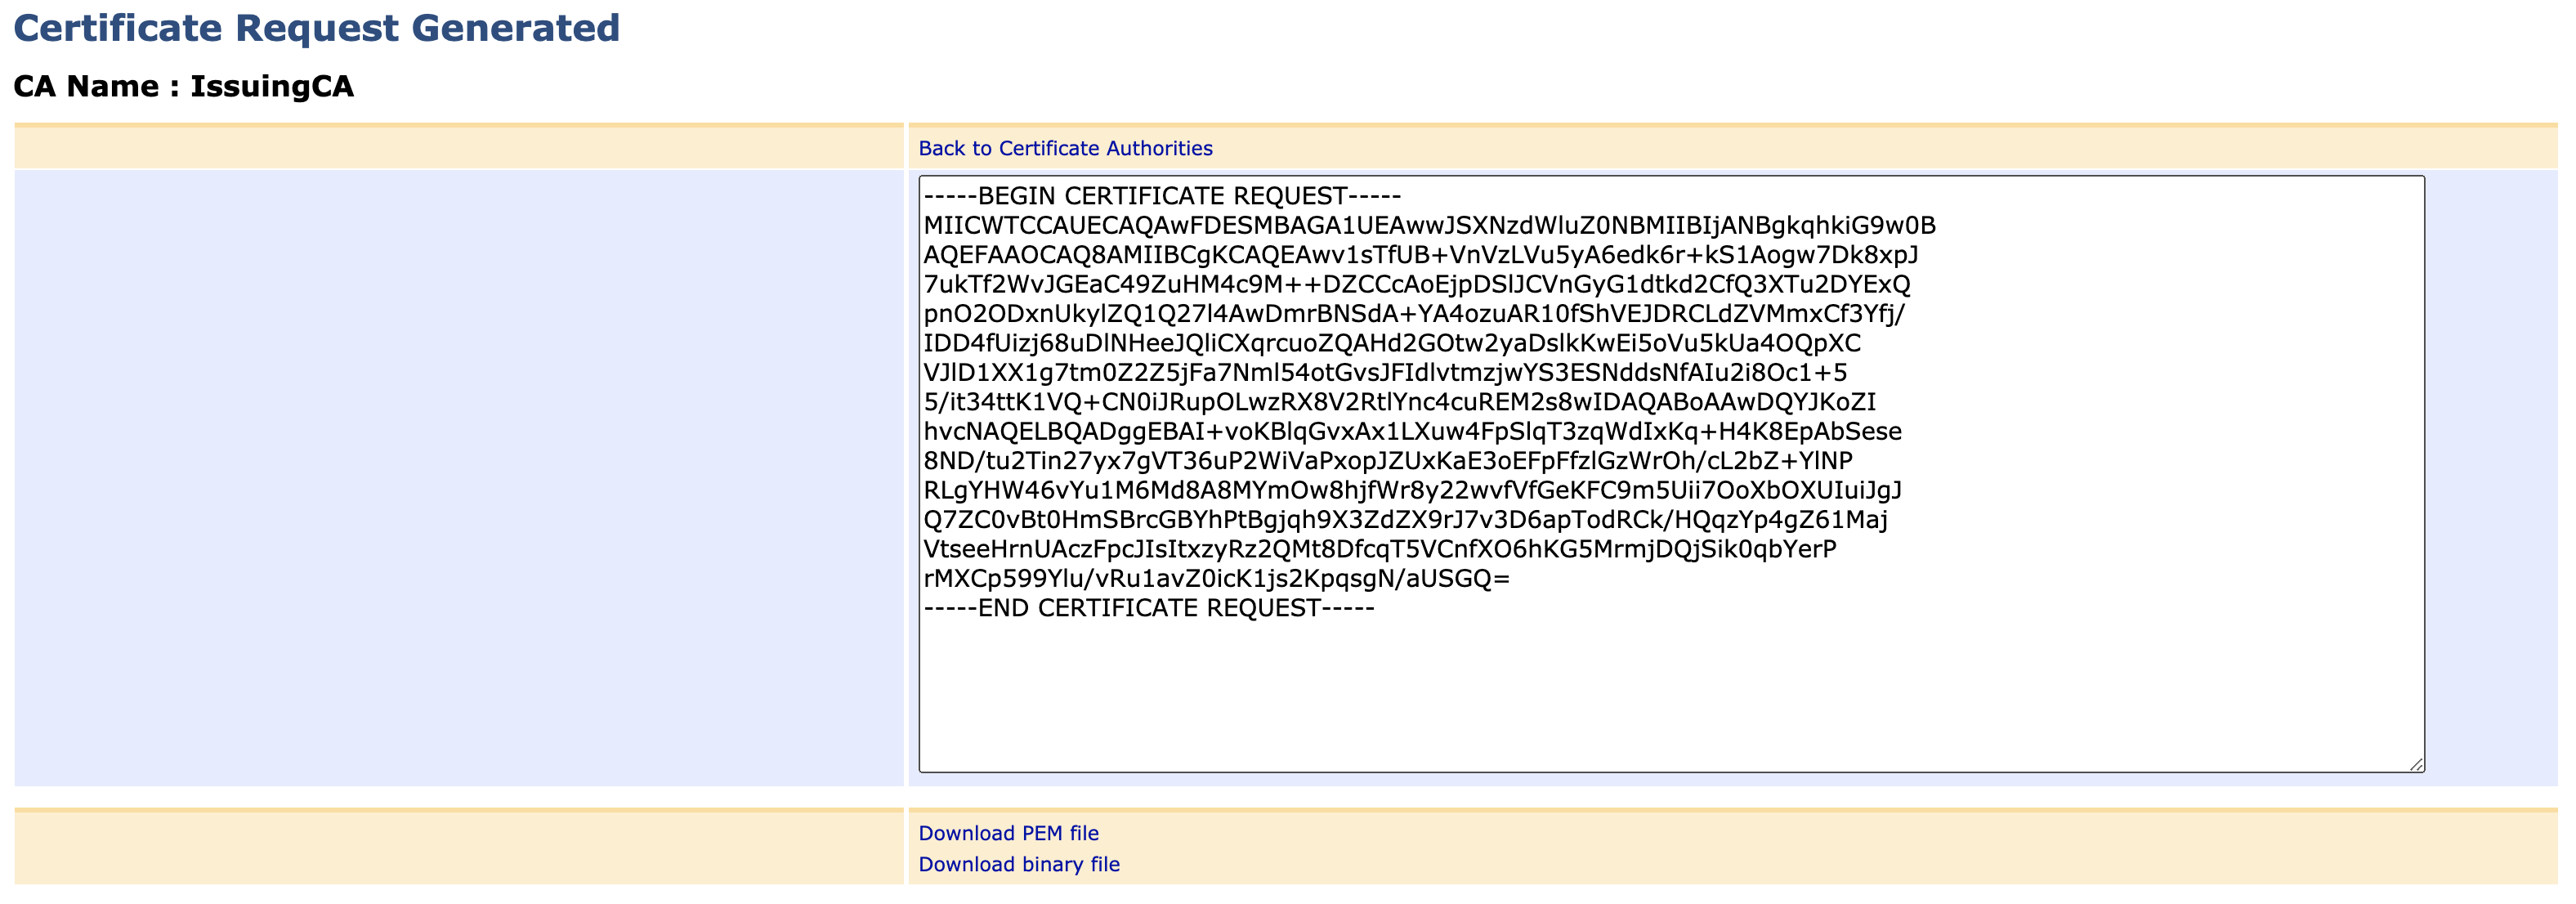
- Click Create at the bottom of the page to finalize the CA.
On the Manage Certificate Authorities page, notice that the Issuing CA is now created and has the status Waiting for Certificate Response, which means that it won't be able to issue certificates, sign CRLs or reply to OCSP requests until the keys have been signed. 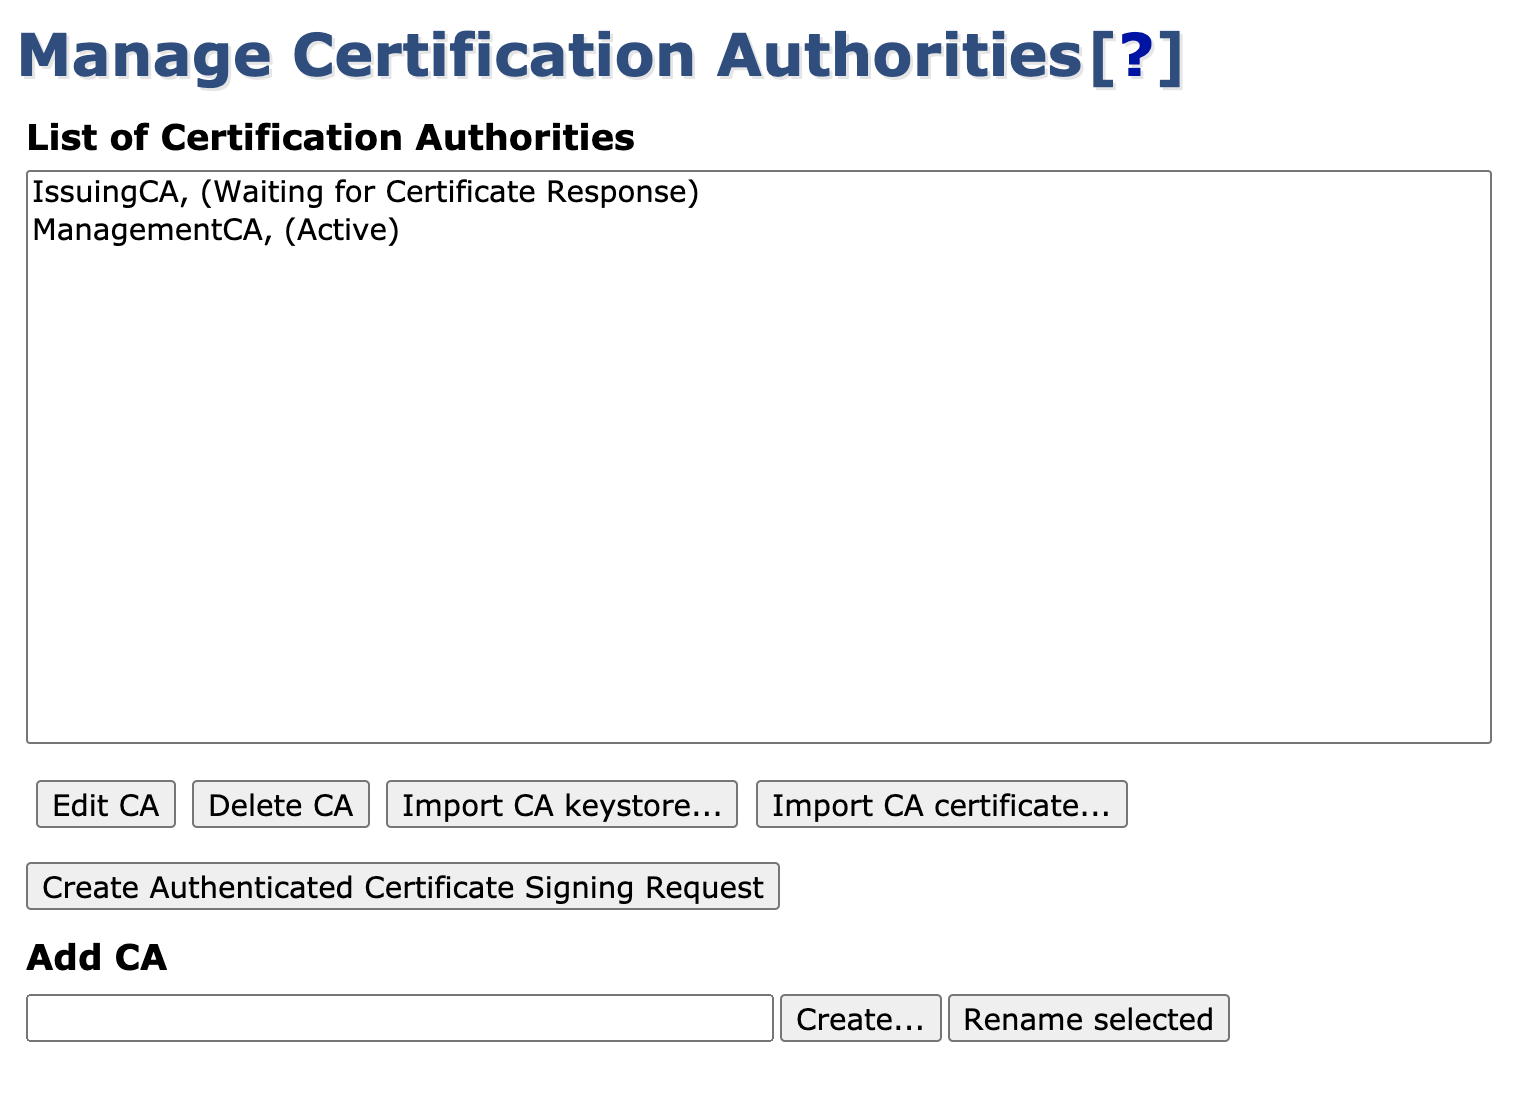
Sign CA Key Pair
Returning to the Root Instance, you will now sign the Issuing CA's key pair by issuing a certificate for it.
The following instructions require the following profiles:
- A certificate profile describing CA certificates. For instructions, see Create a Certificate Profile.
- An end entity profile with all the template values for your CA infrastructure. For instructions, see Create an End Entity Profile.
For more information on the profiles, see Certificate Profiles Operations and End Entity Profiles Operations.
To sign the Issuing CA's key pair by issuing a certificate for it, do the following:
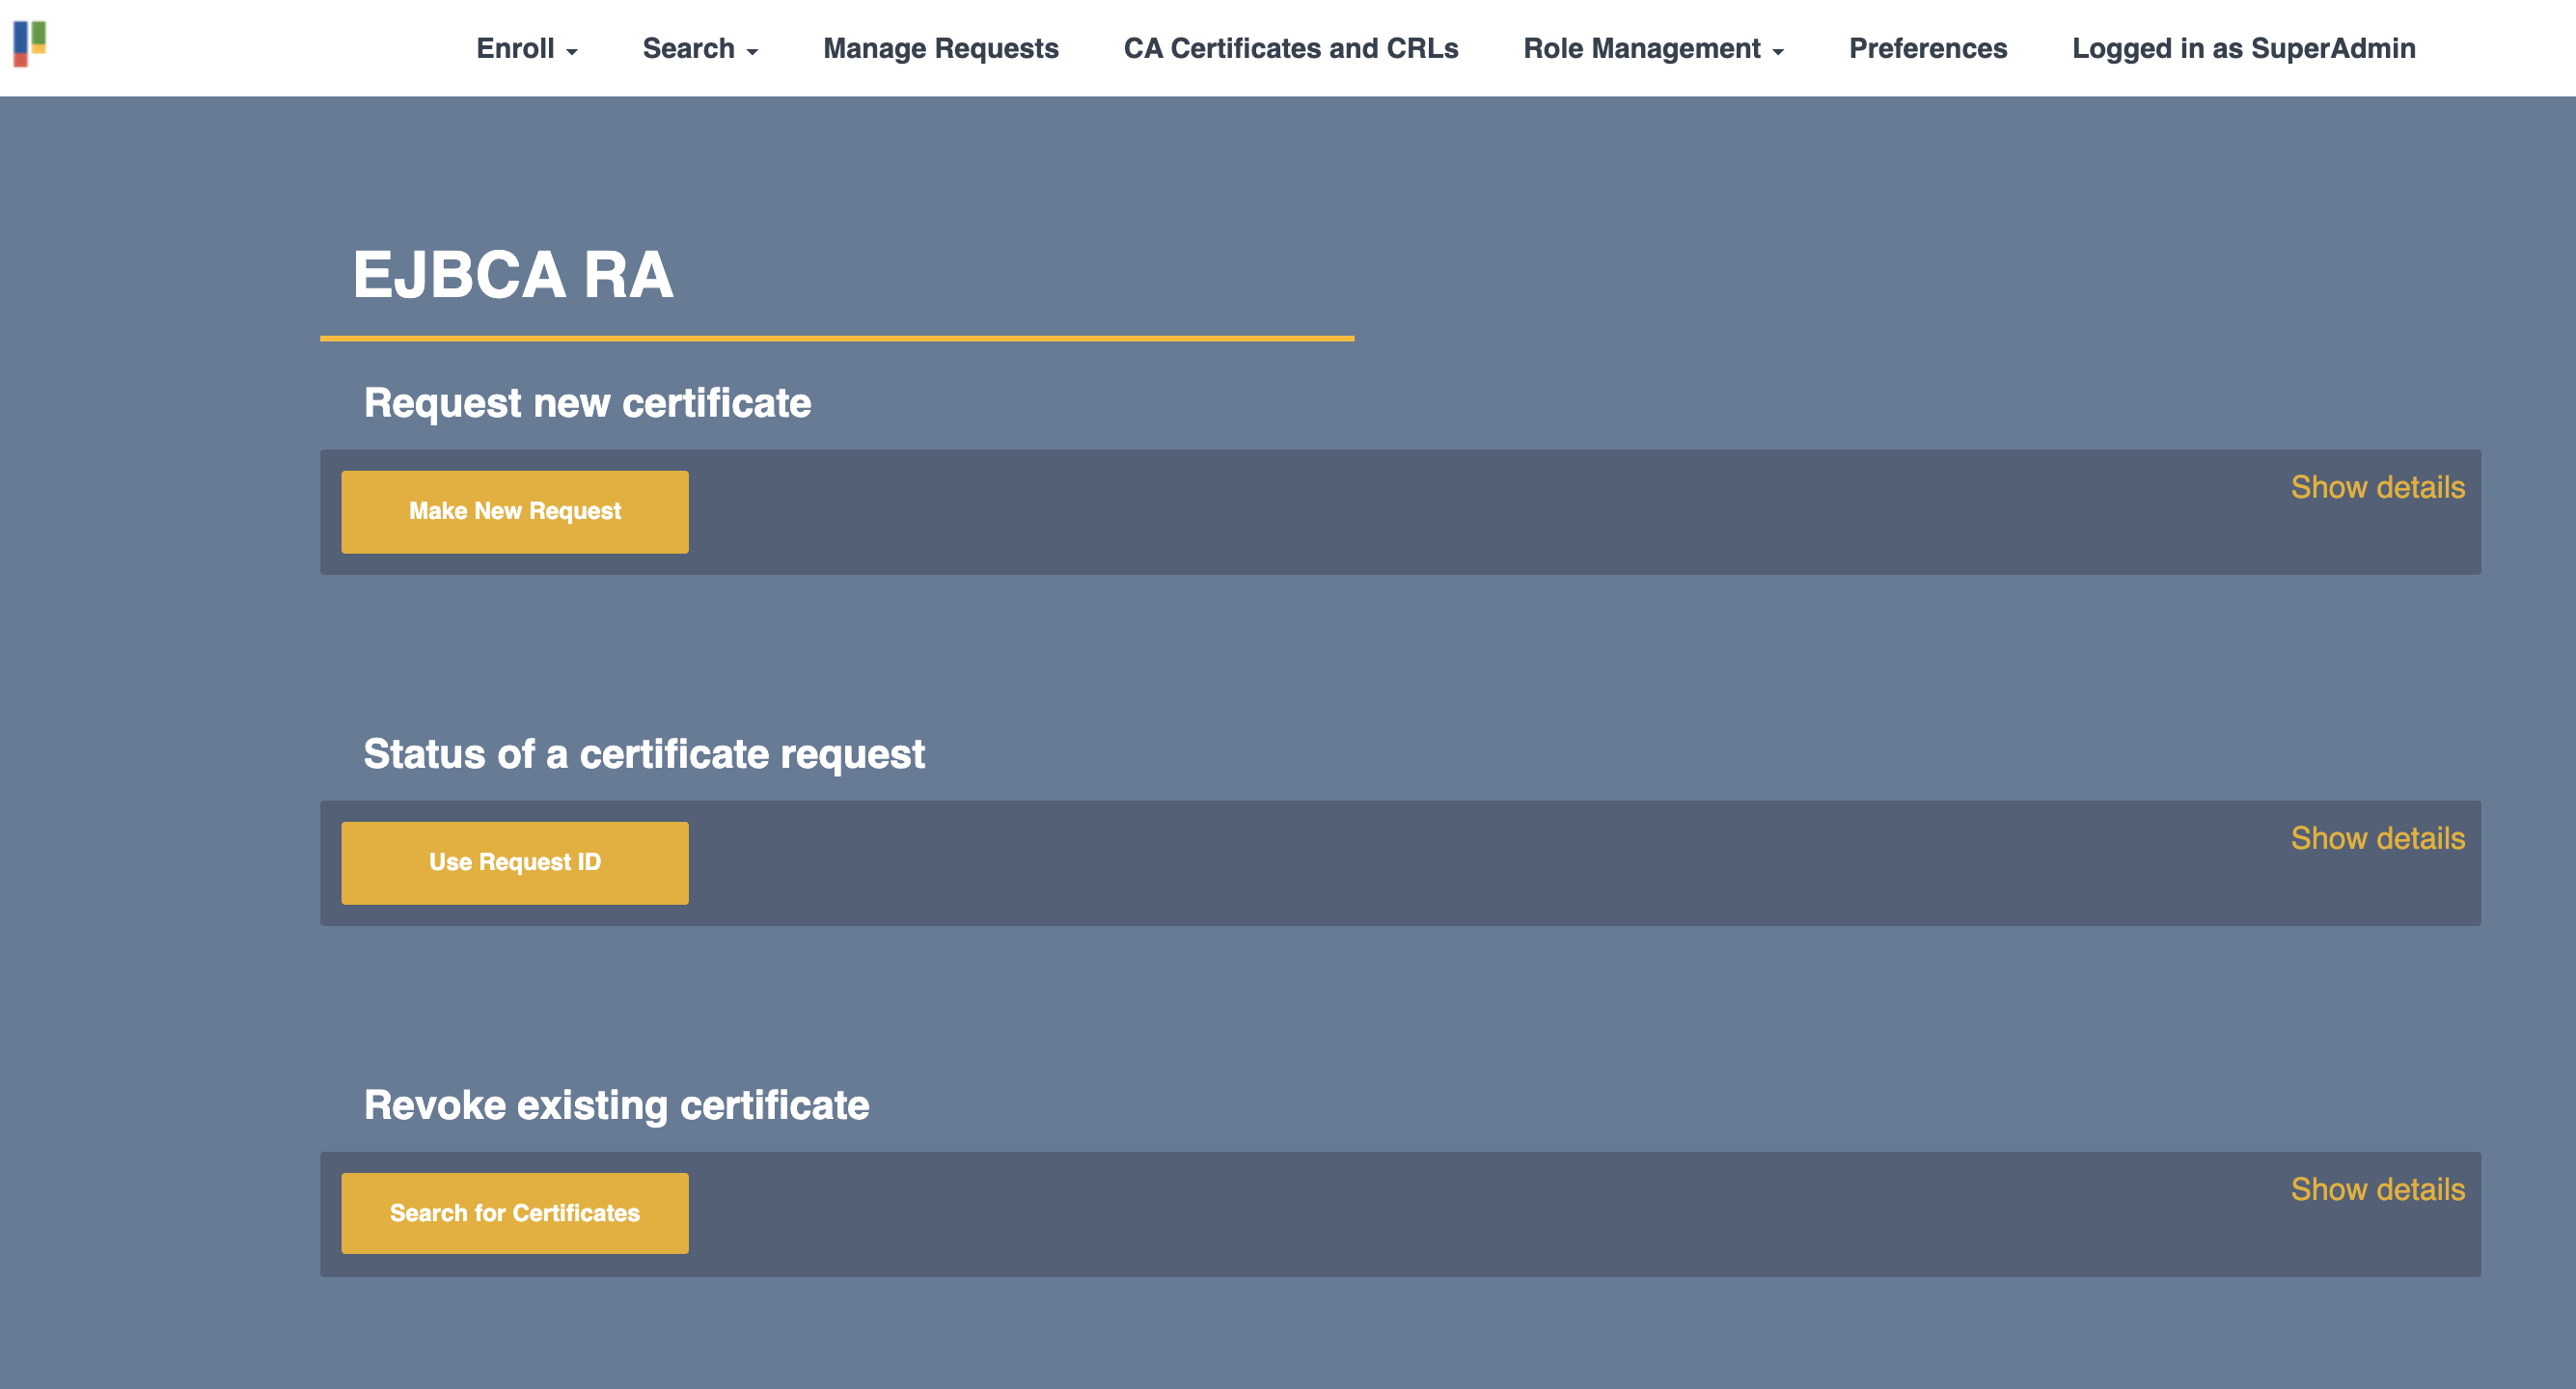
- On the Root CA instance, select the RA Web menu option and click Enroll New Certificate. From the Root CA's point of view, the Issuing CA is simply another end entity.
- Select the correct End Entity Profile and Certificate Profile (if the End Entity Profile allows more than one), and the correct CA. Then choose the option (if available) Provided by user to indicate that the key pair is not to be generated on the Root, and then either paste or upload the CSR.
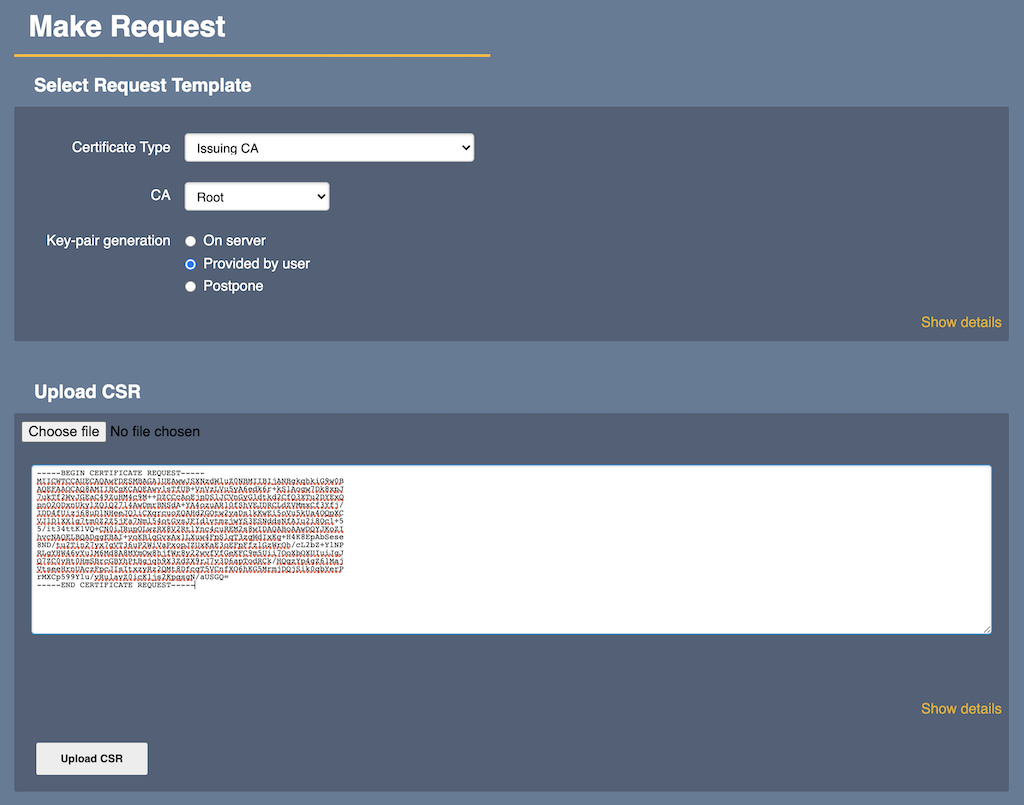
- Click Upload CSR to enable reading the CSR from the Issuing CA and allowing you to review one last time before enrollment and issuance. The Username you are asked to provide is mainly to bind the generated end entity to a physical identity.
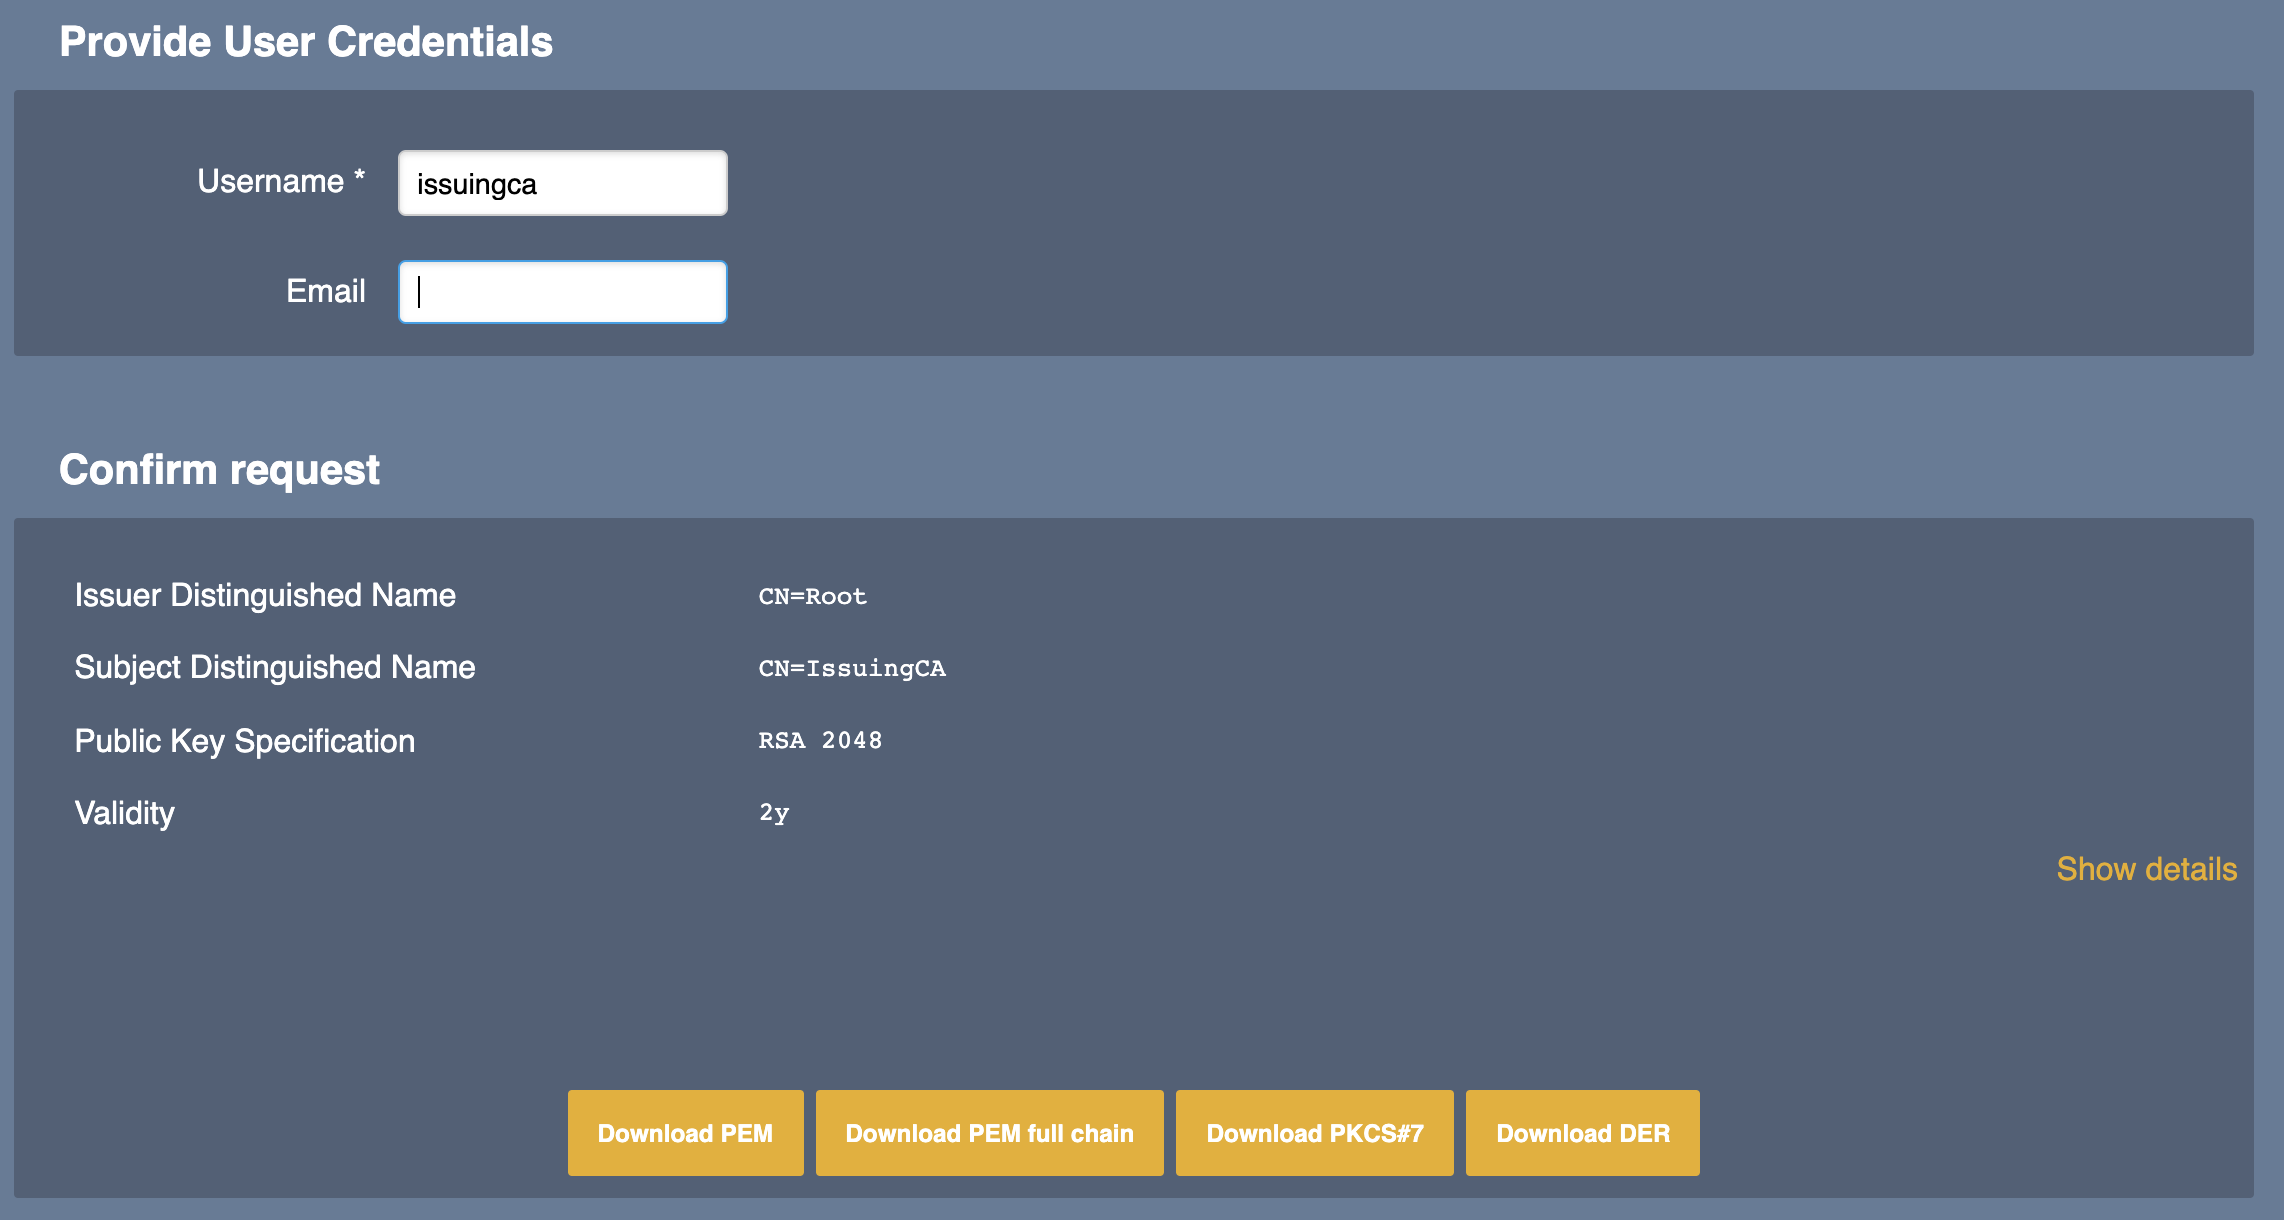
- The certificate is now issued. Click one of the Download buttons to download the certificate in your preferred format.
Read Certificate Response on Issuing CA
To read the Certificate Response on the issuing CA, do the following:
- Return to the Issuing CA instance and click Certification Authorities under CA Functions to open the Manage Certificate Authorities page.
- Select your CA in the list and click Edit CA.
- Scroll down to the section Externally signed CA creation/renewal. Under Step 2 - Import Certificate, click Choose file to upload the certificate you just downloaded from the Root, and then click Receive Certificate Response.
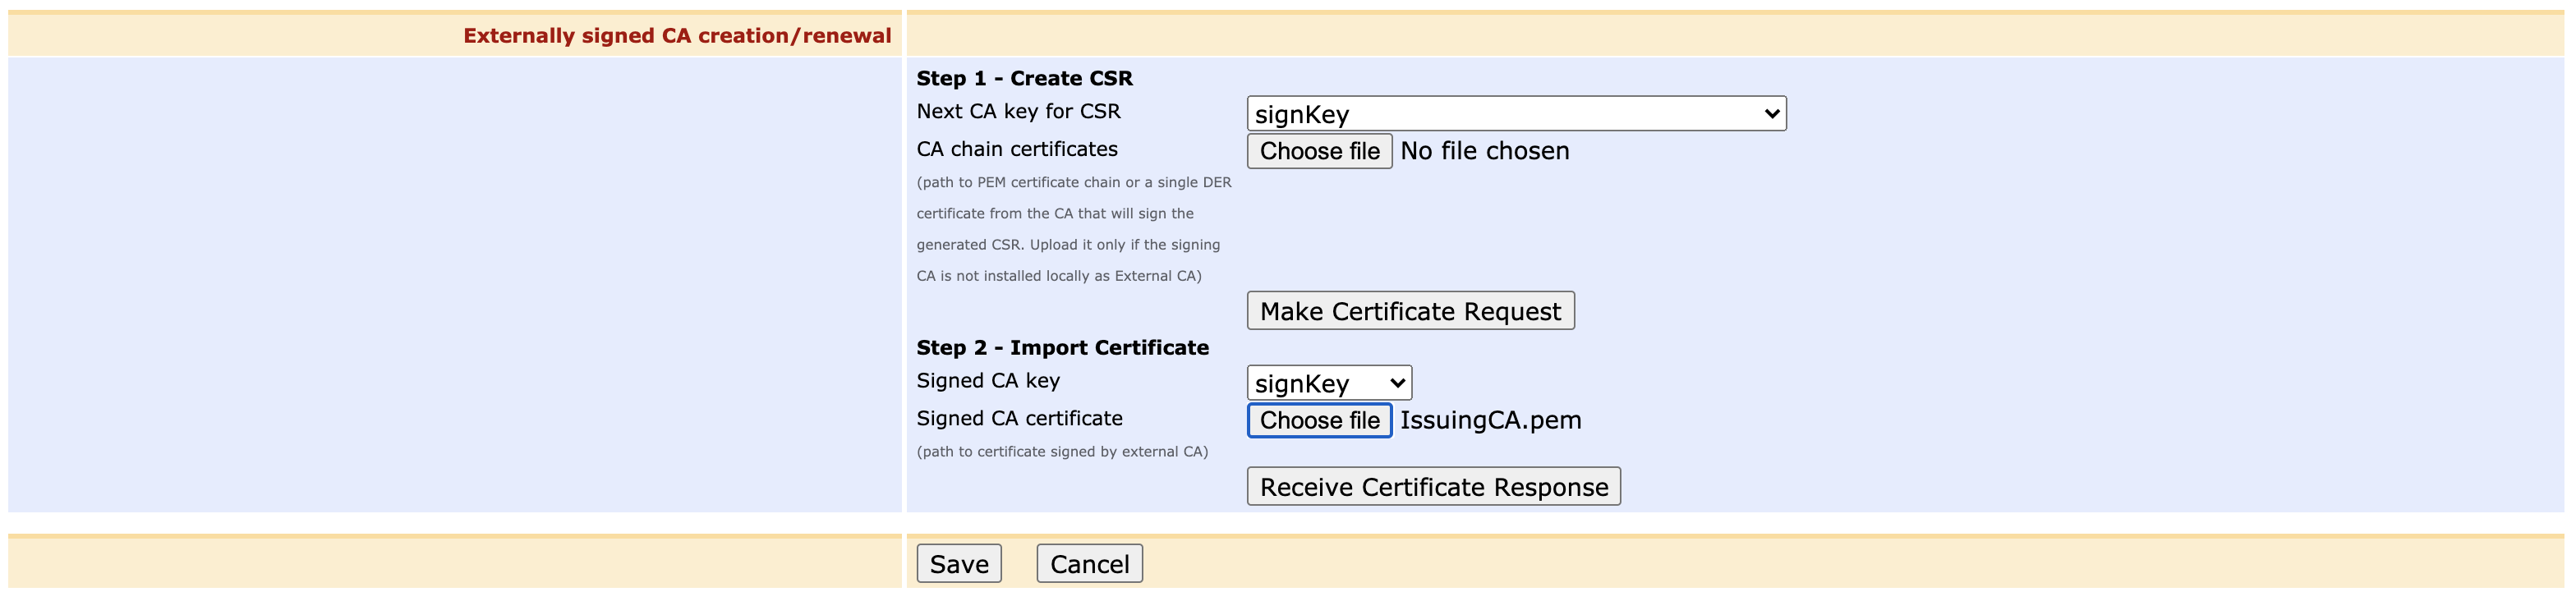
- Your Issuing CA is now fully signed and online and listed as Active in the list of Certificate Authorities list.
Create CA Signed by External CA Using Command Line Interface (CLI)
Alternatively, you can create the CA signed by an external CA using the Command Line Interface (CLI).
Create the CA generating a CSR.
 Note that the Crypto token password is set to
 foo123:$ bin/ejbca.sh ca init CaSignedByExteral "CN=This CA is Signed by an external CA" soft foo123 secp256r1 ECDSA 365 null SHA256withECDSA --signedby External -externalcachain chain.pemBASHThe file chain.pem contains the certificate chain of the external CA, as described above. Running the above command, a CSR named CaSignedByExteral_csr.der is saved to your disk, containing a PKCS#10 CSR in binary format. Send the CSR to the external CA and get the signed sub CA certificate returned back.
Import the sub CA certificate, activating your CA:
$ bin/ejbca.sh ca importcacert CaSignedByExteral subcacertificate.pemBASHThe file subcacertificate.pem contains the received sub CA certificate.
Related Content
-
Page:
-
Page:
-
Page:
-
Page:
-
Page: