In some cases, you might want to have one of your CAs signing another external CA. This is typically performed in the following steps:
Assuming both your CA and the external CA are using EJBCA, the set up is performed as described in the following steps.
Step 1: Create Profiles on Your CA Machine
It is recommended to create a dedicated certificate profile and an end entity profile for the external CA on your CA machine, instead of using the built-in profiles. The advantage is more flexibility and better management features.
To create a certificate profile and an end entity profile on your CA machine, do the following:
- Go to the CA Web, and select the CA Functions > Certificate Profiles menu option.
- Add a new certificate profile, and use "Sub CA" as template by selecting the Type option Sub CA.
- In the Available CAs list, select the CA that is going to sign the CSR.

- Make additional adjustments as required and save the certificate profile.
- Select the End Entity Profiles menu option.
- Create a new end entity profile. Pick your recently created certificate profile, the CA that is going to sign the CSR and select User Generated as token type:

- Make additional adjustments as required and save the end entity profile.
Step 2: Add End Entity
To add an end entity on your CA machine, do the following:
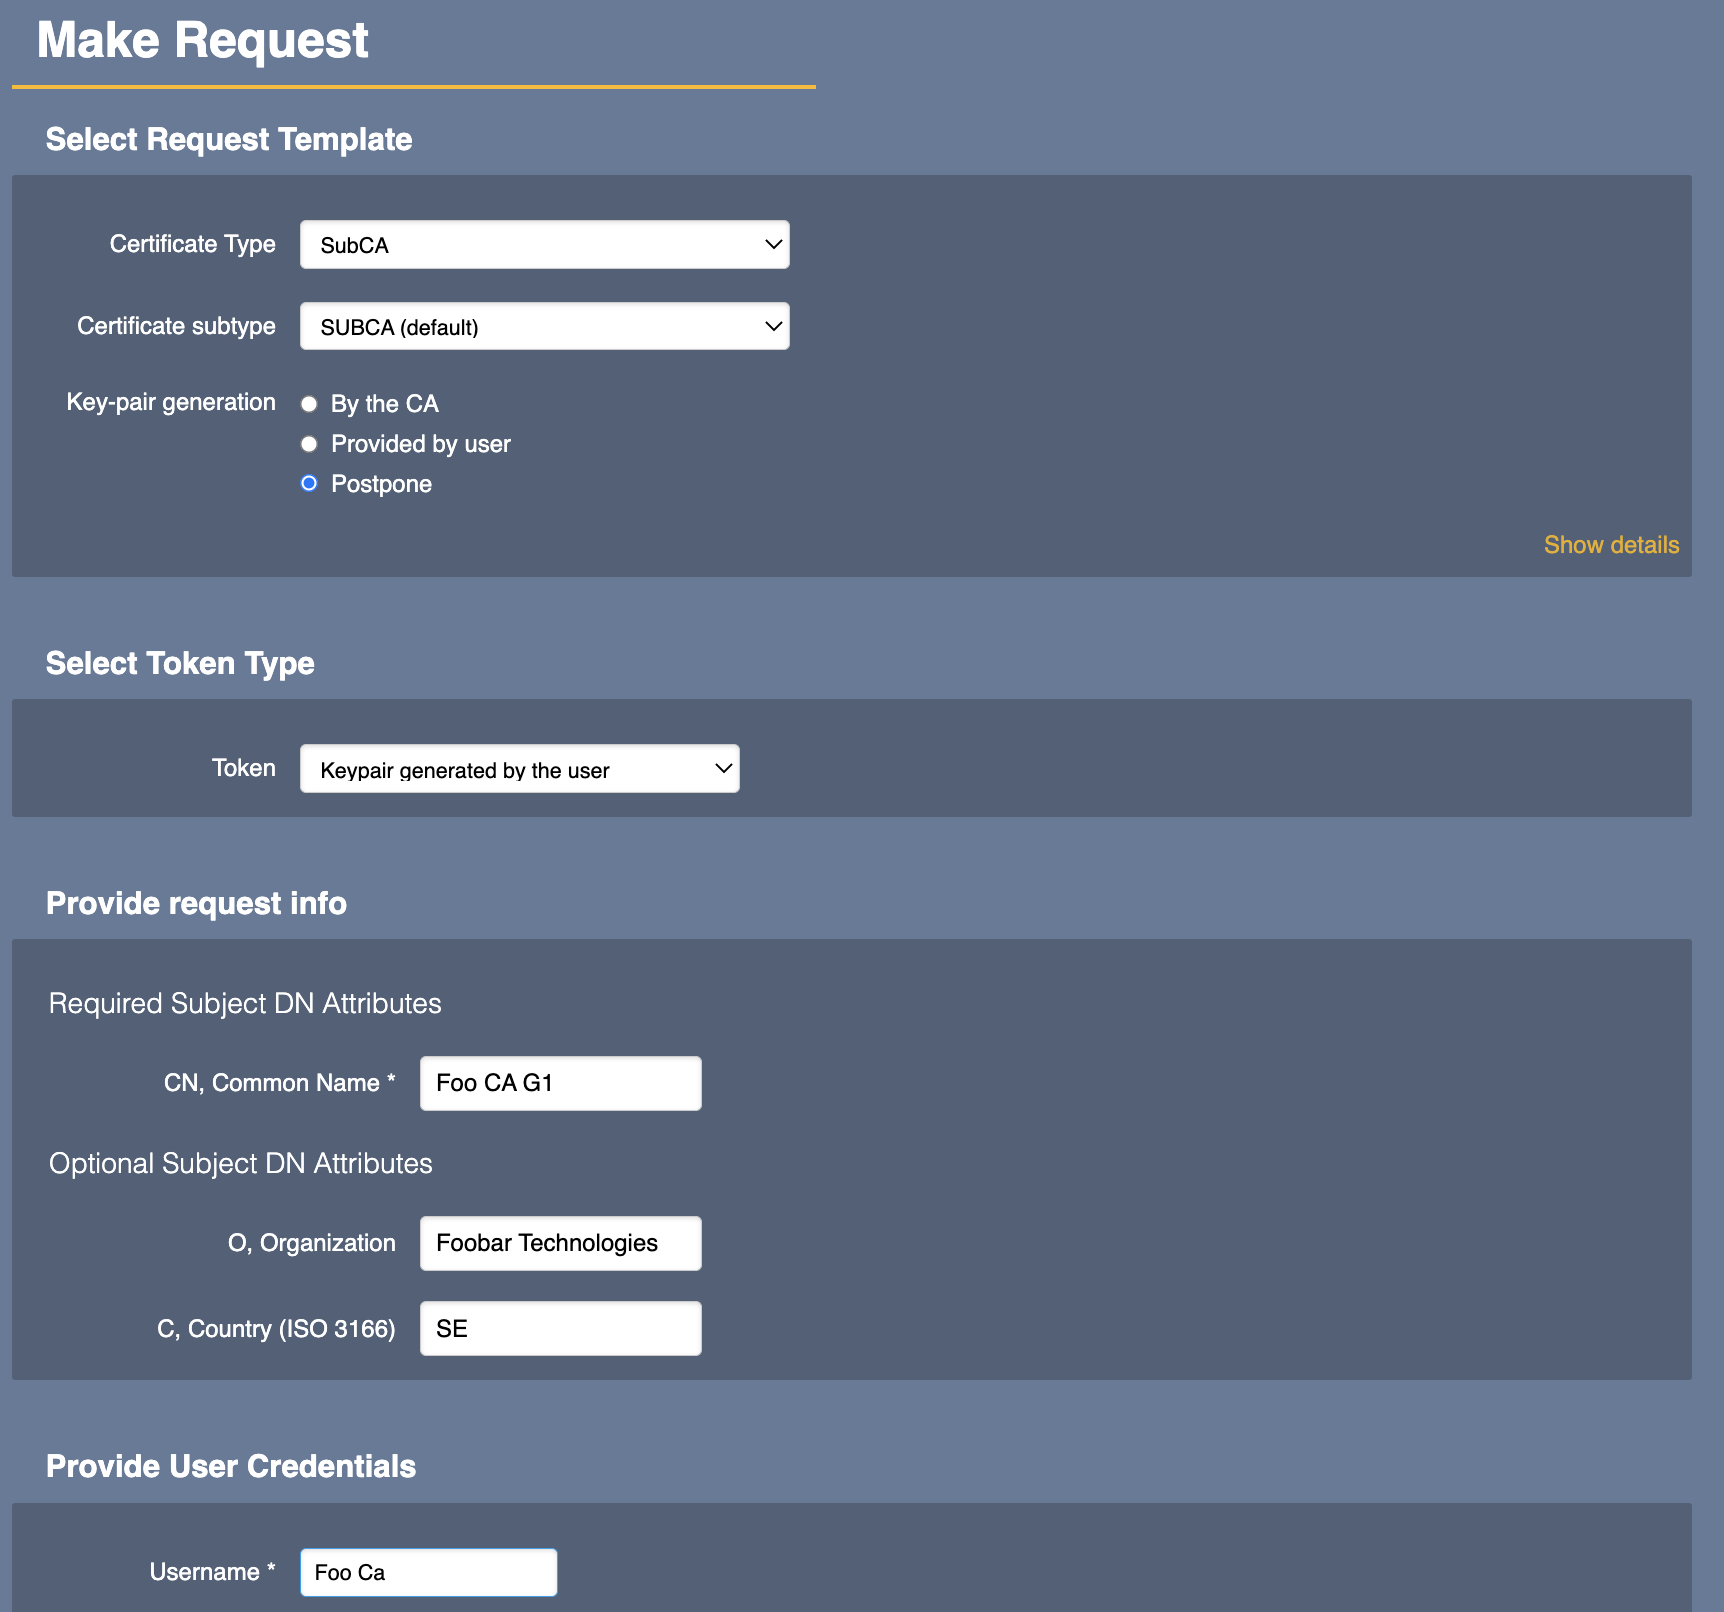
- In the RA Web, select the Enroll > Make new request menu option.
- Add a new end entity using the end entity profile you created in the previous Step 1: Create Profiles on Your CA Machine.
Step 3: Create CSR
To create a CSR on the external CA machine, do the following:
- On the external CA machine, go to the CA Web, select the menu option CA Functions > Certificate Authorities, enter Sub CA in the Add CA field, and then click Create.
- To make this CA an externally signed CA, select the Signed By option External CA.

- To save the CA and create a CSR, click Make Certificate Request.

- Save the CSR to for example a USB stick and transfer it to your CA machine.
Step 4: Sign CSR and Issue CA Certificate
To sign the CSR and issue the CA certificate using the appropriate CA on your CA machine, do the following:
- Go to the RA Web on your CA machine, and select the Enroll > Use Username menu option.
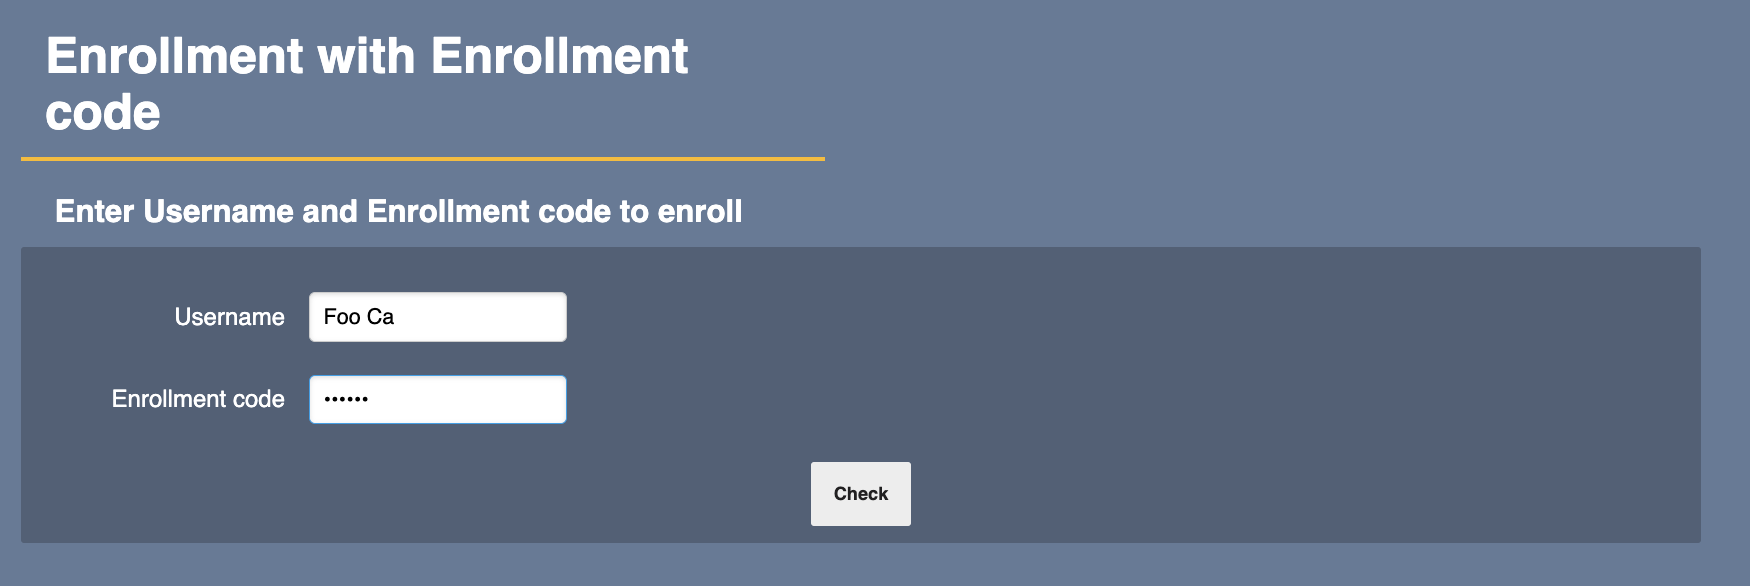
- Enroll using the username and enrollment code you specified when adding the end entity. Then save the certificate on for example a USB stick and transfer it to the external CA machine.
Step 5: Import CA Certificate
To import the CA certificate on the external CA machine, do the following:
- On the external CA machine, go to the CA Web, select the menu option CA Functions > Certificate Authorities, and edit the CA you signed in the previous Step 4: Sign CSR and Issue CA Certificate.
- Upload the CA certificate and click Receive Certificate Response to import the externally signed CA certificate and activate the CA.
