Tutorial - SignServer Code Signing with OpenPGP Signatures
Learn how to get started with code and package signing using the OpenPGP message format with SignServer.
SignServer OpenPGP and Debian package signing allows securing software release packages and repositories with code signing.
The OpenPGP signer signs arbitrary data and produces an OpenPGP detached signature in binary or ASCII armored form, or a cleartext signature. For more information on the OpenPGP format, refer to RFC 4880. In addition to PGP signing that allows signing Debian software repositories, the SignServer Debian Dpkg-sig Signer also lets you sign individual Debian packages and adds the signature in the dpkg-sig format.
The OpenPGP Signer and Debian Dpkg-sig Signer use OpenPGP instead of X.509 certificates. The OpenPGP public key can instead be obtained from the worker's status output. Additionally, the generate CSR functionality allows adding a user ID to the public key and storing the new public key in the PGPPUBLICKEY worker property.
In this tutorial, you will learn how to:
- Add an OpenPGP Signer in SignServer
- Add User ID / Certification
- Generate and Store Revocation Certificate
- Sign using the OpenPGP Signer
- Submit and Sign File using Client Web and Client CLI
- Verify Signature
Prerequisites
Before you begin, you need the following:
- SignServer Community Docker container installed, see Quick Start Guide - Start SignServer Container with Client Certificate Authenticated Access.
- To authenticate with SignServer Administration Web, you need to import a client certificate into your web browser. If you do not have a client certificate or a Certificate Authority (CA), you can follow the Quick Start Guide - Issue Client Authentication Certificate using EJBCA.
- Add a CryptoTokenP12 crypto worker.
Step 1 - Add an OpenPGP Signer in SignServer
Follow the steps below to add the OpenPGP signer using the sample configuration file openpgpsigner.properties as a template.
To add the OpenPGP signer, follow the steps below and use the template openpgpsigner.properties:
- Go to the SignServer Admin Web Workers page and click Add to add a new worker.
- On the Add Worker / Load Configuration page, choose the method From Template.
- In the Load From Template list menu, select openpgpsigner.properties and click Next.
- Click Apply and select the worker name OpenPGPSigner.
Click the Configuration tab and make the appropriate adjustments for:
NAME: Specify a name.
CRYPTOTOKEN: If using SignServer Enterprise, this should match the name of the crypto token configured in the SignServer software installation section.
Generate a new key pair for the signer, by clicking the Status Summary tab and then Renew Key.
Select a Key Algorithm, such as RSA, and a Key Specification such as 2048, and click Generate.
- Select the worker in the list and confirm that the Worker status is Active and without errors listed. If not, confirm that the DEFAULTKEY property is correct and check in the Crypto Token tab of the crypto worker that a key with the specified name exists.
For all OpenPGP Signer specific properties, see OpenPGP Signer.
Step 2 - Add User ID / Certification
Follow the steps below to add User ID / Certification for the OpenPGP public key using the Generate CSR option.
- Select the SignServer AdminWeb Workers tab.
- Click the OpenPGP worker.
- Click Generate CSR and specify the following:
- Specify a Signature Algorithm, for example "SHA256withRSA" or "SHA256withECDSA". Note that the OpenPGPSigner also accepts just specifying the OpenPGP Hash Algorithm.
- Specify DN as the wanted User Id, for example "Signer001 (Code Signing) <signer001@example.com>".
- Click Generate, and then click Download.
- Open the downloaded file using any text editor and copy its content.
- Select the worker and click the Configuration tab.
- For the PGPPUBLICKEY property, click Edit.
- Paste the public key content in the Value field, and click Submit.
- Click Status Summary and confirm that fields like PGP Key ID and PGP Public key are listed. Also, note that the User ID is listed.
Step 3 - Generate and Store Revocation Certificate
To generate and store a revocation certificate, do the following:
- On the AdminWeb Worker page, click the Configuration tab.
- For the GENERATE_REVOCATION_CERTIFICATE property click Edit.
- Set Value "true" and click Submit.
- Click Generate CSR.
- Specify a Signature Algorithm, for example "SHA256withRSA" or "SHA256withECDSA". Note that the OpenPGPSigner also accepts just specifying the OpenPGP Hash Algorithm.
- Specify any DN value as this field is not used when generating a revocation certificate.
- Click Generate, and then click Download.
- Store the revocation certificate securely so that it can be accessed by authorized personnel in case the public key needs to be revoked.
- Click the Configuration tab.
- For the GENERATE_REVOCATION_CERTIFICATE property, click Edit.
- Set Value "false" and click Submit.
Step 4 - Sign using the OpenPGP Signer
- Client Web Form Upload: Submit and sign a file with the OpenPGP signer using the SignServer Client Web form in your web browser, see Submit and Sign File using Client Web.
- Submit File Using Client CLI: Submit and sign a file with the OpenPGP signer using the SignServer Client CLI SignClient, see Submit and Sign File Using Client CLI.
- Web Services: Integrate in a custom application using the SignServer Client Web Services (WS) interface. For more information, see section Code Signing with Plain Signatures.
- Scripting Using cURL or wget: Use an HTTP client such as cURL or wget. For more information, see section Code Signing with Plain Signatures.
Submit and Sign File using Client Web
The following example shows how to sign using the SignServer Client Web.
You can test signing using any of the SignServer client interfaces, for example by integrating a custom application using the SignServer Client Web Services (WS) interface. For more information, see Code Signing with Plain Signatures.
To upload a file and create a detached signature for it, perform these steps:
- Go to the SignServer Client Web Generic page.
- Scroll down on the page to the Generic Signing Or Validation by File Upload section and specify the OpenPGPSigner in the Worker Name field.
- Click Choose File, select the file to create a detached signature for, such as release.zip, and click Submit.
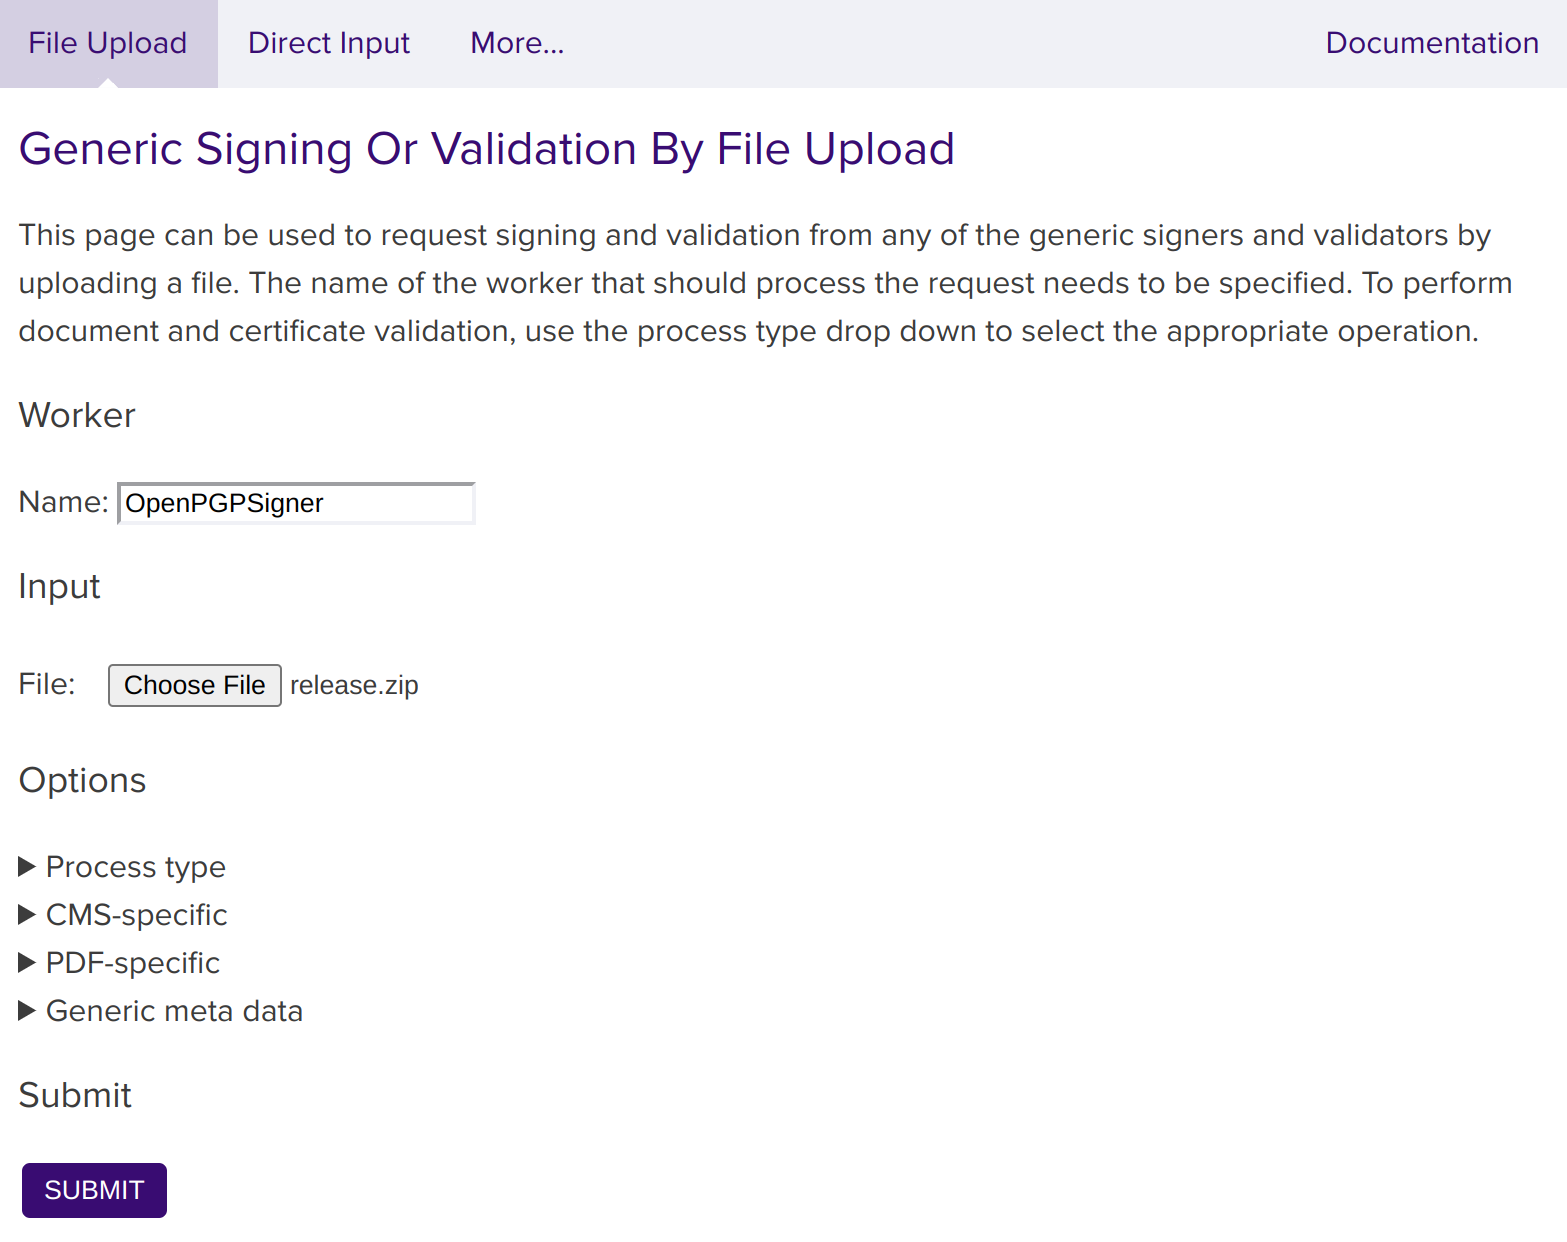
- Store the resulting signature file, for example, release.zip.asc.
Submit and Sign File Using Client CLI
To submit a file for signing using the SignServer Client CLI SignClient, send a request to the worker using the following command:
bin/signclient signdocument -workername OpenPGPSigner -infile release.zip -outfile release.zip.ascwhere workername is the name of the worker in your SignServer server, infile the path to the unsigned input file to sign, and outfile the filename the signed version will be written to.
Step 5 - Verify Signature
You can verify the signature using any OpenPGP tool. This example shows how to verify the signature using the OpenPGP tool GnuPG.
Run the following to verify the signature using GnuPG:
$ gpg --verify release.zip.asc release.zipIf needed, first import the public key to GnuPG before verifying the signature in the third step:
- Store the public key (i.e. from PGPPUBLICKEY property) as signer001-pub.asc.
Import the key to GnuPG:
$ gpg --import signer001-pub.ascCODERun the following to verify the signature:
$ gpg --verify release.zip.asc release.zipCODE
You can optionally distribute the OpenPGP Public Key to clients, for example by publishing the public key to any online key server.