Step 0: Comparing Security Keys
With these actions, you will check whether the key you have received via e-mail corresponds to the HSM authentication key stored on the machine. This is to make sure that the machine has not been manipulated. To compare the security keys you need to do the following:
- Download the HSM Auth Key that is stored on the Hardware Appliance.
- Verify the HSM Auth Key by comparing it with the key you received from PrimeKey.
Refer to the sections below for more details.
These actions are only required for a brand-new EJBCA Hardware Appliance eIDAS edition that is set up for the very first time. In all other cases – as for example re-installing a Hardware Appliance – you can proceed with Step 1: External Erase and Factory Reset.
Downloading the HSM Auth Key
To download the HSM Auth Key:
- Turn on the Hardware Appliance and wait until it is booted up.
When boot-up is complete, the TLS Fingerprint is displayed in the front display. Write it down, you will need it for a later step:

- Change the default IP address to match your network requirements. For more information refer to Step 3: Changing the IP Address of the EJBCA Hardware Appliance.
Open your browser and type in the newly assigned IP address to connect to the configurator WebConf of the EJBCA Hardware Appliance eIDAS edition. You will be asked to compare the TLS fingerprints:
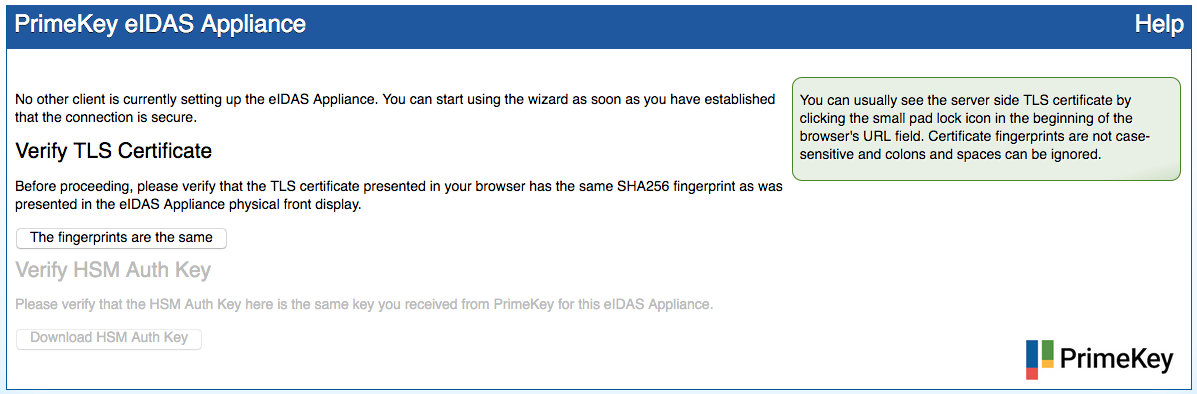
- To compare the fingerprint of the TLS certificate and the fingerprint on the display of the EJBCA Hardware Appliance eIDAS edition proceed as follows.
Click the Padlock icon
 in the address bar of your browser.
Click > to expand the information for Connection is Not Secure. This opens information on the security of your connection.
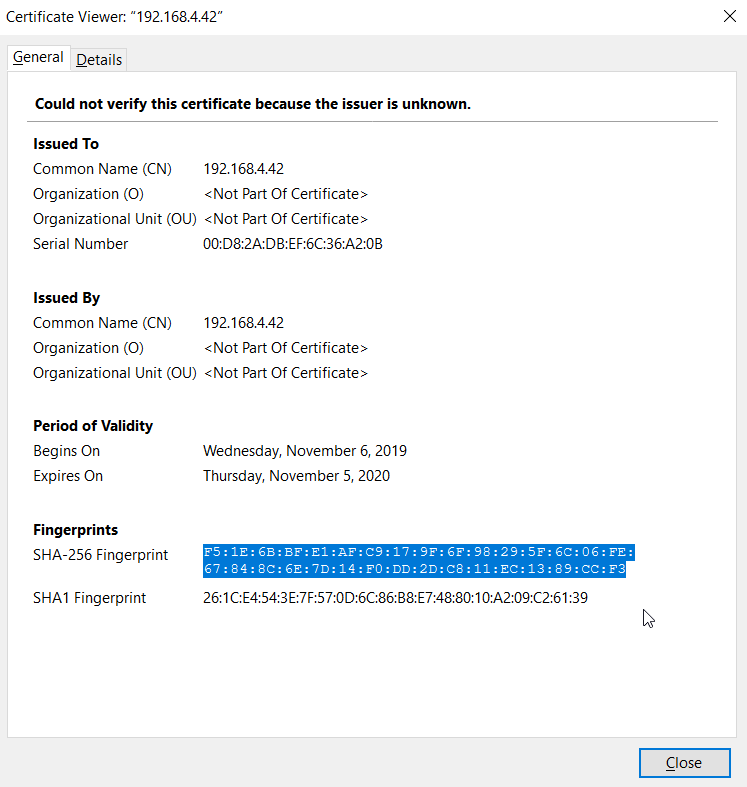
Click More Information and then View Certificate to open the Certificate Viewer.
In the Certificate Viewer, find the SHA256 Fingerprint and compare it to what was shown on the appliance's display.
If the two fingerprints match, the appliance is connected to the correct machine.Close the Certificate Viewer panel.
Click The fingerprints are the same in the Hardware Appliance Configuration page. You will be asked to compare the HSM Auth Key with the key you received via e-mail:

- Click Download HSM Auth Key.
You can now proceed to verify the downloaded key by comparing it with the key you have received from PrimeKey.
Verifying the HSM Auth Key
To verify the downloaded HSM Auth Key, you need to open the file and check that the first 828 characters match with the first 828 characters in the key provided by PrimeKey. In the following description, we use Notepad++ for this action:
- Open the two keys side by side in Notepad++.
- Go the tab with the HSM Auth Key and split the key in two lines.
After the following steps, Line 1 contains the first 828 characters that should match, Line 2 contains the rest of the key:- Press Ctrl+H on the keyboard to open the Search and replace dialog.
- In the field Find what enter ^.{828}
- In the field Replace with enter $0\r\n
- In the section Search Mode select Regular expression
- Click Replace All.
This will insert a line break in the key after the first 828 characters.
- Go to the tab with the key provided by PrimeKey. Repeat the steps 2a-2e to split this key, too.
- Press Ctrl+Alt+C on the keyboard to compare the two files.
Verify that the first lines in the two files match. The following screenshot illustrates what you should see:

The first line in both files contains the first 828 characters. It is not highlighted, signifying that it is identical in both files.
The red and green markers in the second line are irrelevant, these characters do not have to be identical.
If the keys match you can safely use your device. To continue proceed to Step 1: External Erase and Factory Reset.
Do not continue to use the machine if there is a mismatch between the HSM Auth Key and the key you have received via e-mail. In such a case contact the PrimeKey support team.